How to Increase Internal Storage of Android Smartphones?


Google Play Store has numerous applications that can keep you hooked to your smartphone all day long. Applications from different categories such as productivity, social, game, and news not only keep you entertained but also allow you to be more productive. But there is a catch, which is commonly referred to as the internal storage.
Internal storage is a space that a smartphone uses for storing system files and other apps that are at the heart of the device. In contrast to applications that are stored in internal storage, applications in SD card cannot be accessed right away when the phone boots because SD card takes some time before it can be mounted.
Internal storage is something that your applications will always love to reside in, so here in this article I am mentioning some simple tips using which you can instantly get some more space in your phone.
Uninstall Apps
If your garage cannot accommodate your new vehicle, get the useless ones out. This is true for apps as well.
There may be many games in your storage that you rarely play. There could be some fancy applications that you no longer need. Get them all out of your internal storage (send them to SD card if the apps allow you to do so).
To uninstall them, tap on the 'menu' button present on the home-screen to see all installed apps, long press on any of the apps you want to remove, and drag it to the uninstall option present on the home screen.
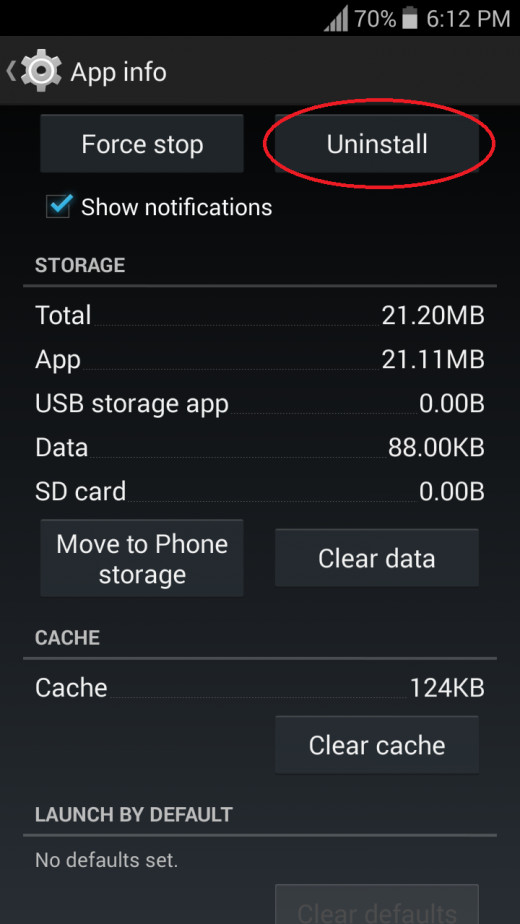
One can also go to the 'Apps' through Settings menu, select the app and tap on 'Uninstall'. Please refer to the screenshot below.
Clear the Data (and Cache)
Your apps keep accumulating data, and this phenomenon is more common with social media apps such as Facebook or Instagram.
Some applications are given a name 'bloatware' because they keep on collecting data from your phone (do you remember the permissions it asks for when you installed it?) and bloats to a significant level. That 10 MB app you downloaded a month ago might have swelled up to 90 MB. (Check please!)
Clearing data will get your phone rid of outdated information. Do not clean data of those apps in which the information might be of use at any later stage.
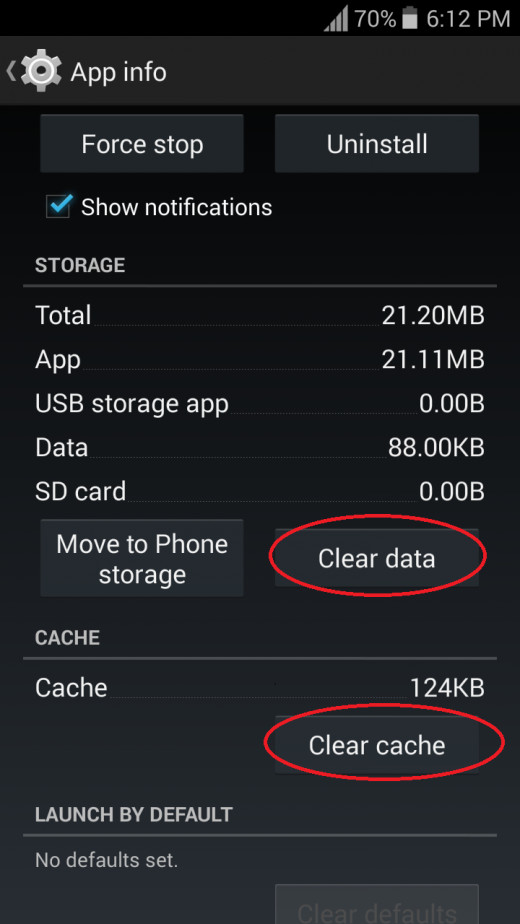
To clear data, go to the 'settings' and locate 'Apps' or 'Applications' option, tap on it and the list of apps will be shown. Then, tap on any app, select 'Clean data' to free up space.
Clean Cache memory of the application as well if you find it taking more than 10 MB of space. Keep cache intact if you frequently load the app.
(Clearing data will also clean your login credentials for that app so you will have to login again.)
After deleting cache and data, your application will start really slow for the first few times. I recommend cleaning the data and cache of only those applications that you don’t use regularly, and whose collected data is not that important to you.
I sparingly use Instagram and it had collected 160 Mb data. Not a good cost-benefit ratio (or storage-benefit ratio you may say), so I deleted the cache and data of the app.
Note: Removing data of any game will reset your progress to zero. So this step is not recommended to Candy Crush lovers who have devoted hours in stepping up the levels.
Move apps to SD card
By default all apps get stored in internal storage. It is wise to move those apps that could reside in the external storage space.
To do this, again go to the applications tab of settings menu, select an App and tap on 'Move to SD Card' option.
Most of the games can easily be sent to SD card without receiving any impact on their performance.
Clean Junk Files
Install a good cleaner software to get rid of junk files. Systweak Android Cleaner is one such option. It also has a built-in Application Manager giving you an alternative to removing apps manually.
Remove duplicate Image and video files
Images and videos take a considerable space in your smartphone memory. We won’t suggest you to delete these but how about deleting duplicates?
Take the help of File Manager again to spot duplicates. You can also download 'Duplicate Photos Fixer' from Google Play Store. This small app will scan your 'Picture Gallery' to find duplicate images and will delete them in a few simple taps. It is a nice app for photography lovers, and those who have gigabytes of pictures in their phone gallery.
Remove unwanted Files
Files and other documents are silent occupants. We download a lot of PDFs and other docs only to forget them at some later stages. Although documents don't generally take up a lot of space, there is little merit in cluttering the documents folder of your smartphone.
Open File Manager and locate those files (pdf, doc, and etc.) which are unneeded. Commonly such random files are downloaded from Internet and thus can be spotted in download folder of the phone. Long press on any of the files you want to remove and tap on delete icon.
Move your memories to your computer
What if your smartphone gets damaged or stolen? Do you have any backup?
Your computer is any day safer than your smartphone for keeping your files secure. So why not to move all the image and video files to your computer and keep your storage for other stuffs that you need on the go?
Use a data cable (preferably the one that came with your smartphone), install a data transfer suite (if needed), and access your files from your computer. Select the files that don't have any reasons to stay in your phone and cut-copy-paste them to your computer.
Use a cloud service
If you are using stock Android, Google 'Drive' must have come pre-installed. If it is not there, you can get it from the Play Store.
You can upload any e-book, image or video files to Drive. It not only enables you to share any files easily but also gives you an access to your saved documents on the go and on any smartphone with Google drive app and Internet connection.
If you have a google account (Gmail will do) and Drive app, go to the file manager, long press any file that you want to send to cloud, and tap on share icon. In the list of share options, select 'Drive'. The content will be uploaded.
You can also delete the file after you have sent it to Drive as you can always have access to it (given you have a working Internet connection).
These were some easy-to-follow steps that will give you more reasons to live with whatever internal storage your smartphone has. And for the next upgrade, get a phone that has at least 32 GB of internal storage if you don't want to scroll through my article again in future.


