How to Install Wordpress From the Ground Up


What is WordPress?
To define WordPress we would have to start from the definition of blogging. Blogging is the writing of a series of short articles (100 – 400 words) called ‘posts ’ on a topic. The topics could be on anything, as long as they have something in common. Every time there is something new it is updated. WordPress allows the writer, called a ‘'blogger,' 'copywriter,' 'content creator' or 'writer' to write, edit and update their posts.
WordPress is a free Content Management System (CMS) software. It is the most commonly used and most popular blog publishing application. It is powered by PHP and uses MySQL as its database which are also freeware.
What do you need to install WordPress?
In order to install WordPress you will need a few things. Let us see them one by one:
Domain name
Before you start anything you will need to have a domain name. This is the address of where people will go to find the blog when they want read your posts. Ideally, the domain will be something that is related to the subject of the posts. For example, if a blogger wants to write about his days in college, a great idea would be to buy a domain name that had "tomincollege" in it . This serves two purposes. The first is that people reading the domain name will have an idea of what to expect in the blog. The second is that people will find it easier to remember.
Hosting account
While the domain name serves as the address for the blog, a hosting account will actually be its home and hold the blog pages, images and content in general. It is the physical place where your digital data will reside. Depending on your initial budget, how much space you will need for your blog and the amount of traffic you will be expecting you can figure out the hosting plan that you will need. A good idea is to start small and grow as the traffic and content of your blog increases.
A good place to look for the best hosting would be at HostGator.
WordPress software
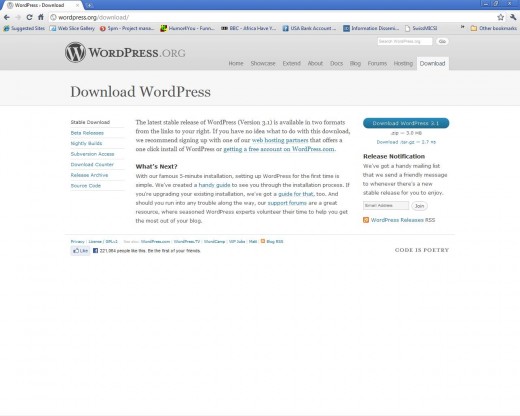
Finally, you will need the WordPress software itself. This is free and the latest version can be downloaded from the WordPress site. Clicking on the ‘Download WordPress’ button will start the download. You will need unpacking software like WinZip to extract the files.

FileZilla
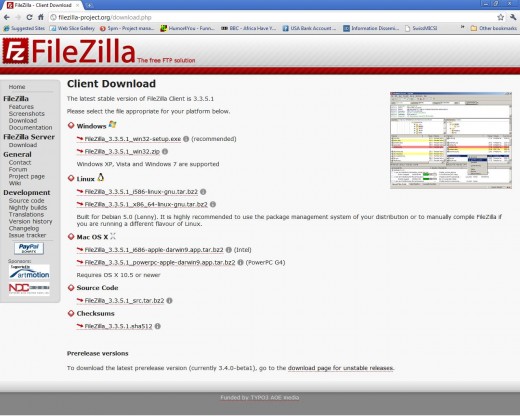
To transfer files from your computer to your blog host you will need a file transfer application. One commonly used, and extremely popular, software is FileZilla. You have to make sure you download the client version that is compatible with your computer’s operating system.
Start Installation
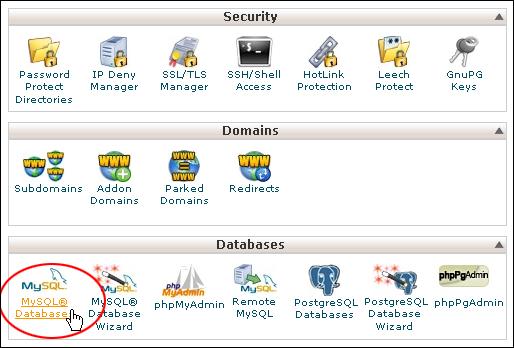
Now that you have everything, it is time to start setting up the WordPress blog. First extract the WordPress files in a separate folder. Next, go to your host’s administration panel and log in. If you have opted for HostGator then it is called cPanel. Locate the Databases section and click on the MySql Databases link.
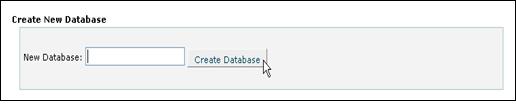
On the next page, find the ‘Create New Database’ section and enter a new database name that you will be using for the blog.
When the database is created it will be renamed with a name added before the name you chose. For example if you chose ‘Toms_Database’ it will be renamed to something like ‘XXXXXX_Tom_Database’. Don’t worry, that is just HostGator’s way of making sure the allocation of the database is clearly known. What you need to remember is that the database name is the whole name yours and the HostGator prefix (‘XXXXXX_Tom_Database’).
Next create a username and password for an account that will access the database. You can either manually create a password or click on the ‘Generate Password’ button to have a password created for you.
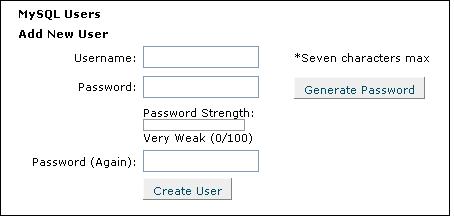
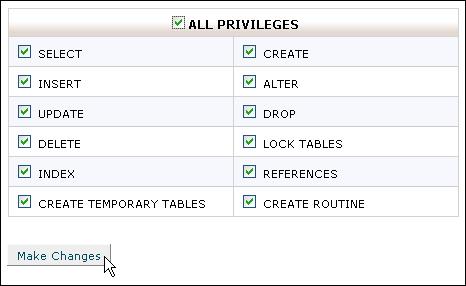
Although you have created a user, you still have not allowed him access to the database; therefore you will need to go to ‘Add Users to Your Database’ and grant the user account you created some privileges to work on your database. Make sure that you grant all privileges to your new account.
Back To Your Computer
Now that we have setup the database on the host, we can configure our WordPress to work correctly with it. In the folder where the WordPress files were extracted look for the file ‘wp-config.php’. The file can be edited with Notepad. If you cannot locate it then it could be named ‘wp-config-sample.php’. If so then make sure you rename it by removing the ’-sample’.
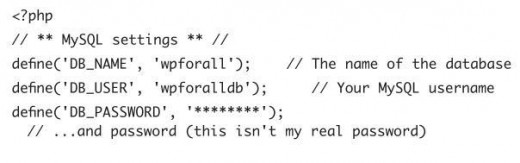
Locate and edit the section:
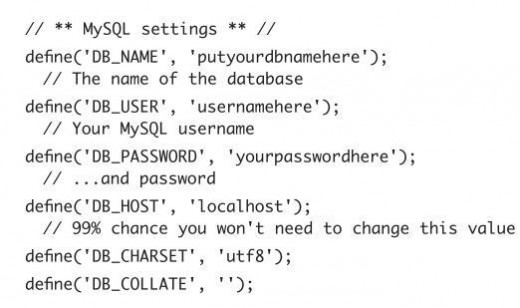
Since you have the names of the database, username and password that you created on HostGator, replace the ‘putyourdbnamehere’ with the database name, ‘usernamehere’ with the user name and ‘yourpasswordhere’ with the password you created. Remember to write it all within the quotes.
An example:
Next save and close it.
Go to your file transfer protocol and set it up to connect to your HostGator account by supplying it with the domain name, your user account and password. This is information that is supplied to you when you first create the account.
Connect to HostGator and go to the ‘public_html’ folder and go to your home site. Next extract the files that are in the folder named ‘WordPress’, not the one where the original setup file was downloaded but a folder that was created in it. A clue would be that you will find the ‘index.php’ file. Copy all the files inside the ’WordPress’ folder into the public_html folder.
Depending on your connection this might take quite some time. But once it has copied all the files, you are set!
Fire Up Your Browser
When you open your browser and enter your domain name you will see the WordPress installation page:
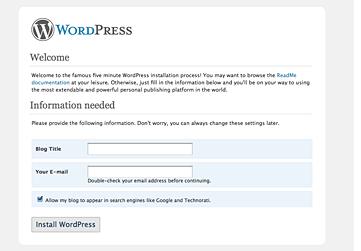
From then on, you only need to follow the instructions. Input the blog name, and an email. Finally press ‘Install WordPress’.
Happy Blogging!

 for Website Building")


