- HubPages»
- Technology»
- Computers & Software»
- Computer Software»
- Digital Photography & Video
How to Merge Multiple Photos With Photoshop


Merging photos in Photoshop
If you don’t know how to merge photos in Photoshop here is a step by step guide
1. Open the photos you want to merge.
2. Zoom out (Ctrl +) the photo you want to copy and merge into another. Click Ctrl – to zoom in.
3. Select the Pen tool and click on the edges of the object you want to merge.
4. After you have selected the entire area, left click the mouse. A box will appear. Click Make Selection.
5. Another box will appear. Set the Feather Radius; 1 or 2 is recommended. Click OK.
6. Copy the selected area (Ctrl C) and paste on another photo (Ctrl V). The object will appear in a new layer.
7. Press V to select Move tool. Move cursor to move the object to the right place.
8. Click Ctrl T and move the cursor to the corner and align the object to the desired place by rotating left or right. You can also increase or decrease the size by dragging the edges. Press Enter.
9. Select Eraser tool to delete unnecessary parts of the object, if any.
10. Select Blur tool and blur the edges of the object. Remember to keep the Strength of Blur tool between 40-60 percent.
11. If the tone of the blended photo varies, adjust brightness and contrast.
12. You can also adjust Hue/Saturation (Ctrl U) and Color Balance (Ctrl B). Remember to select the right layer.
13. If you are satisfied with the result, merge the layers (Ctrl Shift E)
14. Save the merged photo. If you don’t want to lose your original photo click Ctrl Shift S to save as a new photo.
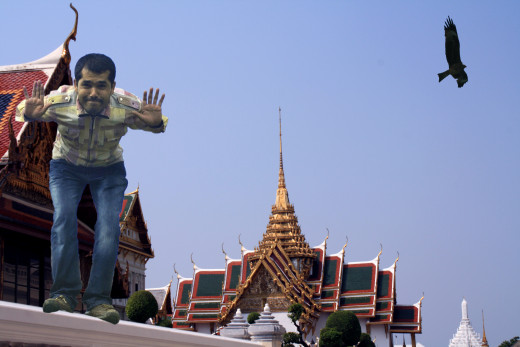
Merged Photo
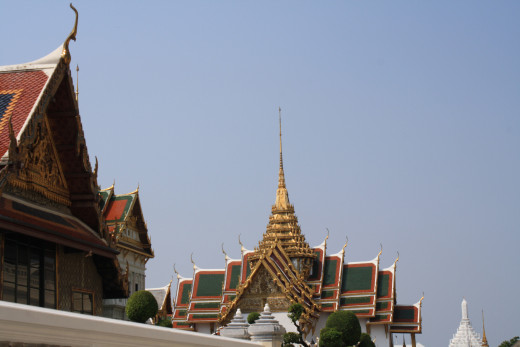
Original Photo

Merge photos in Photoshop: Points to Remember
Layers and Tools are very important in Photoshop. Remember to select the right layer while working.Learn how to use the right tool.
Zoom out the photo to large size while working. And zoom in to see if you are working correctly.
To give perfect look to the merged photo, use Doge/Burn/Sponge tool and make the second picture match with the first one. Don’t forget to set the Range and Exposure.
You can make the merged photo look real by adjusting brightness, contrast, hue, saturation, and color.
Click [ (opening bracket) to increase brush size and ] (Closing bracket) to decrease brush size.
Blend Photos in Photoshop
If you want to blend the entire photo and not just a certain part here is the process.
Open the photos you want to blend.
Click Ctrl A to select the photo, and Ctrl C to copy. (If you want to crop the photo, use Crop tool.)
Paste this image in the photo you want to blend.
Click V and move the mouse to shift the copied photo in the place of your choice. Now you can see the photos in different layers.
Click Ctrl T and move the cursor in corner to rotate the picture to right or left. Drag mouse from the edge to increase or decrease the size.
Use Eraser tool to delete unnecessary parts and Blur tool to blur the edges. If you want to give shadow effect, decrease the opacity of the pasted picture.
Clone tool lets you to blend the background of second photo with the background of the first. Go to the layer of original photo, select Clone tool, and then press Alt Click, cloning area is selected. Then go to the layer of pasted photo and click on the area you want to clone.
If tonal qualities of pictures are different, go to any layer and adjust brightness and contrast.
After adjusting Brightness/Contrast, if the tone still varies, go to Hue/Saturation and adjust the level. You can also use Color Balance to adjust midtones, hightlights and shadow.
Click Ctrl Shift E to merge the layers and then save the photo.