- HubPages»
- Technology»
- Communications»
- Smartphones»
- iPhone
How to Record iPhone or iPad Screen Using Built-in Screen Recording
Introduction
With the rollout of iOS 11, Apple introduced built-in screen recording functionality for the Apple iPhone and iPad. The Screen Recording feature lets you capture the events that occur on your screen with or without audio, and then saves the video to your Photos app, where it can be accessed similar to any other video you would capture on your iPhone or iPad. Capturing a screen recording of your actions can be a great training device that you can use at work, or share with friends and family to illustrate what you're doing on your device. Before you can use the Screen Recording feature you first have to add it to the Control Center. After adding the feature to the Control Center, you can access the feature through the Control Center.
Steps to Add Screen Recording to Control Center
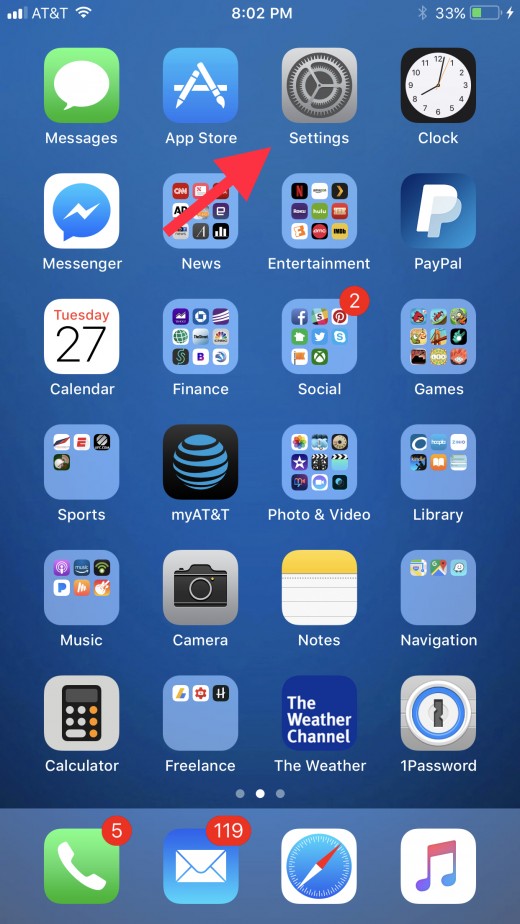
- Tap the "Settings" app on the iPhone or iPad home screen. The Settings window appears.
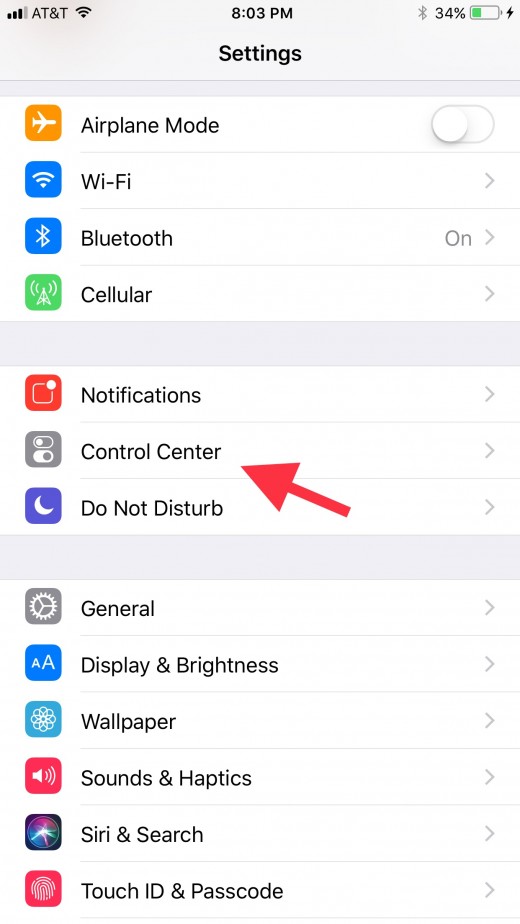
- Scroll down to the third section, and then tap "Control Center." The Control Center screen appears on your device.
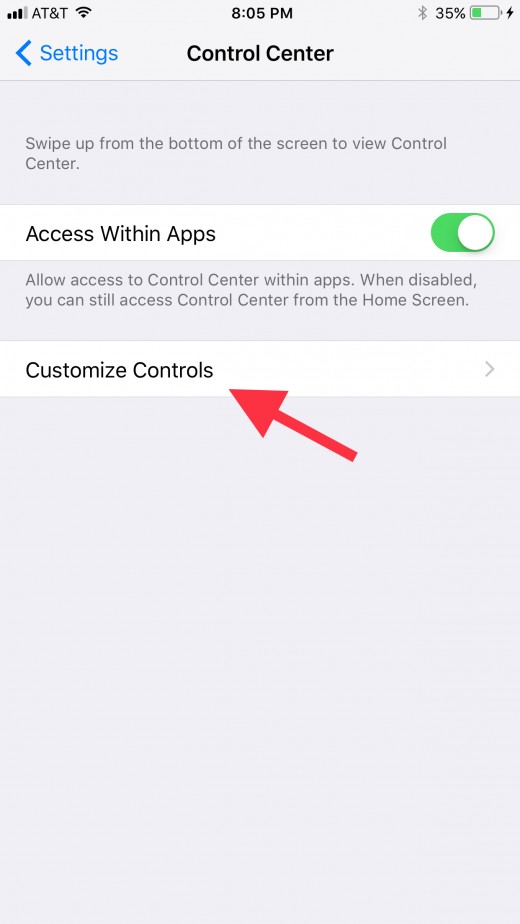
- Select "Customize Controls." The Customize screen is displayed.
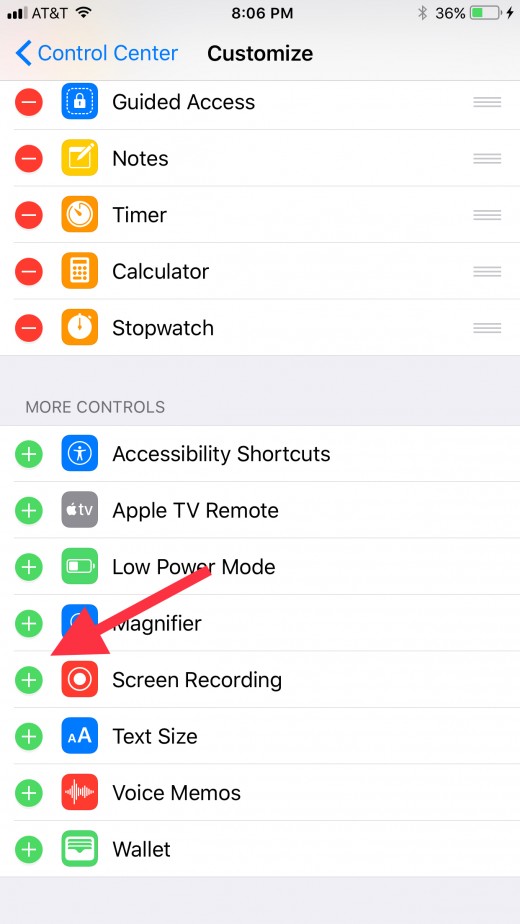
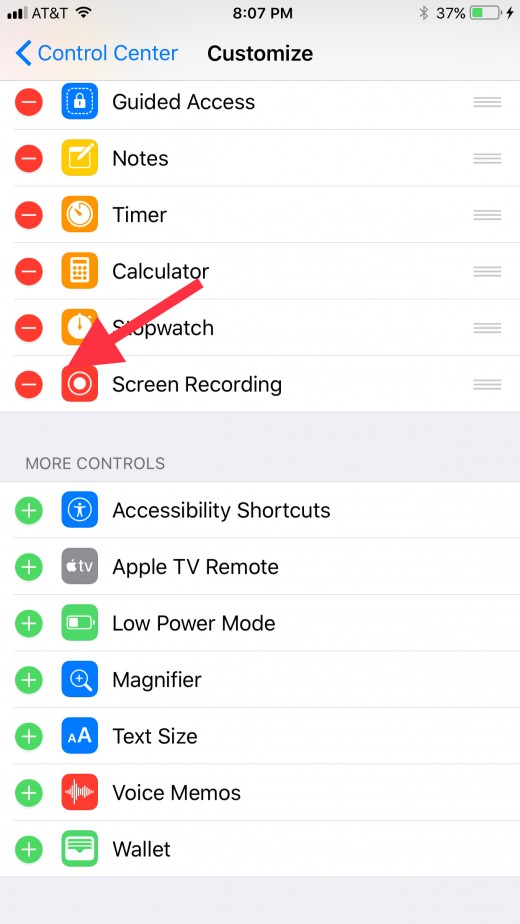
- Scroll down to the More Controls section, and then click the green "+" button to the left Screen Recording. Screen Recording will move into the Include section. You've now successfully added the Screen Recording feature to the Control Center, where you can access it.


How to Enable Do Not Disturb While Driving on Apple iPhone
How to Use Screen Recording
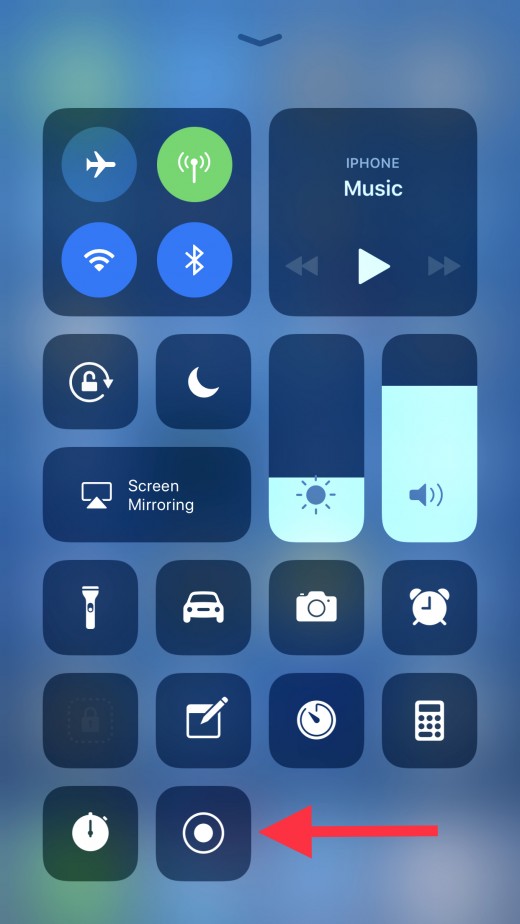
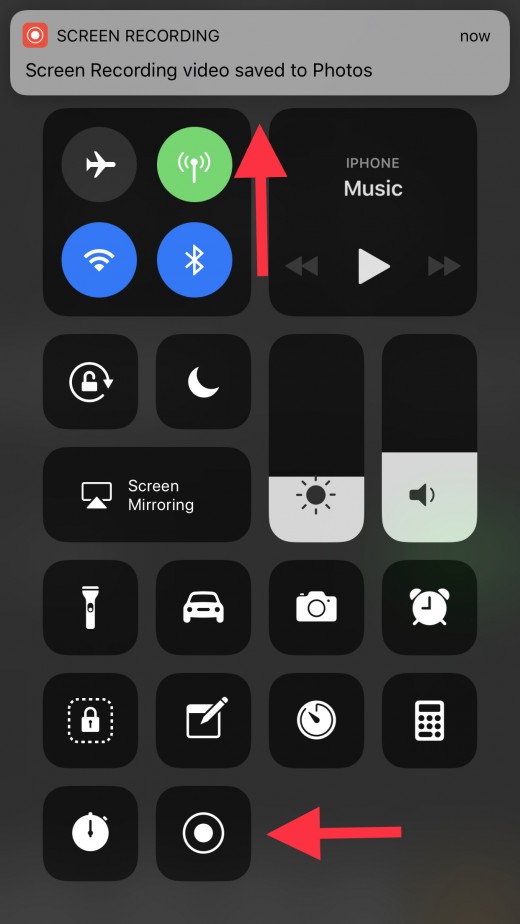
- Swipe up from the bottom of your screen to access the Control Center on your iPhone or iPad.
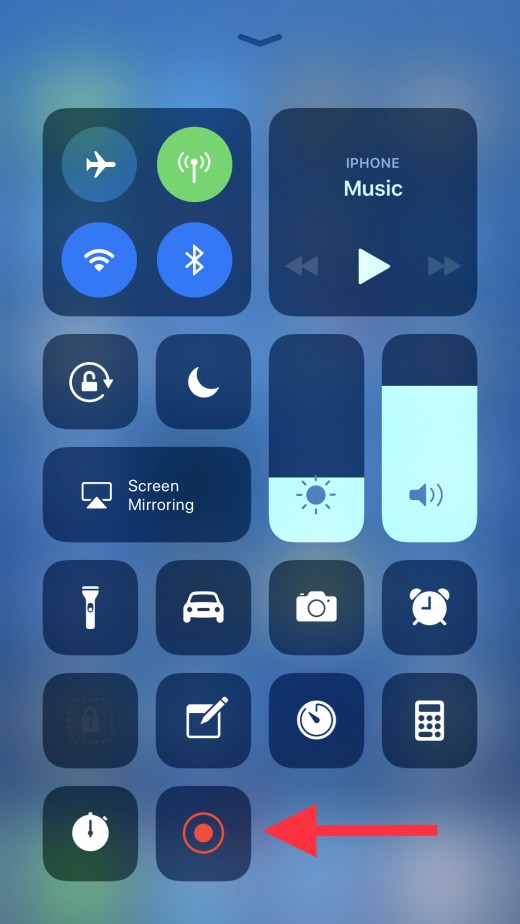
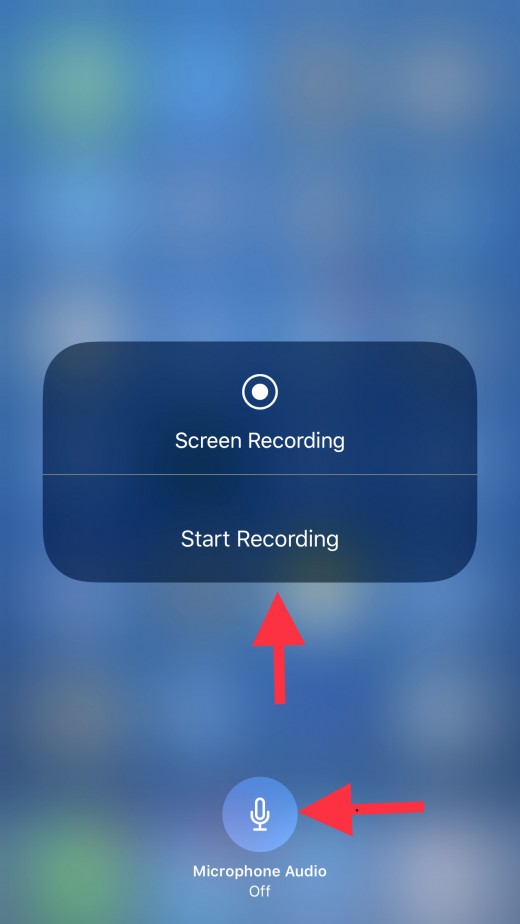
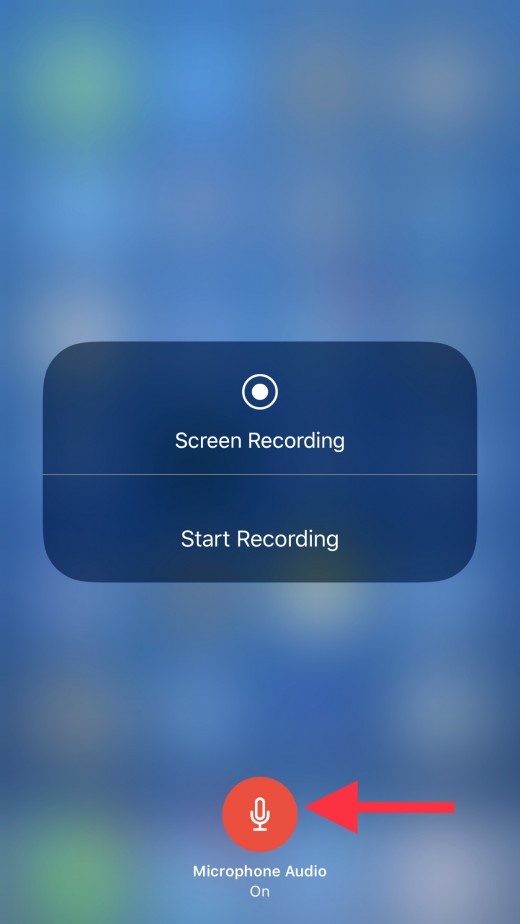
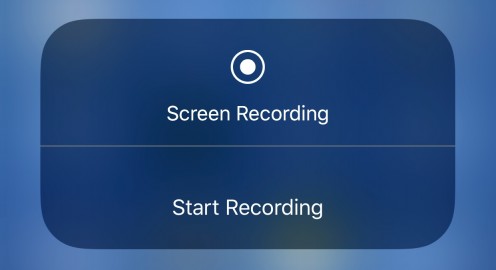
- Tap the "Screen Recording" icon. The Screen Recording icon looks like a bulls eye, with a dot inside of a circle. The Screen Recording icon will turn red, and screen recording begins automatically. Alternatively, if you'd like to record audio in addition to the video, you'll need to press the "Screen Recording" icon to open a 3D Touch menu. Within the menu that appears, tap the "Microphone Audio" icon at the bottom of the menu until it turns red, and then tap "Start Recording" on the screen to begin recording with audio.
- Navigate back to the Control Center, and tap the "Screen Recording" icon again after you've completed the actions you wanted to capture on your iPhone screen. The Screen Recording icon will will return to its original white color, and a notification will appear along the top edge of your screen letting you know that a video of your screen recording can be accessed in the Photos app.
- Press the "Home" button on your iPhone or iPad to return to your device's home screen.
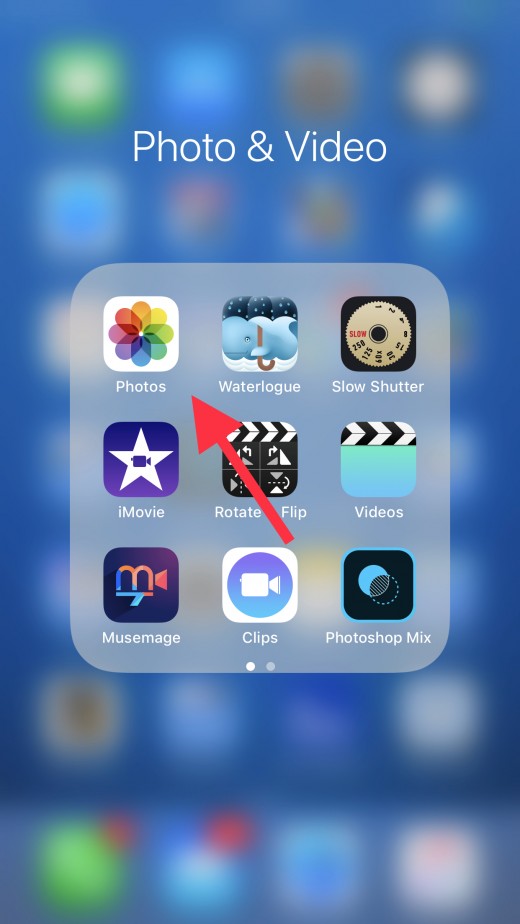
- Tap to open the "Photos" app.
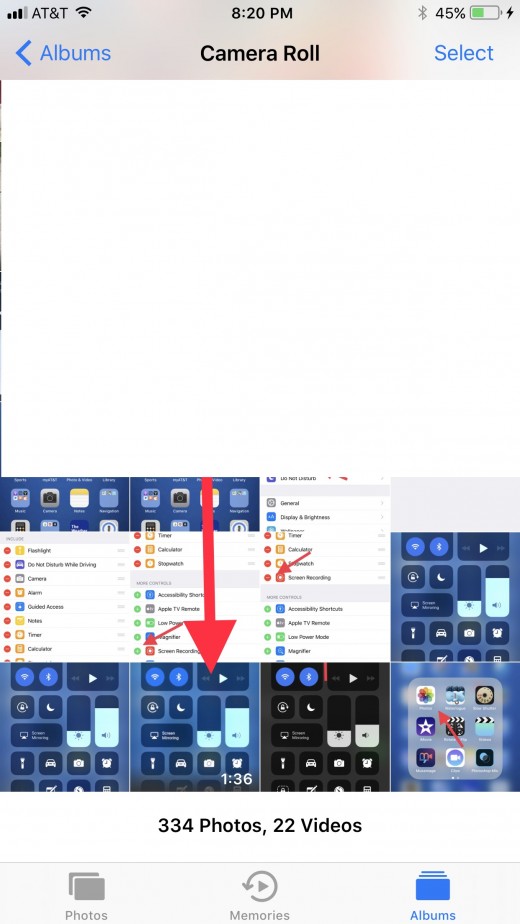
- Navigate to the video you captured, and then tap to play the video.


© 2017 Max Dalton

