- HubPages»
- Technology»
- Computers & Software»
- Computer How-Tos & Tutorials
Video Card Fan Not Spinning, How to Replace
How to Replace a Failed Video Card Fan on Heatsink
So, I was in the middle of playing one of my all time favorite games on and then all the sudden the computer froze in place. At first I thought maybe it was a glitch or something. So, with no other option, I cold cycled (turn off) the computer, give that control, alt, & delete did nothing. After the computer turned back on, I resumed my game, and it did it again. Now, I am beginning to think something is wrong. I quickly checked my Nvidia hardware monitor after the computer was rebooted again only to find out that my graphic card was cooking at 100c (that is really too hot.)
I opened my case up, and saw that the fan on the card wasn't spinning. Well, this is a problem, isn't it? Good news is that it isn't all that expensive to replace, but does require a little time and will power. In this hub (long hub with lots of pictures,) I will show you what all I did to get myself back in the game. Enjoy!
Shopping List, If You Don't Already Have These Items.
Project Time: 30 minutes to an Hour Project Skill: Intermediate to Advanced
- Precision Phillips Screwdriver(s)
- Flat Head Screw Driver (May or May Not Need)
- Needle Nose Pliers
- Rubbing Alcohol (70% or greater)
- Cotton Swabs
- Paper Towel (Soft, not abrasive)
- Thermal Compound (Recommend: Arctic Silver 5)
- Drill with 1/16" Drill Bit (Bit needs to for Metal)
- Block of Wood (Scrap Piece of 2x4 will do)
- Compress Air
- Last but not Least, some patience and will power.
The list above, not all will be shown in the images below. Tools was not really on my mind as I was snapping pictures as I went along. Keep in mind that you should keep yourself static free as you work on this or any electronic. A static strap is always a nice thing to have around or even a mat. You should also allow the video card time to cool to room temperature before working on it, unless of course your don't value your skin.
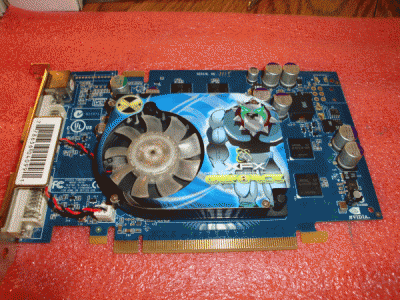
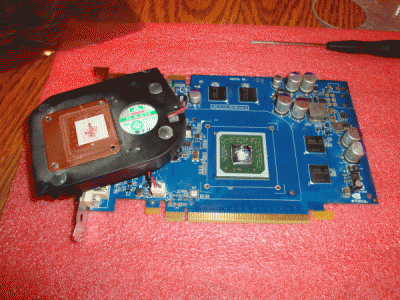
PCI-Express Video Card w/Failed Fan
One Step At a Time
The XFX EN6600GT PCI-E video card above is lying flat on a table. Always keep in mind that electronics are not made to withstand a lot of pressure. So, when you are working on removing the screws, connectors, etc., don't overdo it or you may crack boards or circuits. Keep oily fingers and/or skin way from the golden tips (connection) at the base of the card as well.
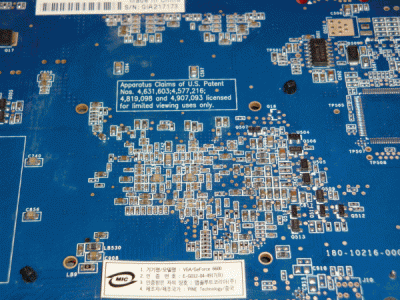
First off, you will need to know how to remove the heatsink form the main part of the board to separate it from the processor. This can be done by releasing the pressure clips on the back of the card. In the image below on this particular card you will see the clips (or pins) at the upper right and lower left of the board in a square like pattern. They can be released by using a needle nose set of pliers and gently squeezing together, they should snap through the holes.
Removing the Heatsink and Fan
Heat Sink Removed
When the clips have be removed, the heatsink may lift off easily, however if it doesn't due to thermal compound hardening, then you will need to gently place a flat head screw driver under the heatsink and twist/pry it off. Do this gently and evenly around the GPU area. You don't want to crack or damage the GPU.
Once it is removed. The processor will be exposed, showing the original thermal compound as seen in the image below.
NOTE: Not shown in any of the images, Do not forget to unplug the heatsink fan power cord before removing heatsink.
Heat Sink Shown Removed
Time to Clean the Mess
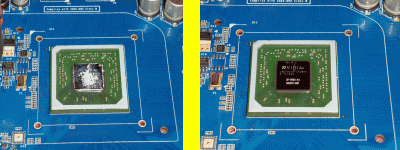
The gunk you see is old thermal compound, and it must go. Later we will replace it, however for now it is a good practice to clean up the old rather than keep it. In the image below, it will show the before and after shots of the GPU being cleaned. This is the most sensitive part of the whole process, short of the clips earlier. Be sure you are completely discharged of static electricity before continuing. You will need the rubbing alcohol and cotton swabs now. It is a gentle cleaning agent that will not damage circuits or the GPU.
Apply some of the rubbing alcohol on a cotton swab, then rub gently in a circular motion until the thermal compound begins to give way. Do this until the GPU service is completely clean and rid of the old stuff.
When you are done cleaning, you should be able to see writing on the GPU. Be sure to cleanup around the GPU as well as soak up any excess rubbing alcohol.
Before/After Cleanup of GPU
Heatsink Cleaning
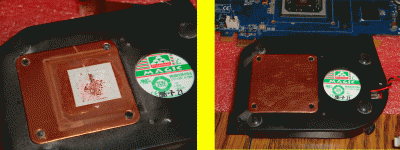
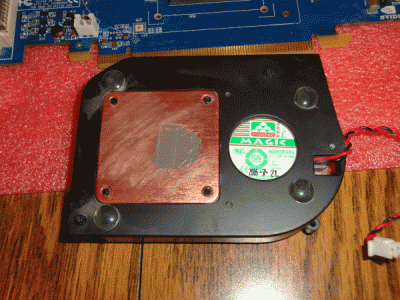
At this point the heatsink should be separated from the GPU (video card.) The heatsink is solid metal (this one was copper,) so you don't have to be as gentle with it as you were with the GPU. You can still clean in the same way with a non-abrasive paper towel or cotton ball. Be sure it shines back at you, this is how you know it is clean. Be sure not to use anything that will cause scratches on the heatsink.
Images below show the before and after shots.
Cleaning the Heatsink Before/After
About Halfway Done
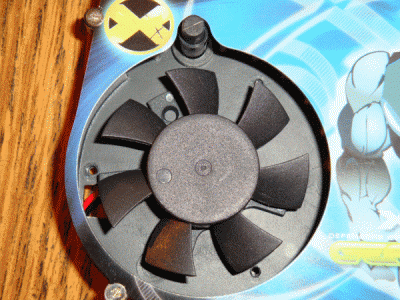
Since we are now done cleaning. We can move the card away (far away) from us to begin working on installing the new fan. The fan is likely held in by a few screws. Mine had (3.) Be careful not to loose these screws, they are small and easy to misplace. A precision screw drive is the best tool for the job here. Go ahead and remove the screws.
NOTE: Don't get rid of the screws. You will likely need them for the new fan. The fans I ordered didn't come with any screws, so I had to reuse the stock screws.
Removing the Original Fan Screws
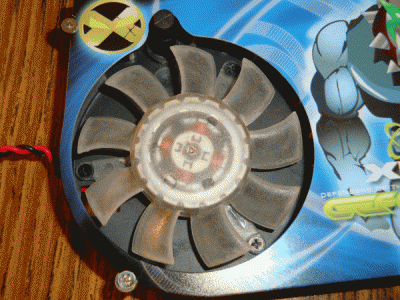
Old Original Fan Removed
I don't have showing here a picture of the missing fan, sorry, but after removing the old fan you will want to place the new fan in the center (eye balling it is okay.) At this point you will want to mark your drilling holes with something like a pencil or scratch it with a precision screw driver.
NOTE: When you purchase a new fan, the chances of it not lining up wth the current holes are likely. In my case, I put the fan in the center, scratched a few marks on the inside of the heatsink where I need to drill new holes using the new fan as a template.
NOTE: Be sure to measure the size of the fan, the one I needed for my project was 40mm. Yes, everything is in metric, so you will have to get a metric ruler or convert from American to Metric.
Time to Create Drill Marks
Time to Drill a Bit :)
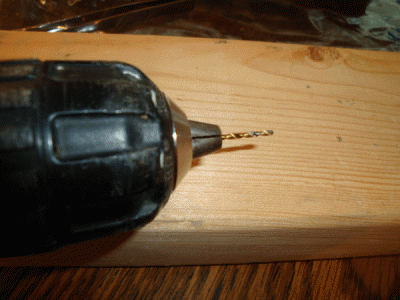
The screws for the original fan are a little bit bigger than 1/16", so I used a 1/16" drill bit to bore holes. This allowed the screws to latter be screwed in with pressure and create their own threads to tighten in place. Always evaluate your surroundings before proceeding.
The block of wood is to have a back to drill into. This prevents over drilling and punch-outs, and it prevents damage to the table you're working on.
1/16" Drill Bit (for metal) and a Block of Wood
After Drilling....
You will see by now all the little metal shavings left over from the drilling. They are sharp, tiny, and dangerous for you and the video card. It is best to use a vacuum to clean these up. Don't use your fingers to wipe them away, unless you like metal shrapnel going into your skin. Compressed air along with a damp towel can assist with cleanup as well.
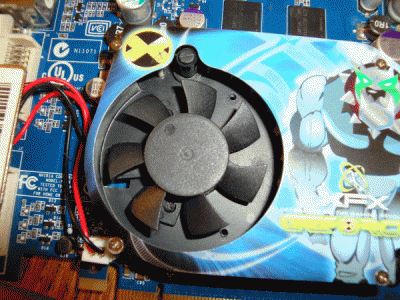
New Fan Attached
Drive the Screws
Now you can drive your screws with the new fan in place into the new holes in the heatsink.
Let's Apply Some New Thermal Compound
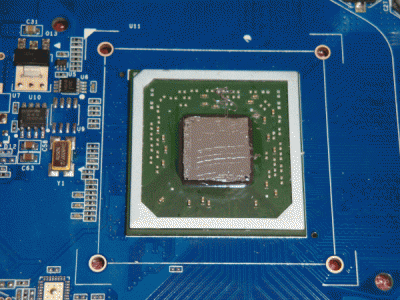
Applying Thermal Compound on GPU & Heatsink
Get yourself some Arctic Silver 5 thermal compound. This is the best stuff out there (IMHO.) When applying it, apply smoothly to about a (1) mil thick on both the GPU and Heatsink. This will allow for a nice heat transfer form the GPU to the Heatsink. (1) mil is about the thickness of (2) sheets of copy paper. When applying the compound, use a business card or something like this to spread it evenly. Don't use anthing that is hard or can scratch.
See images above and below for visuals.
A Dab of Thermal Compound on Heatsink Too!
Almost Done!
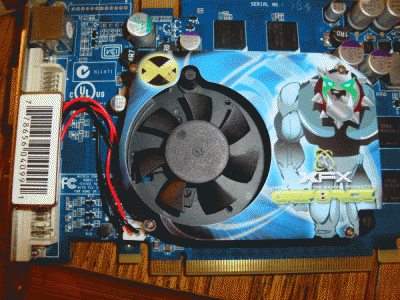
When the thermal compound is applied, you will now re-seat the heatsink back into it cradle, which should snap into place with its clips. Replug the power cord from the new fan into the power header.
Now, your done. Hopefully, you had success and are able to get back into the game as I did. My card now runs an average of 55c in game, and idles at 40c out of game. A long ways off from the original 100c.
Thermal Compound
Re-seat the Heatsink into the Clip Holes, and You're Done!
Video Cards
© 2009 Ryan Hutzel


