How to Start a Cooking Blog on Blogger and Promote It

If you love to cook and share your recipes with others why not start a cooking blog? Creating a culinary blog is a great way to share your recipes with the world while also gaining fans and potentially making some money, which is never a bad thing.
How to Start Your Cooking Blog
The best place to start a cooking blog (in my opinion) is with Google Blogger. It is FREE, easy to set up and maintain and there isn't a limit to how much you can post on it. To create your culinary blog simply go to blogger.com and sign in with your Google account. If you don't have a Google account just sign up. You will be asked to enter your full name and then choose a username and password. You will need to enter the password a second time for confirmation. Then you'll need to provide your birthday, your gender, your mobile phone, and your current email address. Once you've entered all that information type in the two pieces of text you see to prove that you are not a robot, check the box to agree to Google's terms of service and privacy policy and click to go to Next Step.
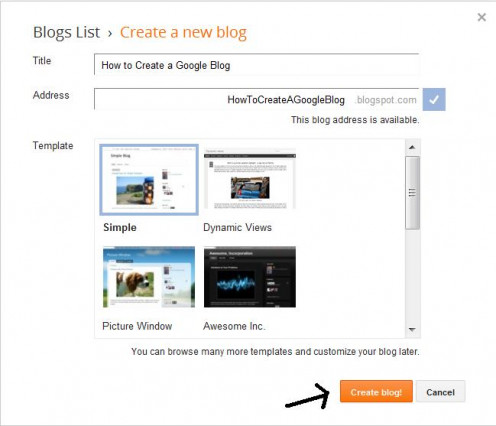
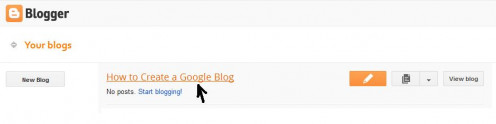
Now is where you will start creating your cooking blog. Enter the title you want your culinary blog to have, and the blog URL (usually your blog title will go into the URL but you can change it to whatever you want). Select a template for the blog. Just click on any template at this point as you will be able to change it later. Once you've entered all the information click on Create blog! button to create your blog. When your blog is created you will be taken to a page with a list of your blogs. Click on the blog title you just made.
Now that your blog exists it is time to actually set it up and get it ready for sharing with the world.
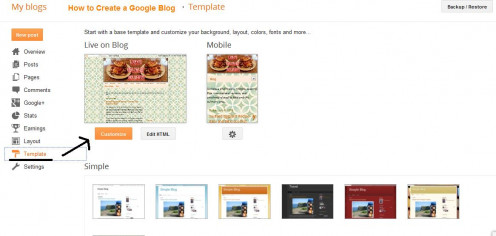
When you click on the blog title you will be taken to your blog's dashboard. On the left side of the page click on Template. When you get to the template page click on Customize. You will be taken to the Blog Template Designer page where you will customize your blog.

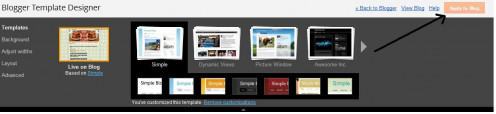
In the Blog Template Designer you will be able to choose a template for your blog if you don't like the one you have now, the background theme and image (you can choose their images or upload your own), adjust the width of the blog and of the side bar, choose a body and footer layouts, and make advanced changes to the appearance of your blog. These customizations include:
- background and link colors
- page text font and color
- blog title font and color
- blog description color
- tabs text font and color
- tabs background color
- post title font
- date header text and background color
- post footer text and background color
- gadgets font and color
- images background and caption colors
- accents (separator line and tabs border) color
- mobile button color.
Once you've made all the changes to your blog click on the Apply to Blog button to apply those changes to your cooking blog.
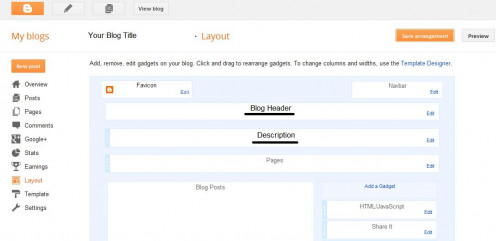
Now click on Layout on the left side of the Blogger Template Designer. There you will see the different layout options for your blog and footer. If you scroll down a bit you will see all the gadgets that are in your blog.
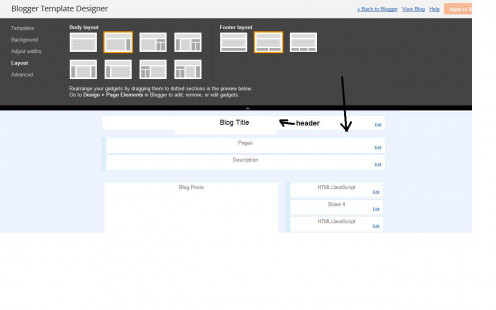
Click Edit next to the blog header. You will see the blog title already displayed. You can leave it as is or change it to something else if you have a better title. In the blog description write the description for your cooking blog. Be short but specific when saying what your blog is about. Don't forget to use relevant keywords in your blog description. When done click Save. If you want you can also upload an image for your blog that will be displayed where the blog header is. You can choose to insert the image using one of the three placements:
- Behind title and description
- Instead of title and description
- Have a description placed after the image
Don't forget to click Save when done with uploading the image.
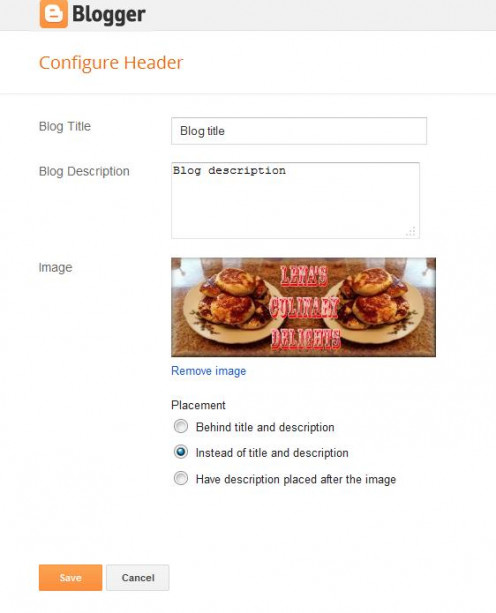
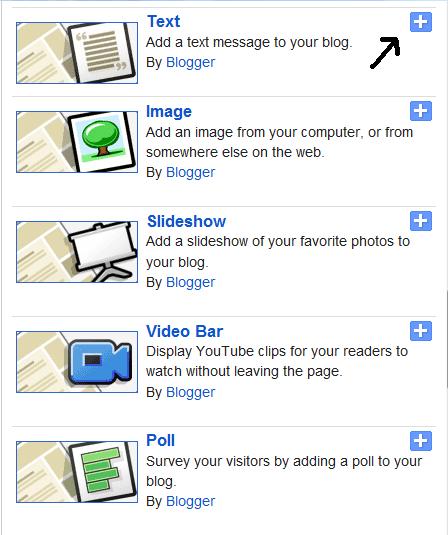
What I do for my cooking blog is place the image instead of title and description. This means that my blog title and description will not be visible. What I do then is inside my image I include the title of my blog. Then in the Layout page (from the dashboard not in the Blog Template Designer (you can't do it from there)) I insert a text gadget and in it write the blog description and place this gadget directly under the image. This way visitors will see my blog image, title and description. To do this simply click on Add Gadget, search for the Text gadget and click on the + sign next to it.
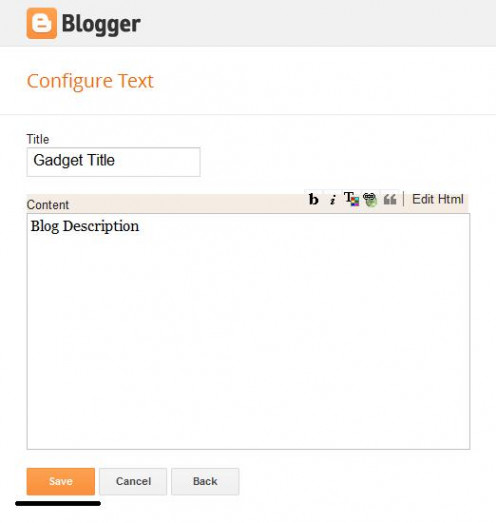
In the Configure Text window that pops up write the title for your gadget in the Title text box. The title is for the text gadget so title it in such a way that you will remember what it is. No one will see it. It is just for you. I'd give it a title of Description or Blog Description as that's what you are doing this for. In the Content text box write the blog's description. Click Save when done. On the Layout page that appears drag the text gadget you just created directly below the blog header and click to Save Arrangement so the placement of your text gadget will be where you placed it - under the blog header.
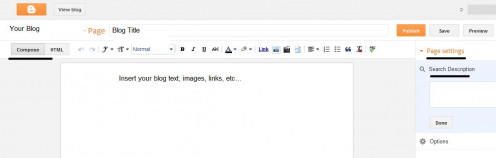
Now it's time to add some pages to your blog. To do this simply click on Pages on the left side of the dashboard of your blog. There you will see a button New Page. Click on that.

You will be taken to the Edit mode of the page. Simply write the title of the page. Then select the Compose tab and in the body insert whatever you want the page to have - be it recipe photos, relevant text, or relevant links, etc. When done click on Search Description under Page Settings on the right side of the page. Then click Publish and your page will be live. You will be taken back to the Pages page. Repeat these steps to create more pages.
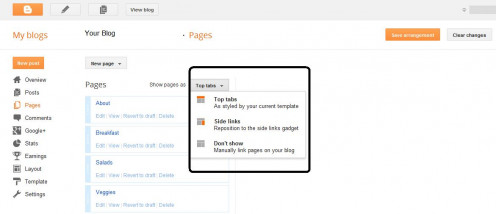
Once you publish your pages you should see them in the Pages page. You can change the order in the way the pages will appear by dragging and dropping them. When you are done changing the order of the pages (or leaving them as is if they are fine the way they are) and click to Save Arrangement so the order of the pages is saved.
While on this page you will also see Show Pages As. Next to it there will be a drop down list with the following options:
- Top Tabs
- Side Links
- Don't Show
Links to your pages on the blog will appear either on the side as links or below the header as tabs. Choose whichever you think is best for your blog. I prefer top tabs because they are clearly visible no matter what page I am on in the blog. Be sure to click on Save Arrangement just to be all changes are saved.
What Pages Should You Include in Your Cooking Blog?
You already have the Home page on your blog where all your blog posts go. I would rename that page to something else and you can do that when you are in the Pages page. Aside from this page there are many other pages you can include in your cooking blog. Here are the pages that I would definitely have in your cooking blog.
- About Page - here you can introduce readers to your blog, showcase a few recipe photos, and provide readers with a picture of you so they can put the face to the chef. I would direct your readers/visitors to this page instead of to the main blog page. This way before they read your blog posts or go to any other pages they will find out about what this blog is about, who you are and what kinds of dishes you create.
- Products Page - here you can showcase things that you use when cooking (available on Amazon) - be appliances, cutting boards, knives, measuring cups and bowls, dishes, and any other culinary gadgets, even cookbooks if you use any. This will not only make your blog more professional (especially if you have Amazon's astore) but it will also give you the chance to earn some money with Amazon. I go into this later in this hub.
- Recipe Page - here I would showcase recipe photos of the final product with descriptions of the dishes and recipe links (where those recipes are published - be it on this blog or on another site). You can include the actual recipes here if you want but that would clutter up the page so I would advise against it especially if you have a lot of recipe photos to showcase. Instead I would publish the recipes as blog posts or publish them on HubPages. If you have many dishes you've created and want to share with others you can create many recipe pages - one for breakfast dishes, another for salads, another for soups, and so on. I believe you are only allowed to have 10 pages on the Google blog but I could be wrong.
Another page you can have on your cooking blog is cooking and presentation tips. Here you can provide your readers/visitors with useful cooking tips and educate them on how to improve the presentation of their dishes and make them look like works of art.
How to Make Money with Your Cooking Blog? Join Google AdSense
Now that you've set up your Google culinary blog it is time to monetize with Google AdSense so you can potentially make money. If you already have an AdSense account simply link it to your culinary blog. If you don't have one you will need to sign up for one but before you can do that you will need to place content on your blog or you run the risk of your AdSense application not being approved. Create a number of interesting blog posts that have great content. Add content to your blog pages as well. After that go ahead and submit your AdSense application. You can do so by going to adsense.com and applying there.
Once you have been approved for Google AdSense, or if you have it already, allow for ads to be displayed on your blog and link AdSense with your blog. You will now see Google ads being displayed on your blog pages and posts. Whenever a visitor clicks on one of the ads you will earn money. The earnings can range from a few cents to a few dollars per click. It all depends on what the CPC (Cost-Per-Click) for that particular ad happens to be. You may also earn money simply by having ads shown on your blog without people actually clicking on them. In this case you will earn based on CPM (Cost-Per-Thousand Impressions). Again you can earn from a few cents to a few dollars here. Unlike other sites who share your AdSense earnings you get paid 100% of all that you earn with Google on your blog, which is great.
Whenever you've made anything from your blog you will see those earnings when you login to your AdSense account. Once you've earned a minimum of $100 you will get paid by Google. It may take a while for you to earn that $100 minimum. Don't try clicking on ads on your blog. That is not allowed!!!!! If you do this Google will penalize you by suspending your AdSense account and you will lose any earnings you've made so far.
How to Make Money with Your Cooking Blog? Join Amazon Associates
Aside from making money with Google AdSense you can also make money with Amazon by displaying relevant Amazon products on your blog. When people click on one of the product links on your blog and buy that item and/or other items and ship those items to themselves you will earn 4% of each product's price. The more expensive the product the more you earn. Once you've sold 7 items in a given month you will start earning 6% of each product's price and that percentage may increase again... When you've sold a minimum $10 worth of products Amazon will pay you whatever you've earned. If you haven't reached the $10 minimum for that month don't worry. The earnings are carried over to the next month and so on until you reach the minimum.
Displaying Amazon products on your blog will not make you any money until you join their affiliate program Amazon Associates and then display Amazon products on your blog using special product links that have your Associates ID in them. If you already have an Amazon Associates account that's great. If not, you need to sign up for one. You can sign up by going to the following site: affiliate-program.amazon.com.
If you are part of the Amazon program already create a new tracking ID with your Google culinary blog name so that you can track where the product link clicks come from - your cooking blog or another site you are using Amazon Associates with. If you just signed up for Amazon Associates and were approved you don't need to do that as this is the only site you'll use Amazon Associates with.
There are different ways to display Amazon products on your blog. One is to simply include a product link with just text or a product link that has text and a product image. If you choose to include a text and image link in a blog post you have to paste the code into the HTML tab of your blog post and not in the Compose one. To get the special link or code for particular product simply log in to your Amazon Associates account, click on the Links and Banners tab, search for that particular product and click to get link.
Another way to display Amazon products is to create a widget that will display a number of Amazon products. You can do this for a blog post or for it to be displayed on the side of the blog pages. To do this simply log in to your Amazon Associates account, click on the Widgets tab and follow the steps to add the products you want to the widget and then copy and paste the code you are given into your blog. If you are pasting it into a blog post simply paste it into the HTML tab when you are in edit mode for your post. If you want to have the widget on the side of your blog simply go to Layout, click to Add Gadget, select the HTML/JavaScript gadget and insert it where you want it to go. Then click to edit it and paste the Amazon code into it and save. Once you do this click to Save Arrangement and view the blog. You should see the Amazon product widget on the side off the blog.
Yet another way to display Amazon products on your cooking blog is to create an astore. Simply log in to Amazon Associates, click on the astore tab and follow the instructions to create the astore with the products of your choice. Then copy the link of your astore, go to your blog, click to create a new page so it takes visitors to a web address and paste that astore link and click to create the page by giving it a name. Once you are done, go to view the blog, and you should see a page with that name on it. When you click on it it will take you to the astore. People will be able to browse the products, add them to their shopping carts and buy them without having to go to Amazon. Note that visitors will be taken away from your blog and won't be able to return to it unless you provide a link in your astore to take them back to the blog. You can set this up when creating your astore.
How to Promote Your Cooking Blog?
Now that you have your own cooking blog how to get people to actually visit it. While people may find your blog while searching for something on Google it is not guaranteed. What you have to do is promote your cooking blog and there are many ways to do it.
- Share your blog and blog posts on Facebook and with your Facebook friends. If you are not already on Facebook, go ahead and join. Also, create a cooking page on Facebook designed specifically for your cooking blog. Title it the same title as your blog. In the about section of the page include a few words about your blog and a link to it. Then join Twitter if you are not already on it and link your cooking page with Twitter. This way whenever you post to Facebook the post will automatically show up on Twitter. This saves you time by not having to post to Twitter separately.
- Go ahead and join Pinterest and pin recipe photos there with links to your recipes or recipe pages.
- Join Tumblr (a micro-blogging site) and focus on writing short blog posts specifically related to your culinary blog and to the blog posts you've got on there. In the about section write about your blog and provide a link to it. Then publish short blog posts about things on your cooking blog and include links to those posts or pages. Be sure to link your Tumblr with Facebook and/or Twitter so that when you pin something people on Facebook and Twitter will be notified.
- Join Google+ and share links from your cooking blog on it.
- On your culinary blog be sure to include the Follow button for Twitter, the Like button for your Facebook page, the follow button for Pinterest and Google+.
Now that you've educated yourself on how to start a cooking blog on Blogger, how to monetize it and how to promote it go ahead and start your very own cooking blog. You never know where this venture will lead you. You may get lots of fans and followers and even make some money while you are it. You may even publish a cookbook or two.
Much success to your on your culinary blog journey! Happy cooking and happy blogging!
© 2013 Lena Kovadlo


