- HubPages»
- Technology»
- Computers & Software»
- Computer How-Tos & Tutorials
Computer Skills 101: How to Turn on a Computer!

Personal computers (sometimes also called desktop PCs) are a staple in any office or home in today's society. Personal computers are used for an array of tasks including entertainment, writing, doing your finances, and updating your social media accounts - such as FaceBook. However, if you have ever had a problem with your computer and didn't know how to fix it, it's likely that you may have placed a phone call to the GeekSquad or your IT department. Ironically, one of the first things that they will tell you to do is to restart your computer or to make sure that it is turned on (or plugged in). Ever wonder why they tell you this? Well, quite surprisingly actually, turning on a computer is one the biggest challenges facing new technology users today (especially young children and senior citizens). Because I didn't see too many resources on this subject, I decided to write this how to guide for the technically challenged. In just 5 easy steps I will explain how easy it can be to turn on a computer.
Step 1: Verify That You Have Power
Before you attempt to turn on a computer, it's a good idea to check and make sure that your home or office has power. An easy way to check to see if you have power is to look for signs of electrical usage in other devices around you. For example, if the lights are on in your office building or the coffee maker is brewing some 'joe, that is a good sign. If you are at home, check to see if your appliances, such as your refrigerator, are running.

If in either of these cases there is an indication that there may be a loss of power, you may need to find the circuit breaker box that controls the flow of electricity into your building. The circuit breaker box could be located in a basement, on the exterior of a home, or in the maintenance room or janitor's closet of an office building. Once you have found the circuit breaker box, check to ensure that there isn't a problem by verifying that all of the breakers (switches) have been flipped to the "on" position. As soon as you have verified that your building, and the outlet where the computer resides, has power connected to it, you can move on to the next step.
Step 2: Ensure Electrical Connectivity
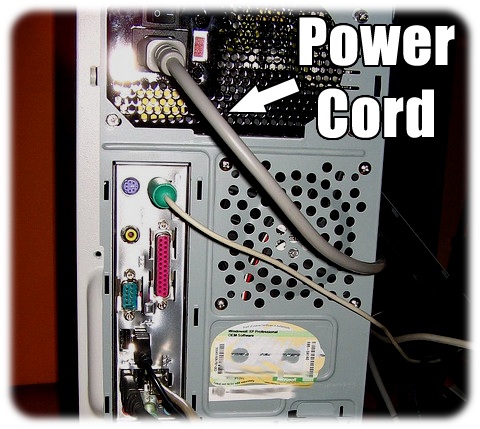
Before you can turn on a computer, you need to make sure that it is actually connected to a source of power. First find the rear of the computer and locate the thick cord that ultimately leads to a power strip, surge protector, or wall outlet. Don't be alarmed if you notice several, if not dozens, of cables connecting the rear of your computer to various peripherals and input devices. In most cases the power cord will be located near the top of the computer close to a fan grill. Near the power connection you may also see a inset red or black voltage switch that is marked with the number 115.
Once you are sure that you have located the power cord, follow it to the end where it should meet a power strip, surge protector, or wall outlet. If the end of the power cord is not attached to one of the aforementioned items, you will need locate one to establish a power connection. If needed, align the three prongs of the plug end of the power cord with the three holes of a wall outlet, power strip, or surge protector. Once the prongs and holes are aligned, press them together using and ample amount of pressure to secure the electrical connection.
Step 3: Check the Power Strip
If the computer is connected to a power strip or surge protector, the next thing that you will need to do is to check and make sure that these devices are also turned on. Most power strips and surge protectors have toggle switches that enable you to control the power connectivity to the computer as well as many other devices. Locate the switch and make sure that it is placed in the "on" position. In many cases, these switches will be lit up with a red, blue, or white light to show you that the power is indeed on. Once you have ensured that the power strip or surge protector is allowing electricity to flow into the computer, you can move on to the next step.

Step 4: Turn on the Monitor
These final two steps in turning on a computer are often the most complicated. It's good to begin by locating the power switch on the computer monitor. A monitor is the device that resembles a television and is used to display content for a user to view and interpret. Monitor power switches are often located on the bottom or sides of the frame that surrounds the screen. On older CRT style (large, bulky) monitors, the power switch is often located on the front as a push button switch or on the rear as a toggle-style switch. Once you have located the switch, make sure that it is in the "on" position. Push button switches won't have an "on" position; you will have to press them and wait for a response, such as an LED light or a flash on the screen, to ensure that the power is on.
Step 5: Initiate the Computer's Startup Sequence
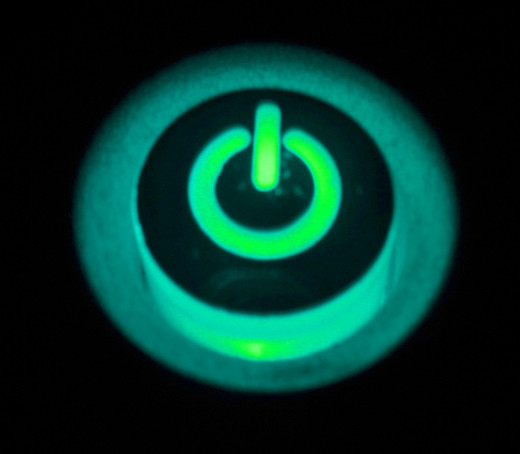
When the monitor is ready to display signals from central processing unit (the computer's brain) you are ready to initiate the computer's startup sequence. To do this, locate the power switch on the front of the computer. In many cases this switch will be a push-button style switch denoted by one of the symbols shown in the figure to the upper right.

Once you have located the switch, press it inwards using your index finger until the button reaches it's maximum depth. At this point you can release the switch and turn your attention back to the monitor. If you see a splash screen or a series of lines of text it is very likely that you have succeeded in initiating the computer's startup sequence. After waiting a few moments (sometimes even 5 or 10 minutes) the computer should be ready to use.
Final Thoughts
I sincerely hope that you have found these tips helpful. As you can see, turning on a computer doesn't have to be a mind-bending, stress inducing task. With time (and practice) you should have no trouble turning on your computer whenever you need to update your FaceBook status or make a blog post about your cat.


![How to Remove Kaspersky Password Protection? [Easily Recover]](https://images.saymedia-content.com/.image/t_share/MTc2Mjk3NDcwOTAzNTkyMTI2/how-to-remove-kaspersky-password-protected-easily-recover.png "How to Remove Kaspersky Password Protection? [Easily Recover]")

