- HubPages»
- Technology»
- Computers & Software»
- Computer Software
Increase Internet Speed- How to change the DNS Server Address
What Is DNS.
DNS stands for Domain Name Server. It is used to convert a web address (Eg: www.hubpage.com) that you type in your internet explorer, into corresponding IP address.
A web address such as the above, is a high end language which cannot be understood by your computer. (The computer only understands low level language which consists of 0 and 1). For that, an IP address is used, which is a 32 bit address consisting of 0 and 1 specifically. An example of an ip address would be 192.168.1.1. When converted to binary form, it appears as 11000000.10101000.00000001.00000001 which is readable by the computer.
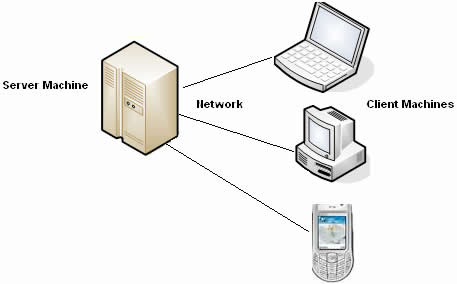
Each website contains its own unique IP address. When a user enters a website name and clicks on enter, the same is taken up by the local DNS server where the name gets converted into the corresponding IP address. Once the translation is complete, the DNS server connects to the remote computer which is specified by the ip address,
On connection getting established, the remote computer links itself with the home user computer and DNS server disconnects, proceeding with other operations.

How to change the DNS Server Settings
The Internet Service Provider, automatically assigns a DNS server to each new connection. The drawback is, some of the assigned DNS server will be very slow in its operation and this can cause the net speed to reduce drastically, even though you have high bandwidth.
There are some high speed DNS server which are available for free. One of the most notable would be the Google DNS server.
To change the settings of the DNS server, here are the following steps.
- Press Windows Key + R. In the Run command, type ‘ ncpa.cpl ‘ and press ' OK ' button.
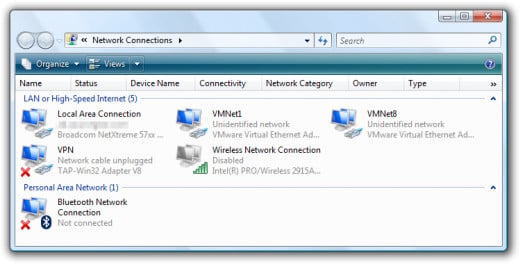
- Now the page for Network Connections will open. This will list all the available Networks currently installed on your computer.
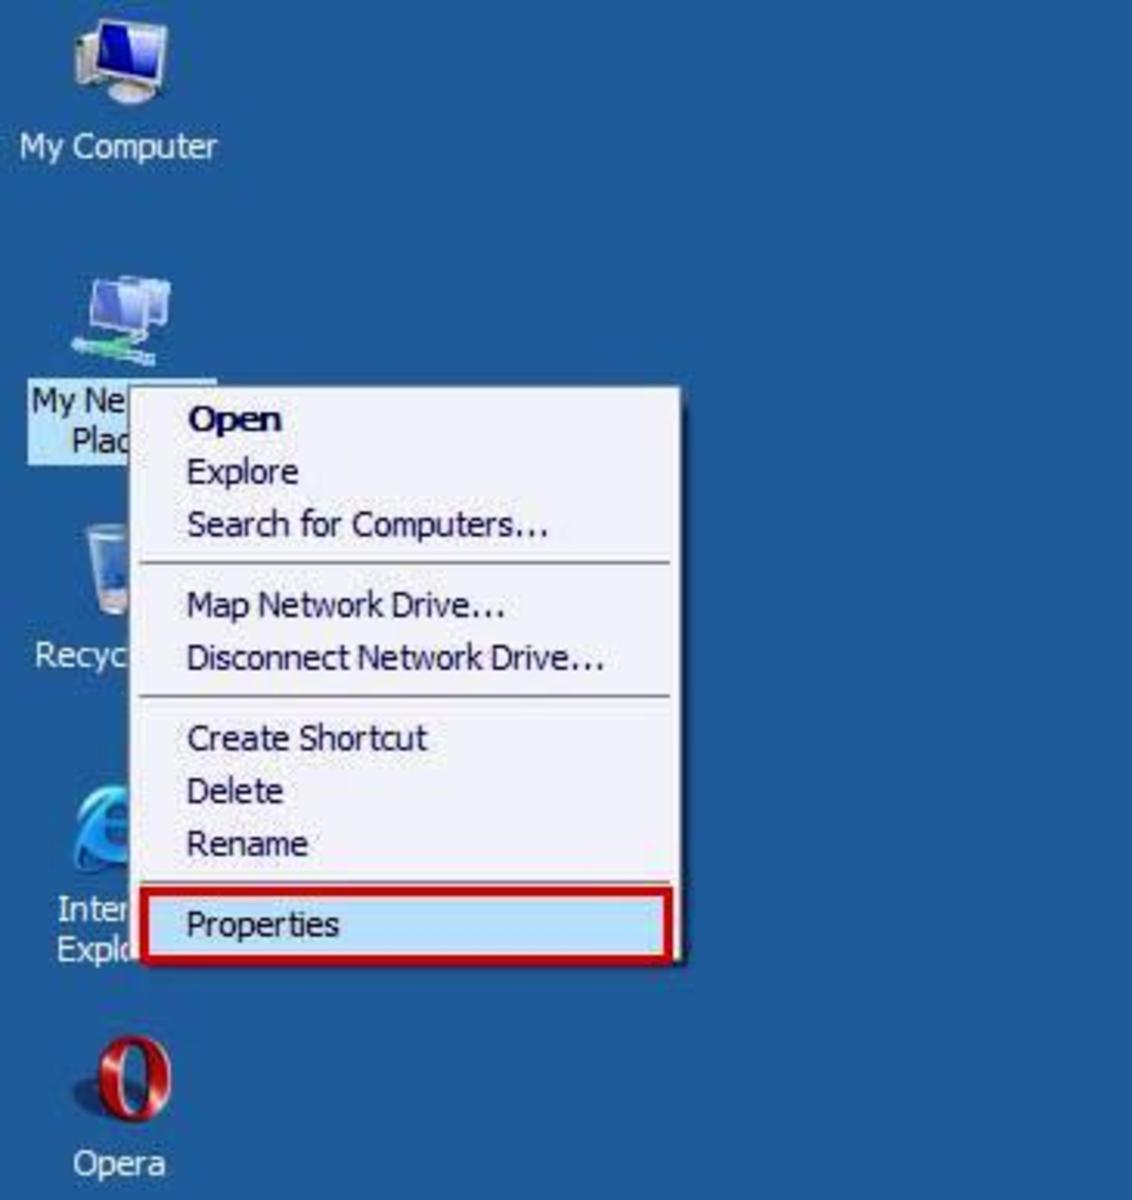
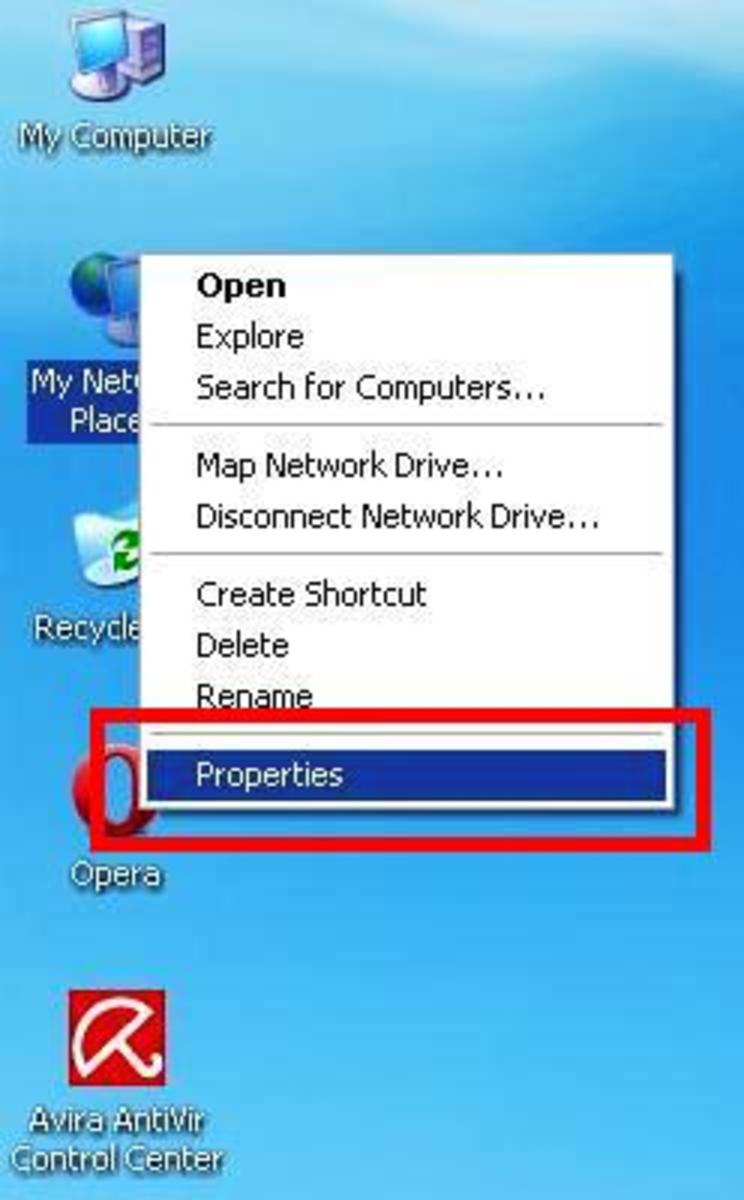
- Right click on the icon of your respective network connection and click on Properties Tab.
- Click on Continue button from the User Account Control Window that pops up, to proceed.
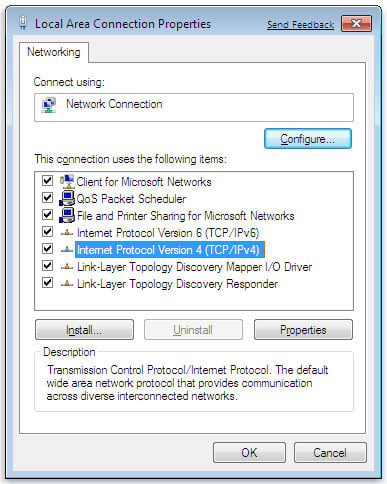
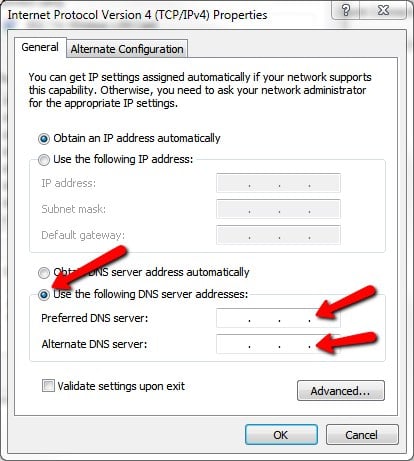
- Now a new page will appear. Double Click on ‘ Internet Protocol Version 4 ( TCP/ipv4) ‘ option from the given listing.
- On the bottom of the Pop Up window that appears, click on the option “ Use the following DNS Server address “.
- On the corresponding box for “Preferred DNS Server“, type the ip address 8.8.8.8. In the same way, for “Alternate DNS Address “, type in 8.8.8.4.
The above given ip address are for Google DNS Server. There are also other free DNS server available on the net, Do a search on Google with the search term “ free DNS Server “ for the same and enter the ip address manually as shown above.
List of DNS Servers
SERVER NAME
| PREFFERED DNS SERVER
| ALTERNATE DNS SERVER
|
|---|---|---|
Google DNS Server
| 8.8.8.8
| 8.8.8.4
|
Norton Free DNS Server
| 198.153.192.1
| 198.153.194.1
|
Comodo Secure DNS
| 8.26.56.26
| 156.154.70.22
|
Safe DNS
| 195.46.39.39
| 195.46.39.40
|
SmartViper
| 208.76.50.50
| 208.76.51.51
|


