- HubPages»
- Technology»
- Computers & Software»
- Computer Software»
- Digital Photography & Video
Intro to Photoshop: Faded B & W Photo Problems

Original Photo
Click thumbnail to view full-size
Prized Old Photos Get New Life
Have you ever wanted to know how to make your old photographs better? How many times have you opened an old honored album only to find prized photos fading and damaged, seemingly beyond repair? Did you think for one moment that you could save them yourself with your Photoshop program? If you are like me, new technology is intimidating. But there are some things that are well worth the effort. Adobe Photoshop is one of those. The learning curve is not as impossible as you would think. Like many things (music, art, dance), the more you practice, the better you get at it.
One of the things that I did to practice was to assign myself weekly tasks, mostly with text effects, but also with photographs and photo-manipulation. Years ago people like you and I were stuck with a textbook and hours of head-scratching. Today there are thousands of YouTube Photoshop video tutorials by lots of pioneers who have already done the head-scratching for you.
I have Photoshop CC (Creative Cloud), which charges a monthly or yearly fee, as well as Adobe Photoshop CS5, the program on the disc. There have been a few new advancements between the CS5 and the CS6 and the CC. Most of the tools are the same however and are used basically the same way with the same shortcuts. There are a few differences that I will share along the way.
To begin, you have to learn about some of the basics, such as where to find certain tools and how to work them. For instance, the first time I opened Photoshop, I saw there was a Paint Brush tool. As an artist, I figured that I didn’t need any help working a paintbrush so I clicked onto it and nothing happened. Very disappointing. In this introduction, I will try to cover the many tools and filters used for photography and how each one can apply to your older photographs.
1920's
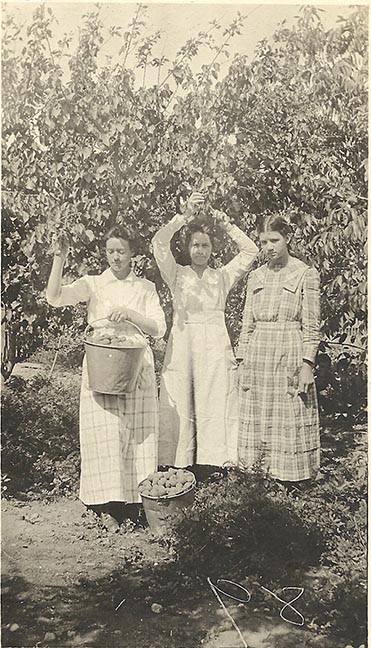
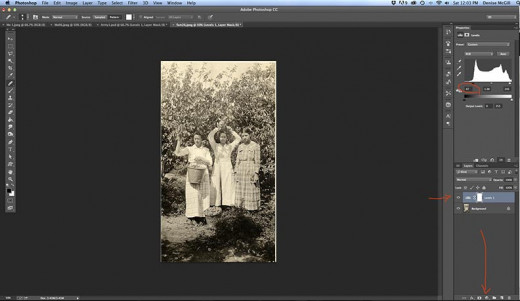
To start I opened a couple of old photos both from the 1920s. One is a photo of my grandfather’s sisters picking apricots on their farm. You may not be able to see it, (I didn’t notice it until I cleaned up the photo) but there is a small boy photo-bombing the girls to the middle right in the shadows. I think it may be my grandfather in that he was the youngest in the family.
Healing Brush Tool
What To Do First?
I have found there are no hard and fast rules on which you should do first, heal the dots, scratches, and artifacts or adjust the levels. It doesn't seem to matter.
Healing Brush Tool
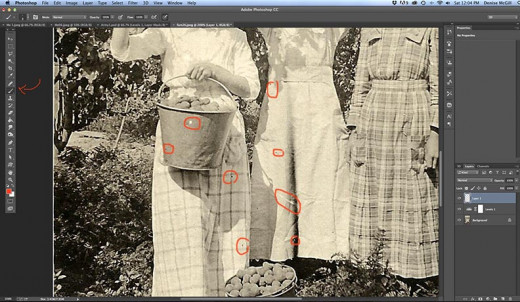
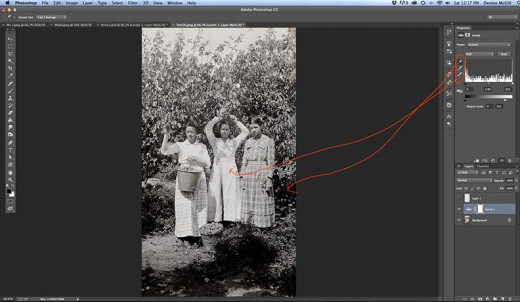
The Healing Brush is in the left-hand Toolbar signified by an icon of a Band-Aid. I like to do this healing on its own layer rather than over your original photo. Make sure the side this brush to fit the scratches and artifacts. You don’t want a huge brush to cover a little black dot on someone’s face. The healing will smudge or soften whatever it touches. You can drag the brush but it will leave often leave a soft noticeable worm-like smudge. It works much better to make small clicks with the brush, move and click again. I have made red circles around the dots and artifacts so you can see what I am healing and how it looks afterward.
Repair Old Photos
Do you think you would like to fix your precious old memories now?
Undo
Keep in mind that you can UNDO whatever you have done by pressing Control/Command+Z or by going to the menu bar above and pressing Edit>Undo. If you should have to go back more than one step Control/Command+Z won’t do it for you. This command shortcut will only go back one step. To go back go to Edit>Stepback and press this as much as you have to do undo what you change your mind about.
Clone Before Levels
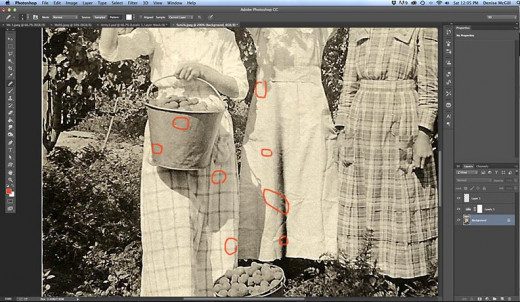
On the Apricot Picker photo, I added the Levels Filter first and then used the Healing Brush to fix the little dots and artifacts. This worked fine but it didn’t work to try to use the Clone Tool on my photo under the Levels Filter. If you need to use the Clone Tool to heal larger areas than the Healing Brush can handle do it first and then adjust the Levels. I had to click the eyeball to make the Level’s Filter invisible while I worked on the photo with the Clone Tool and then turn the Levels Filter back on when I was done.


Levels Filter
To turn on the Levels Filter, press Control/Command+L or go down to the icon with a half black/half white circle at the bottom of the Layers panel and click on Levels. The window will open allowing you to adjust the Input and Output levels. If the photo is too bright, then pull the right Output level with the white arrow to the left. If the photo has faded blacks pull the left Input level with the black arrow to the right. This is all a matter of personal preference and you can adjust it as you like.
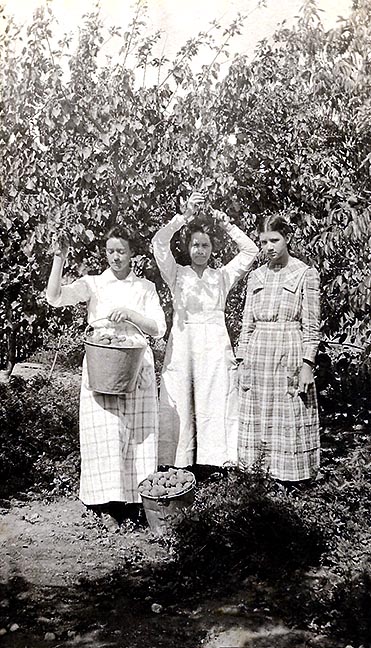
After adjusting the Apricot Pickers photo’s Levels I noticed that the photo was very yellowed so I made one more adjustment. You will notice in the Levels Window there are three little eyedroppers. I only use these on black and white photos. I clicked on the white eyedropper and took it to a place on the photo that I felt should be the whitest white. In this case that was the middle girl’s dress. I clicked on the whitest part of her dress and the whole photo lightened up. Then I chose the black eyedropper and moved it to a place on the photo with the blackest black, in this case, the shadow behind the right girl, and clicked. The darks and lights became more balanced and the yellowing went away. If you don’t like what this did, you can always Undo or press cancel.
Resize
The last thing I did was to resize these photos for Internet use. I always save the original so that I can re-edit it later if need be. I give it a name and save it in a folder where I’m sure to be able to find it again. Then I go to Image>Image Size and when the window comes up I make the longest size no more than 11 inches. If it is already below 11 inches but the Resolution is high (200 dpi or better) then I resize small photos (like 2 or 3 inches on the longest side) to about 8 or 9 inches and change the Resolution to 72 dpi. This is the best resolution for the Internet so that the image is still crisp and clear but not so large that it takes forever to load. For Facebook, I usually make the photo smaller (same resolution but smaller in inches) so that the resolution won’t be good enough for people to want to steal it. I especially do this with my photos of my artwork.
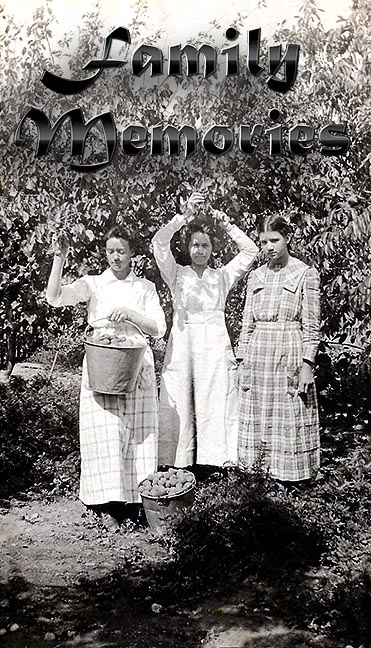
Fine Art Photo Composites

Finished
I heard an artist telling about how she posted her art on Facebook and six months later found quite by accident a large billboard advertisement using her artwork in another country she was visiting. Pilfering has become a pass-time.
I hope you like what I did to fix these photos and that it helps you in the future for your photos. Have fun and remember to enjoy the process. Nothing is permanent so don’t stress.