- HubPages»
- Technology»
- Computers & Software»
- Computer Software
Organizing your nodes in Blender Cycles

When dealing with them, nodes can be quite a handful. There are so many, all interconnected in some way. Sometimes you can lose sight of what node is performing which function.
Especially when you created a large node tree and return to your Blender file a few days later, it’s easy to forget why you did something. What were you thinking when you connected that color socket to the strength factor of your mix node? Luckily, there are several ways in Blender Cycles to organize your nodes.
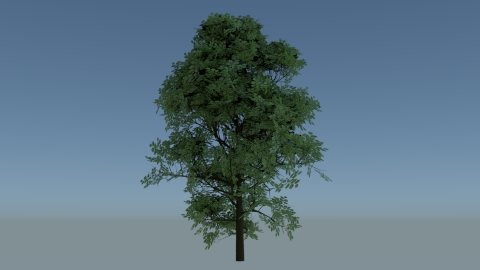
Take this low-poly tree for example. It has a simple setup: A material for the leaves and a material for the bark.
The leaves material uses a PNG image texture of leaves with a transparent background. This way, you can slap this texture onto a normal plane mesh. When using the proper node setup, you will only see the parts of the plane with the leaves on it and not the part with the background.

Normally I wouldn’t bother doing much organizing by labeling and coloring them, because this is a fairly simple setup. However, it’s a good example to start with.
Node Labels
- Open the properties shelf by pressing N
- Select a node. For example, the Mix Shader Node on the right.
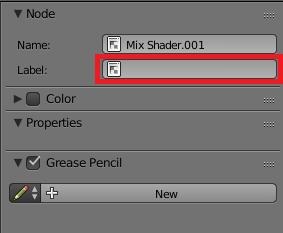
These are the properties of the Mix Shader node. This specific node controls which parts of the planes are visible and which are transparent.
- Now fill in the field Label with a description. For example “Leaves Alpha”.
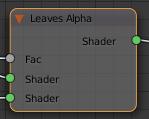
As you can see, the title of the node just changed. When using labels, you can add handy descriptions to help keep the overview. However, the downside of this, is that you can no longer see what kind of node this is, by just looking at the three. I would have to manually check the properties panel of this node. I can take a guess that this is a Mix Shader node. But some nodes look a lot like other nodes.
This can be especially a problem when other people look at your node setups. When I see a picture of a node setup that someone else made and I want to replicate it, it could take a long time searching through all the types of nodes, because I don’t know the original name.

I can of course try to solve this problem by including the original node name to the label. But then you would have to either make the font size smaller or make the node wider. The bigger your description, the wider the nodes. Or unreadable small fonts.
Frame nodes
A frame node is sort of a container. It’s a very good way of labeling entire groups of nodes and then giving them a proper label.
- Add a frame node with Shift-A => Layout => Frame
- Now put this node underneath the mix node.
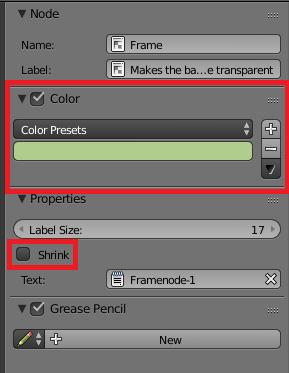
- Now jiggle the Mix Shader node a bit, so it falls in the Frame Node. The size of the Frame Node is automatically adjusted to match the node(s) inside. If you want to manually change the size of the Frame Node, uncheck the box “Shrink”.
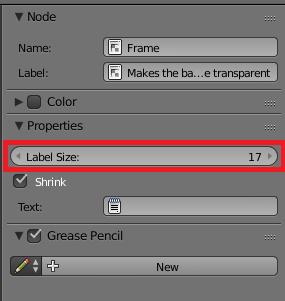
- Fill in the Label field of the Frame node in the Properties panel.
Now you’ll have something like this:

But isn’t it more efficient to label several nodes as a group?
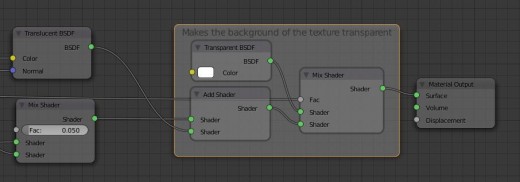
- Drag the Transparent BSDF and Add Shader Node in the Frame Node.
- Position them around so it looks good.
- Change the label of the Frame Node to a description you like. If needed, you can change the Label Size under “Properties.”
The result should be something like this:
If you need to add a larger description, using the label could be a problem. You can add more by creating a text in Blender’s text editor and then add it to the node.
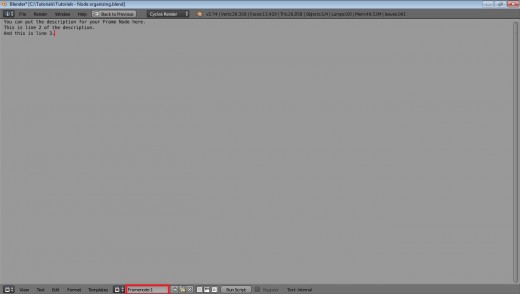
- Go to the Text editor
- Create a new text block by choosing Create Text Block from the Text menu. Alternatively, you can also click the plus sign or use the short key CTRL-N.
- Rename the text to something recognizable, like “Framenode-1”
- Start typing your description.
- Make sure to limit the length of each line. The longer your biggest line is, the wider your Frame node has to be.
- Go back to the node editor
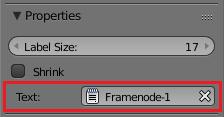
- Make sure the Frame node is selected and go to the Properties panel.
- In the field “Text” click on the note pad icon. Choose your text from the drop down menu.
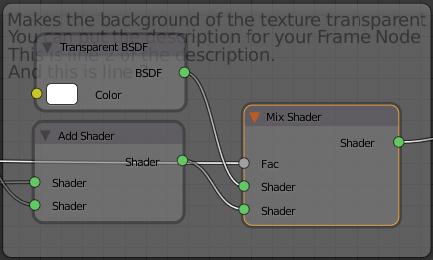
- The nodes are in front of the text. If you have the Shrink option still checked, you can solve this by unchecking the Shrink option and just manually resize the frame node and moving the containing nodes around.
- If you want, you can change the color of the Frame node as well (or any other node). Check “Color” and choose the color you want.
The result should now be like this:
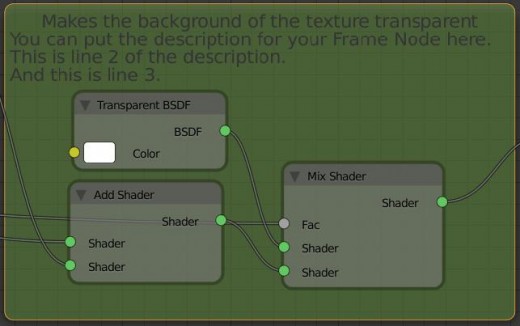
And this is the result with multiple Frame nodes:

Group nodes
Group nodes are a good way to make some space in your node editor. When you have a large number of nodes that do one thing, you can group them. Basically, you are combining a lot of nodes to one super node. Aside from saving space, you can duplicate this “super node” multiple times over multiple materials. This can come in handy, when you have a complex node setup that you need to use more than once.
For example, let’s say I want to make multiple materials for several kinds of tree leaves. Every texture is different, so I’m not sure I will be using the same Bump mapping or glossy settings. But what I do know, is that every leaf will use the Translucent node and the Transparency setup. I will combine these in one group.
- Deselect every node by pressing A.
- Press B and select the nodes as shown in below picture. Make sure you also select the Frame Nodes if you used them.
- Press CTRL-G
Group Node - Image 1

Group Node - Image 2

The “Group Input” node on the left is all the input this node is receiving from outside the group.
The “Group Output” node on the right is all the output this group node will be delivering.
- Press TAB to leave the Group edit.
- If you ever want to edit the group again, select the node group and press TAB again.
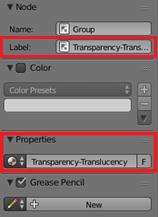
- You can add a label to this Group Node in the Properties Panel and/or change the color.
- You can change the Group name under Properties. This name will be used when adding the Group Node later.
- Note that you can also change the Name of the node on the top under "Node". However, this doesn't have any relevant effect.
Your normal node setup now looks like this:
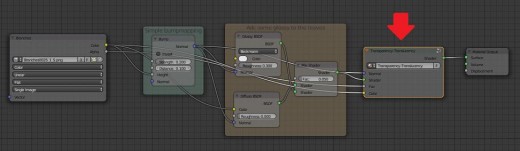
Now you can add this group node to any material you like, by adding it in the node editor with
Shift-A => Group => <Your Group>
Note that any change made to it, will affect all materials that have this group node! Just like with materials, you can easily check how many times your group node is being used.
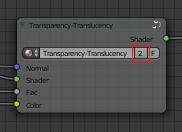
As you can see, in this example the Group Node is used twice. If you click on this number, Blender will make a copy of the Group Node and you can make all the changes you want without affecting any other materials or setups.
That's it!
Well, that's about it for organizing your nodes in Blender Cycles!
If you have any questions or suggestions, let me know in the comments below.