- HubPages»
- Technology»
- Computers & Software»
- Computer Software»
- Digital Photography & Video
Simple Photoshop Tutorial: How to Use the Pen Tool

Basic steps to using Photoshop's Pen Tool
With the newest version of Photoshop it has become easier and easier to work with complex images, especially in the area of selection. For years we’ve had geometric selection tools to use. Rectangular elliptical for the pre-shaped for freehand, we had the lasso tool then, came the magic lasso, click on a point to start and it would find the border of two contrast colors. Move forward and now we have the quick selection tool finding defined edges automatically then POOF there’s the magic wand making the selection based on similarity of color in adjacent pixels.
The Pen tool? That old thing?
And yet there’s another selection tool which is often forgotten, kind of
the “forgotten child” of selection: The pen tool. The pen tool has been
around for quite a while so why use it when you have all these new
wiz-bang selection tools? While they are great they work best with
images of high contrast, when you have an image that is very ‘busy” or
highly complex it’s the pen tool you want to reach for.
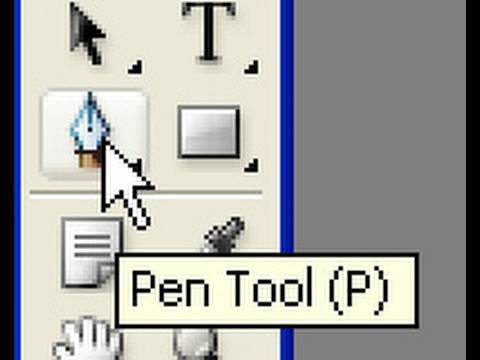
When you click and hold on the pen tool icon, you get quick a few
choices. Now you may be asking yourself why it is called the pen tool.
It sure as heck doesn’t draw like a pen. Some people have called it the
PATH tool, (and some people have called it other things that I can’t say here), and probably path tool is a better name for it. You are
lying down a path and once the path is done it become a selection in and
of itself. Photoshop is primarily a Raster drawing program as opposite
to Vector Graphics. Raster graphics is a data structure representing a
fixed grid of pixels or points of color laid down to represent an image
which is why when you try to change the size of an image it will suffer
distortion. If you try to enlarge you will often see edges that or
jagged or stair stepped.
Vector Graphics on the other hand (which is what the pen tool uses) uses mathematically defined points in
order to define their shape. The greatest thing about this is that they
can be scaled to any size, larger or smaller, without ever losing their
quality. By putting together smaller custom shapes we can create large
complex shapes or selections that will not lose their definition as we
scale them up or down.

The Pen Tools
Using the based pen tool you lay down a path of anchor points, all of which are adjustable. From there you use any of the other pen tool subsets to make adjustments. The freeform pen tool makes paths that curve by default. It follows your mouse stroke allowing you to make fast selections.
Add Anchor Point Tool does just what you would think that it does. It allows you to add anchor points along your patch which in turn allows you to alter the path without redrawing it.
Delete Anchor Point Tool. Deletes anchor points from your path. You want to think before using this one as it can change the shape of your path drastically. If you do use it and don’t like the results a quick hit of the Ctrl-Z will undo it. If you’ve already gone a step or two past that you can use the history window to undo multiple steps.
Convert Point Tool will switch a corner point into a smooth point or back again.
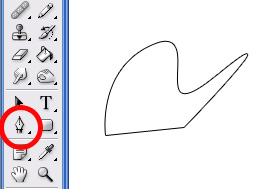
Creating your first path.
Now to get started. You’ve selected your Pen tool and clicked on the canvas creating a single active anchor point. If you click a second time a little off from the first point a line appears between the two. Congratulations, you’ve crated your first path. Your second point should be darker now as it’s the active point. Now add a few more. Don’t click and drag, just click on the canvas. Let’s close the path off and make it into a loop. Hover your pointer over the first spot and you’ll see a small circle appear in the lower right hand corner of the pen icon. This lets us know that we’re about to close the path into a closed circle or a loop if you will. You’ve now created your first shape.
I can’t print it out, what happened?
Now if you tried to print out the shape you’ve created you wouldn’t get anything. Paths are the non-printing parts of an image. But all is not lost for you can make your path appear to the printer by painting along the path itself which is called stroking. Filling paints the inside of a loop or closed path by filling it up with color. If you don’t want just a single color image say, in case you’re building a graph, you can fill it with a pattern or even an image. First you have to select it by using your paths palette menu, on the submenu you would choose stroke sub path. When the Stroke sub path window appears choose brush in the drop down menu click OK and presto! Your custom shape can now be printed.
OK, what’s next?
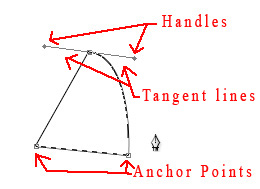
OK, let’s make a curve. Click on the canvas to add an anchor point. Move your mouse pointer over to the right side and up a little. This time you’re going to click and drag before you release. As you do this you’ll see a pair of “bars” appear that extend away from your anchor point these are called the Tangent Line. Remember that anchor points are always square shaped. Which means the diamond shaped points that you’re now seeing are not anchor points but direction handles. They are only used to when creating curved path segments they control the angle and the length of the curve. So why do we need two of them? Because one controls the angle/length of the curve going into the anchor point while the other handles the angle/length going out from the anchor point. One of the best things about the pen tool is that if you mess up you don’t have to keep going Ctrl-Z or hitting the history windows. Just grasp the point and move it.
Back to drawing your path. If you want to only draw a horizontal line press and hold down the Shift key as your drag. Your path is appearing as a curve between the two points. Remember, the longer the handle the longer the curve. Click again without dragging to crate a third point and another curved path. Why was this path curved? Because the second point was curved.
One thing you want to avoid is moving the Tangent lines too far. If you notice your path has “Looped” over onto itself you’ve rotated the Tangent too far in one direction. Easy enough to fix, just rotate it back.
And there you go. Alright, we’ve really just covered the basics of the Pen tool here. The best way to learn to use it is to fire up Photoshop and start using it. In just a little while you’ll be wondering how you got along without it.
Video Tutorials
Learning by watching other people do the actual work is more effective for learning for most of us. So other than just give the written instructions of how-to tutorials to learn to use the pen tool; feel free to watch the video below. You can also head over to Youtube where they have many other tutorials on photoshop in using the pen tool. By logic, the most recent videos will teach you how to use it for the current photoshop version.
If you have found this information of value to you; Please comment, take the poll, and like it. I will appreciate it much. Have an awesome day! :)