- HubPages»
- Technology»
- Computers & Software»
- Operating Systems
Recording Your Desktop in Linux
Introduction
Often times, when making an instructional video or showing someone how to do something on the computer, it might be necessary to make a video of your computers desktop. This can be a great tool and you can upload these videos to sites like Youtube, and share them with the world. If you use Linux, this is made easy using a program called recordMyDesktop.
I will show you how to do this in Ubuntu and also make a video, so you can see how it works.
Installing recordmydesktop
RecordMyDesktop, like most Linux programs, is a command line program that can be called from the Linux Shell. However, also like most Linux programs, someone has written a Graphical User Interface(GUI) that makes using recordMyDesktop very easy.
First, lets install recordMyDesktop and the GUI, so we can record your desktop. We will be using the Synaptic Package Manager, which allows you to easily search and install new software in Ubuntu.
Installing Record My Desktop:
Open the Synaptic Package Manager ( System → Administration → Synaptic Package Manager)
Click Search and Enter: gtk-recordmydesktop
Click on the little square next to the gtk-recordmydesktop package and select “Mark for Installation”
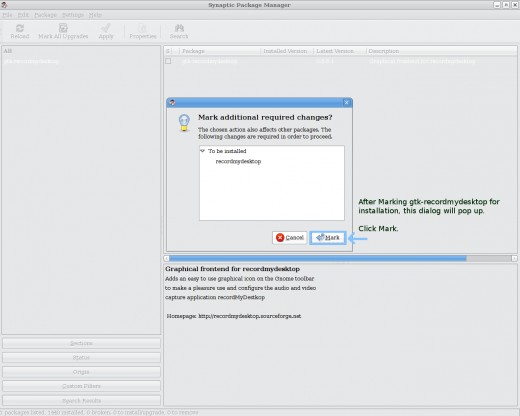
A dialog box will pop up and tell you that you also need to install recordMyDesktop. Click Mark.
Now click “Apply” and the software will install.
Once it is done installing, close the Synaptic Package Manager.
gtk-recordmydesktop is now available under your Applications → Sound and Video Menu


Recording a Video
Recording a Video:
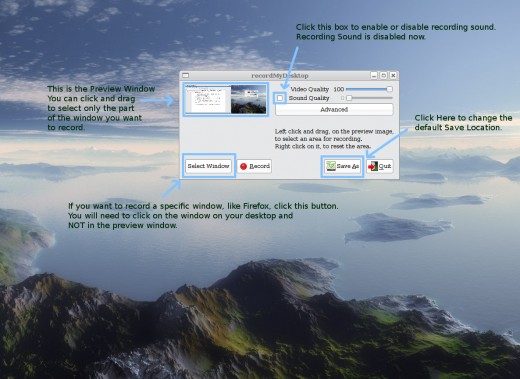
Open gtk-recordmydesktop Applications → Sound and Video → gtk-recordmydesktop
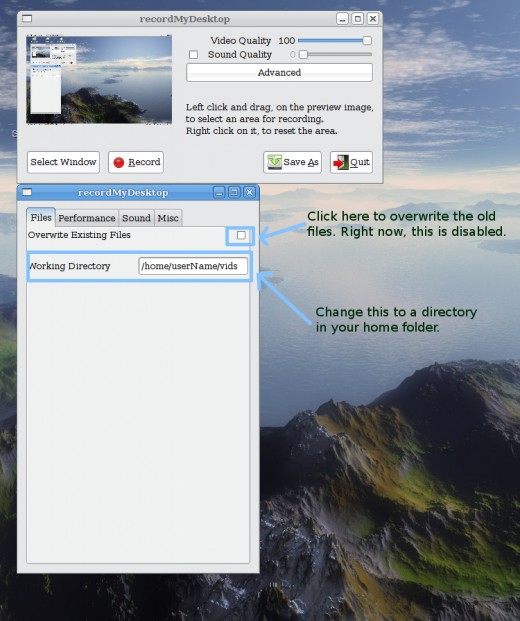
To improve performance, lets change the working directory. Click the advanced tab and add a directory that is in your home directory.
Next, lets disable the sound. Uncheck the box next to “Sound Quality." **
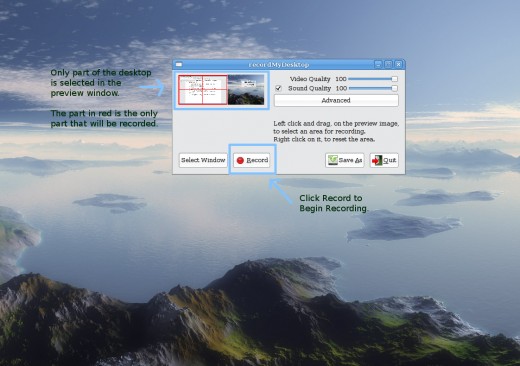
Now we need to select the part of the Window we want to record. A preview of your Desktop is shown and you can click and drag on this picture to select what part of the window you want to record.
If you wanted to record your web browser or a program, you can click “Select Window” and then click on the program. If you do this, you will NOT use the preview image, but will click directly on your desktop.
I want to record my entire desktop, so I am not going to click anything, but instead will just click “Record”
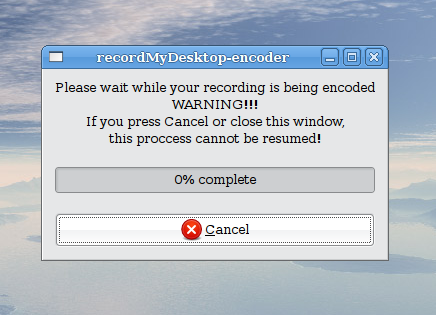
When you are done, click on the little square in your Notification Area. Please note, that it can take a while for the video to be encoded, so just let it sit there until done. Depending on your computer and the length of your video, this can take a while
When you are done, the video is called out.ogg and will be in your home folder.
** Getting the sound to work can be a little tricky, plus it takes longer to encode the video. If you try recording with the sound and it does not work, leave a comment and I might be able to point you in the right direction.
Additional Notes
By Selecting the Advanced Tab, you can make several changes, such as reducing the Frames Per Second, adjusting audio quality, and changing the working directory. You can also set the program to overwrite existing files or make a new one each time.
To change where the video file is saved, click on Save As and you can specify the location and name of the output file.
You can also use recordMyDesktop from the Terminal. Use the command 'man recordMyDesktop' to view the manual for recordMyDesktop and see how it works.

