S58/S80 Series Ethernet Switches Login Guide

As the central nerve of the whole data system, network switch becomes more popular. To satisfy different sizes of networking deployment, there are various types of Ethernet switches. This article will introduce S58/S80 series switches and their login steps.
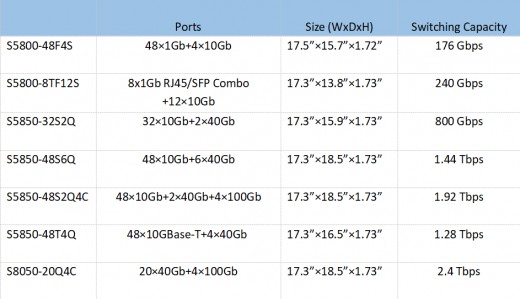
Basic Information of Seven S58/S80 Series Switches
There are seven types of S58/S80 series Gigabit switches: S5800-48F4S, S5800-8TF12S, S5850-32S2Q, S5850-48S6Q, S5850-48S2Q4C, S5850-48T4Q, and S8050-20Q4C. All of them are managed switches which can be managed by CLI/Web/Telnet, etc. Nowadays, they are widely applied for data center and enterprise network. The following part will show a table to introduce the basic information of seven S58/S80 series switches, including ports, size, and switching capacity.
Guide to Connect Computer and S58/S80 Series Switches
First, you have to prepare these products: an S58/S80 series switch, an RJ45 to female RS232 converter cable, a male RS232 to USB converter cable, and a computer. We mainly have three steps to achieve the connection between a computer and S58/S80 series switches.
Step 1
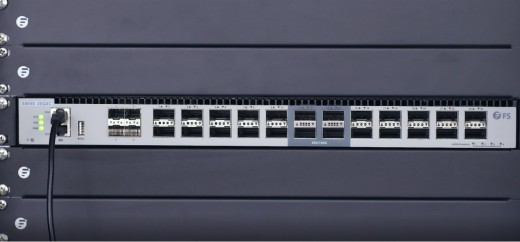
Connect the console port of the switch using the RJ45 to female RS232 converter cable
Step 2
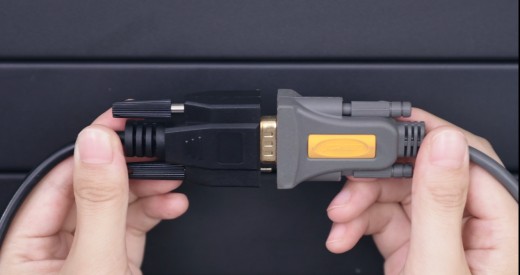
Connect the female RS232 connector with the male RS232 connection of the two converter cables.
Step 3
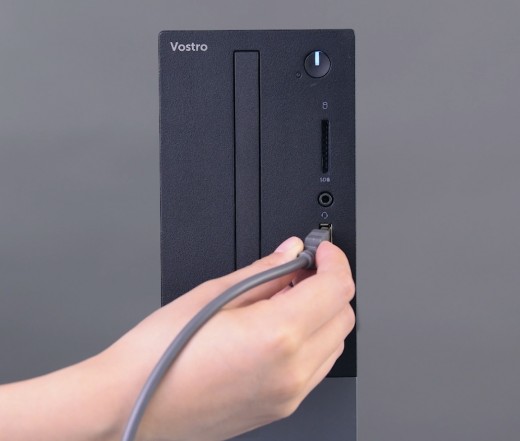
Connect the computer using the male RS232 to USB converter cable. After completing the above steps, your computer and switch will be physically connected.
Steps of Logging in S58/S80 Series Switches
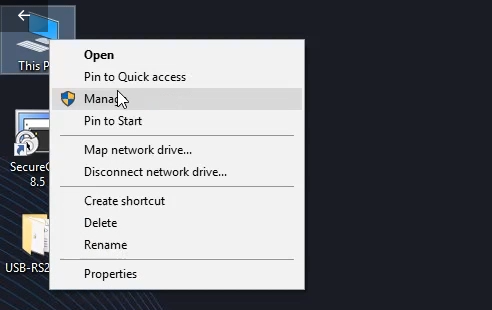
Step 1
Right click on “My Computer”, left click on “Manage’’.
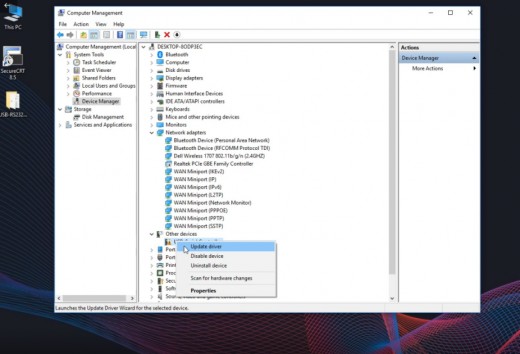
Step 2
Click on “Device Manager”, and we can see a serial device unrecognized. Then, right click on it, choose “Update driver”.
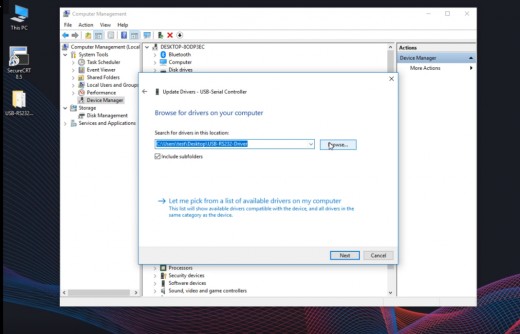
Step 3
Choose “Browse for drivers on your computer”, and select the path where the driver is stored from the local computer (driver is placed on the desktop in this example). Then, click on “Next” and wait.
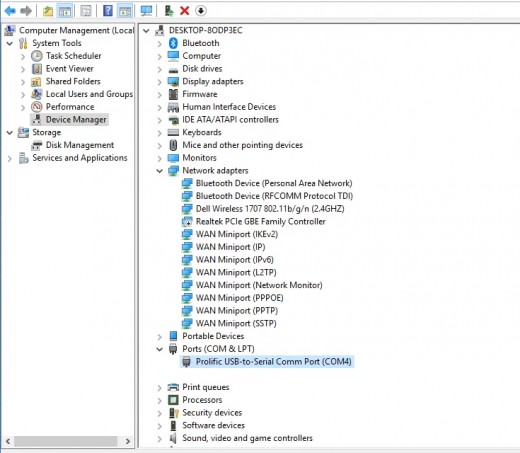
Step 4
Now, we can see the Com number after the installation is 4.
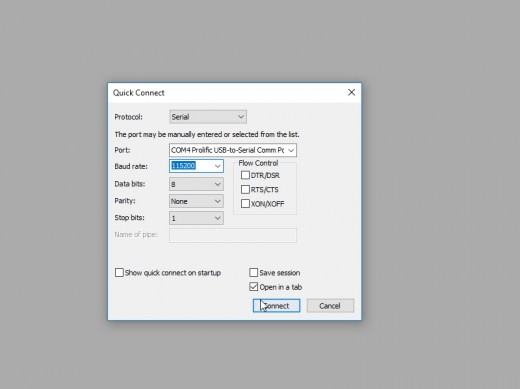
Step 5
Double click on the CRT to open the control software. Then, select the “protocol” as “Serial”, the “Port” as “COM4”, the “Baud rate” as “115200”, and click on “Connect”.
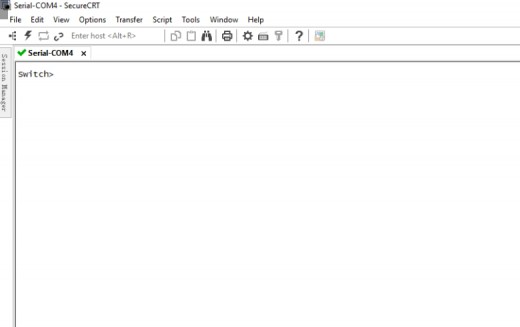
Step 6
Now, we can see a green exclamation mark displayed in the upper left corner, indicating that the com port can be used. Then, press Enter and appear the word “Switch”, which means you have signed in.
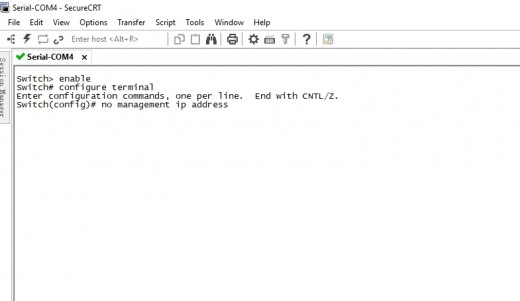
Step 7
Input “enable” to enter the privileged mode, input “configure terminal” to enter the configuration mode. If you want to use your own IP, you should input “no management IP address”, if you want to continue to use the switch's default IP acquisition method, you can skip this step.
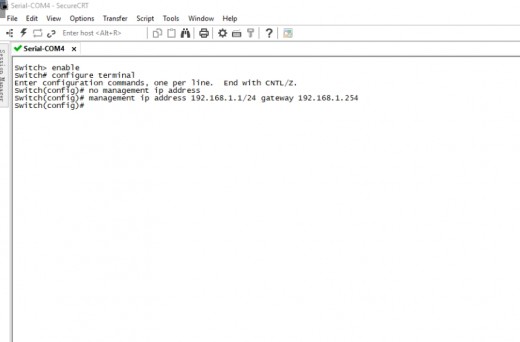
Step 8
Input “management IP address 192.168.1.1/24 gateway 192.168.1.254” to set the “management port IP address” as “192.168.1.1”, the “mask” as “24 bits”, the “gateway” as “192.168.1.254”. Congratulations! At this point, you have completed all the steps for the switch login.


