Setting up Backups in Windows 7

If you haven't set up a backup for your Windows 7 computer yet, you really should. The process is simple, free, and best of all, doesn't require any additional software downloads since it is built into Windows. Backing up data is something no one actually thinks about until it is lost. To determine if you should back up your data, I want you to think of a few things: Think of all the pictures stored on your computer. Would you be upset if they were to vanish with no way to get them back? Think of all of the documents on your computer such as your emails, tax records, etc. What would happen if they simply disappeared? Would you be angry if all of your music was suddenly deleted by a virus? If these questions leave you concerned, then you should definitely set up a backup. Luckily, Windows 7 has a built-in backup utility that is incredibly simple to use.
What You Will Need
A lot of people make the mistake of backing their data up to the same hard drive in their computers. The problem is that when the hard drive is lost, you loose the data AND the backup. Backups must be on a completely separate hard drive to be effective. For that reason, you will need an additional hard drive if you do not already own one. Hard drives are very cheap these days. You can buy an external hard drive that plugs into a USB port, or you can install an internal hard drive in your computer. Either way, make sure you have plenty of space to store your backups. Other than that, the only thing you will need is your Windows 7 computer and about 15 minutes of time.
Setting Up the Backup
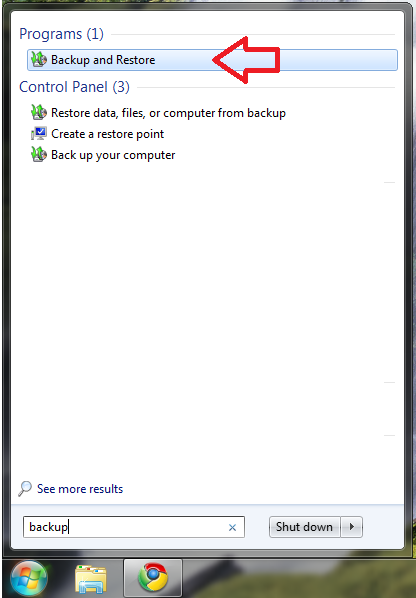
Get started by logging onto your computer as an administrator. Then, click the Start button and type "backup" into the search bar. Click on the program that appears.
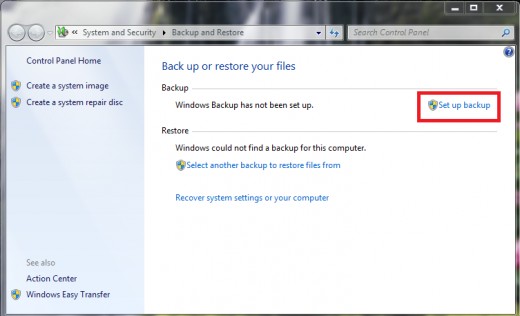
Now, in the window that appears, click "Set up backup" on the right side. You may be prompted to enter your password.
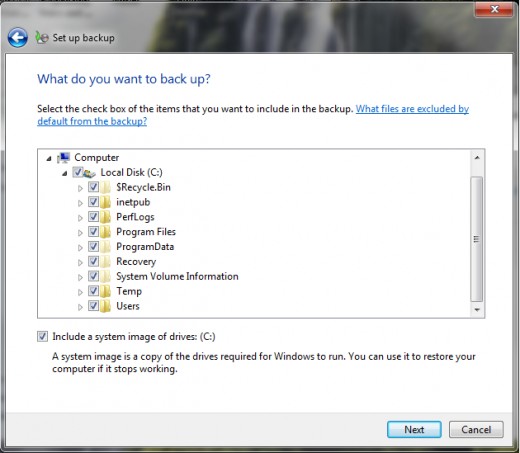
In the next window, choose the hard drive that you want to save your backups to. Make sure you select the one that is the separate hard drive. Then, click next. Select the option for "let me choose" so that you can customize which files you want to backup. Next, go through and select all of the folders that you want to backup. Be sure to include all of the ones that are important and contain pictures, etc. Finally, leave the option checked for "Include a system image."
Then, click Next, review your options, and click "Save settings and run backup." Now, depending on how many files you have, the computer could take a few hours to run the initial backup.
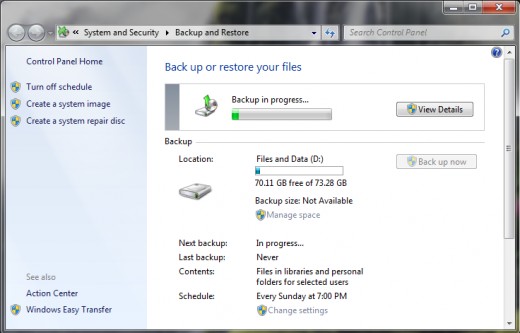
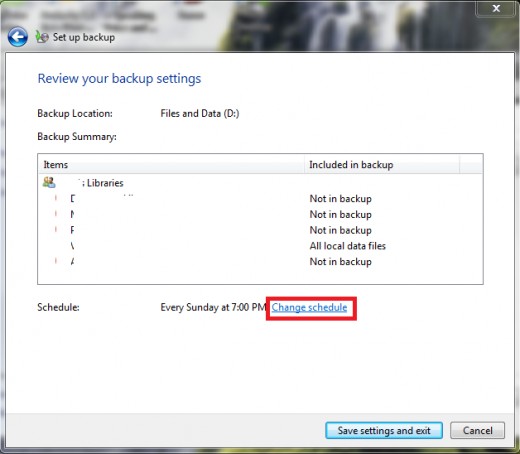
Once it finishes, you will want to change the settings for the schedule. Click "change settings" next to "Schedule." Then, the window with your backup will appear again. Click next through the settings (you already set these up) until you get to the "review your backup settings" page like the image below. Click "Change schedule."
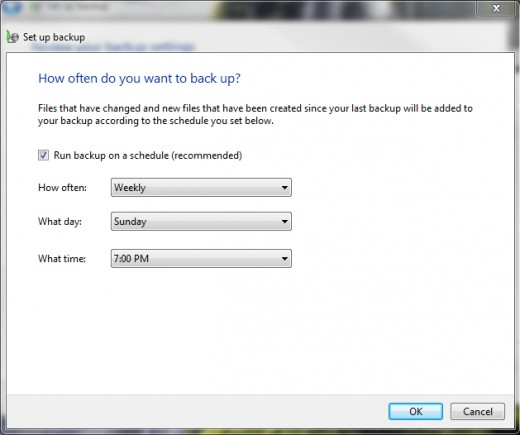
Now, select when you want the backup to run. I recommend leaving it as "weekly," however it is your choice. You can also select a time when you will be away from your computer, but when it is still on, so that it doesn't slow you down while running in the background. When you're finished, click "ok."
Then, click "save settings and exit." You're now finished making a backup for your Windows 7 computer. If you ever need to restore your files to an earlier point, you can open that program again and click "restore." If you can't log in to your computer because of a virus or hard drive failure, you can boot from a restore disc and select the backups you made.
Tags: windows backup, free backup program, backing up files in windows, windows 7 backup utility, backups for windows 7, files backup in windows, free program to backup files in windows 7, backup program, backup files, restoring files in windows, restore from backup, how to backup files in windows 7, system image making, making a system image, making an image of windows 7, how to backup


