- HubPages»
- Technology»
- Computers & Software»
- Computer Science & Programming»
- Programming Languages
Simple Steps to Develop Mobile Applications - Source Code Explained Here

Publisher Comments
This j2me (Java ME) tutorial (2nd One) is part of tutorials being published by me on this topic "How to create and develop your own mobile/cellphone apps?". You can visit the link mentioned earlier to read first tutorial of this series.
Introduction
In this tutorial, I'll explain the source code of our first ever created "hello world" application in our last tutorial of this series, which was automatically generated by Java ME SDK. I can proudly say that after reading this tutorial, you'll definitely fall in love with this language (Java ME) for its simple and easily understandable syntax (if you are new in JAVA Programming).
Source Code Generated by Java ME SDK and NetBeans IDE
Here, below is the j2ME code that was automatically generated by our IDE during application creation, which can be modified and will play an important role in our progress of "Mobile Application Development".
- First, I'm publishing the source code generated by NetBeans IDE as for reference purposes (Just ignore it). It is lengthy because NetBeans generates this code to fulfill the necessities of it's one feature named as "Visual MIDlet" or "Visual Designer". By using this feature, programmer can design applications visually without much coding at back-end (Which is done automatically by NetBeans).
- Secondly, I'm publishing the source code generated by Java ME SDK 3.0 and which we are going to discuss in this article and will be easier for you understand. This will help you in learning core mechanism of developing mobile apps in Java ME.
NetBeans Visual MIDlet Designer Snapshot (Ignore it while learning to program)
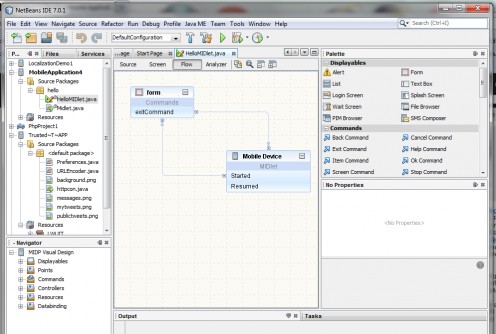
Automatically Generated Code by NetBeans IDE 7.0.1
/*
 * To change this template, choose Tools | Templates
 * and open the template in the editor.
 */
package hello;

import javax.microedition.midlet.*;
import javax.microedition.lcdui.*;

/**
 * @author seven
 */
public class HelloMIDlet extends MIDlet implements CommandListener {

    private boolean midletPaused = false;
    //<editor-fold defaultstate="collapsed" desc=" Generated Fields ">
    private Command exitCommand;
    private Form form;
    private StringItem stringItem;
    //</editor-fold>

    /**
     * The HelloMIDlet constructor.
     */
    public HelloMIDlet() {
    }

    //<editor-fold defaultstate="collapsed" desc=" Generated Methods ">
    //</editor-fold>
    //<editor-fold defaultstate="collapsed" desc=" Generated Method: initialize ">
    /**
     * Initilizes the application.
     * It is called only once when the MIDlet is started. The method is called before the <code>startMIDlet</code> method.
     */
    private void initialize() {
        // write pre-initialize user code here

        // write post-initialize user code here
    }
    //</editor-fold>

    //<editor-fold defaultstate="collapsed" desc=" Generated Method: startMIDlet ">
    /**
     * Performs an action assigned to the Mobile Device - MIDlet Started point.
     */
    public void startMIDlet() {
        // write pre-action user code here
        switchDisplayable(null, getForm());
        // write post-action user code here
    }
    //</editor-fold>

    //<editor-fold defaultstate="collapsed" desc=" Generated Method: resumeMIDlet ">
    /**
     * Performs an action assigned to the Mobile Device - MIDlet Resumed point.
     */
    public void resumeMIDlet() {
        // write pre-action user code here

        // write post-action user code here
    }
    //</editor-fold>

    //<editor-fold defaultstate="collapsed" desc=" Generated Method: switchDisplayable ">
    /**
     * Switches a current displayable in a display. The <code>display</code> instance is taken from <code>getDisplay</code> method. This method is used by all actions in the design for switching displayable.
     * @param alert the Alert which is temporarily set to the display; if <code>null</code>, then <code>nextDisplayable</code> is set immediately
     * @param nextDisplayable the Displayable to be set
     */
    public void switchDisplayable(Alert alert, Displayable nextDisplayable) {
        // write pre-switch user code here
        Display display = getDisplay();
        if (alert == null) {
            display.setCurrent(nextDisplayable);
        } else {
            display.setCurrent(alert, nextDisplayable);
        }
        // write post-switch user code here
    }
    //</editor-fold>

    //<editor-fold defaultstate="collapsed" desc=" Generated Method: commandAction for Displayables ">
    /**
     * Called by a system to indicated that a command has been invoked on a particular displayable.
     * @param command the Command that was invoked
     * @param displayable the Displayable where the command was invoked
     */
    public void commandAction(Command command, Displayable displayable) {
        // write pre-action user code here
        if (displayable == form) {
            if (command == exitCommand) {
                // write pre-action user code here
                exitMIDlet();
                // write post-action user code here
            }
        }
        // write post-action user code here
    }
    //</editor-fold>

    //<editor-fold defaultstate="collapsed" desc=" Generated Getter: exitCommand ">
    /**
     * Returns an initiliazed instance of exitCommand component.
     * @return the initialized component instance
     */
    public Command getExitCommand() {
        if (exitCommand == null) {
            // write pre-init user code here
            exitCommand = new Command("Exit", Command.EXIT, 0);
            // write post-init user code here
        }
        return exitCommand;
    }
    //</editor-fold>

    //<editor-fold defaultstate="collapsed" desc=" Generated Getter: form ">
    /**
     * Returns an initiliazed instance of form component.
     * @return the initialized component instance
     */
    public Form getForm() {
        if (form == null) {
            // write pre-init user code here
            form = new Form("Welcome", new Item[] { getStringItem() });
            form.addCommand(getExitCommand());
            form.setCommandListener(this);
            // write post-init user code here
        }
        return form;
    }
    //</editor-fold>

    //<editor-fold defaultstate="collapsed" desc=" Generated Getter: stringItem ">
    /**
     * Returns an initiliazed instance of stringItem component.
     * @return the initialized component instance
     */
    public StringItem getStringItem() {
        if (stringItem == null) {
            // write pre-init user code here
            stringItem = new StringItem("Hello", "Hello, World!");
            // write post-init user code here
        }
        return stringItem;
    }
    //</editor-fold>

    /**
     * Returns a display instance.
     * @return the display instance.
     */
    public Display getDisplay() {
        return Display.getDisplay(this);
    }

    /**
     * Exits MIDlet.
     */
    public void exitMIDlet() {
        switchDisplayable(null, null);
        destroyApp(true);
        notifyDestroyed();
    }

    /**
     * Called when MIDlet is started.
     * Checks whether the MIDlet have been already started and initialize/starts or resumes the MIDlet.
     */
    public void startApp() {
        if (midletPaused) {
            resumeMIDlet();
        } else {
            initialize();
            startMIDlet();
        }
        midletPaused = false;
    }

    /**
     * Called when MIDlet is paused.
     */
    public void pauseApp() {
        midletPaused = true;
    }

    /**
     * Called to signal the MIDlet to terminate.
     * @param unconditional if true, then the MIDlet has to be unconditionally terminated and all resources has to be released.
     */
    public void destroyApp(boolean unconditional) {
    }
}
Automatically Generated Code by Java ME SDK 3.0
package hello;

import javax.microedition.midlet.*;
import javax.microedition.lcdui.*;

public class HelloMIDlet extends MIDlet implements CommandListener {

    private Command exitCommand; // The exit command
    private Display display;     // The display for this MIDlet

    public HelloMIDlet() {
        display = Display.getDisplay(this);
        exitCommand = new Command("Exit", Command.EXIT, 0);
    }

    public void startApp() {
        TextBox t = new TextBox("Hello", "Hello, World!", 256, 0);

        t.addCommand(exitCommand);
        t.setCommandListener(this);

        display.setCurrent(t);
    }

    public void pauseApp() {
    }

    public void destroyApp(boolean unconditional) {
    }

    public void commandAction(Command c, Displayable s) {
        if (c == exitCommand) {
            destroyApp(false);
            notifyDestroyed();
        }
    }

}
Source Code Explanation Starts Here
Every Project in Java ME should have at-least one MIDlet, which is the core part of any mobile application. Whenever, you follow steps of creating new projects in Java ME SDK! In second Step, it confirms for whether it should create helloMIDlet or not. You can either remove check mark from checkbox in order to create MIDlet manually with some different name or can allow SDK to create it for you. The Noticeable point is file name and class name of MIDlet (inside our application file) should need to be same for proper execution.
Why Class Name is called as MIDlet ?
Logically, It is called MIDlet because it uses the inbuilt class of j2me core named as "MIDlet", on top of which our application will be executed. Line number 6 in our source code above is showing the usage of it via using "extends" keyword before it.
Click on image to view it in bigger size

- Line Number 1: In source code above, "package hello;" is indicating that this file is a part of package named "hello", which was created by SDK automatically during project creation.
- Line Number 3 & 4 : This are very important statements which need to be there in every program of j2me (Specially the first one). This statement tells the system that we are using features of this j2me libraries in our program.
- Line Number 6 : Here we are creating our MIDlet which has already been explained earlier except this "implements CommandListener". This words tells the system that we did added a function named "commandAction" in our MIDlet which will handle Commands that are going to be implemented in our program.
- Line Number 8 & 9 : Here, we are declaring two different type of variable which will handle different tasks of our application i.e. exitCommand and display. "exitCommand" will be used for closing application and "display" will be used to handle events and effects of device screen.
- Line Number 11 to 14 : Here, is the constructor of our class (MIDlet), Where we are assigning appropriate values to variables that are declared previously.
- After Line number 14 : You'll see 4 different functions, out of which three were already explained in our previous tutorial and 4th one is for handling commands generated by application on user interaction. This functions have nothing extra that need to be explained and are just similar like those in other programming languages.
Source Code of "startApp" Function Explanation Starts Here
This function get initiated/starts automatically when lifecycle of application begins i.e. when application starts. In this, On line number 17, we are declaring a variable 't' of type "TextBox" (Similar like "int", "String", "float" etc. in programming languages) and assigning it a new "TextBox" while specifying arguments for various purposes such as title, text etc. via using the "new" keyword of Java ME as shown below. "new" keyword is used for assigning objects to variables.
TextBox t = new TextBox("Hello", "Hello, World!", 256, 0);Then, we are adding a command to variable 't' which will be displayed at bottom of screen when this component "TextBox" will be displayed on screen simultaneously. After that, We are adding a "CommandListener" to tell the system that commands of this component i.e. of TextBox will be handled by current (Main) MIDlet class and finally we are using the "display" keyword to display this component on screen via using "setCurrent" method of Display Class (which is a Part of Core J2me display class).
/*---------------------------------------------------*/
Hope, it is easier to understand. In my next tutorial, I did created/developed one Simple real world cellphone/Mobile twitter app which will help you in learning more about this language (Java ME or j2me), All readers are kindly invited.
Related

Types of Function in C Programming Language

15 Smartphone Applications You Should Have

Java 2D Tutorial I--The Basics, Creating New Package, Abstract Class, and Class that extends Abstract Class

The Two Types of Application Software: General Purpose Applications and Custom Software

Mac Speech Recognition Commands: Replacing the Mouse Since 1993!