- HubPages»
- Technology»
- Consumer Electronics & Personal Gadgets»
- Portable Electronics»
- Tablets»
- iPad
SlideShark for iPad 2014 Review
Using PowerPoint with an iPad
If you have a presentation, created in PowerPoint, and want to present it using your iPad, the SlideShark app provides a much needed service for iPad users. The iPad itself, does not provide loaded Powerpoint software, and until just recently there was not a PowerPoint app available. SlideShark saw the need and filled it.
SlideShark Overview Video
Getting Started with SlideShark
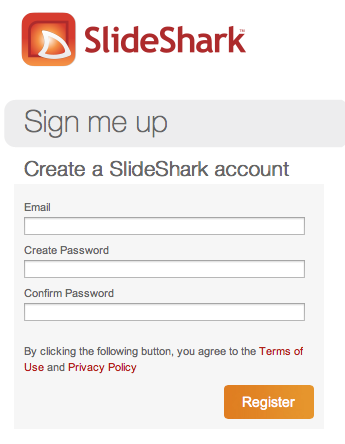
First, go to the Apple App or iTunes store and download the free version of SlideShark. Open the app and create a SlideShark account. You can watch the tutorial videos if you choose. I found the app not extremely intuitive, so the tutorial videos were actually helpful.
How to Get More SlideShark Storage Space
The free app comes with 50 megabytes of storage. If your presentation is heavily graphic or has an embedded video, you will need more storage. If you decide to Upgrade to SlideShark Plus for 500MB, there is an additional cost of $49.00 per year. The SlideShark Pro version is $95.00 extra a year for one GB. Personally, I did not want to pay extra money, so went the free route and asked two of my friends to register for SlideShark. They did not have to download the app, just register for a free account online. For each person you recommend that registers, you will both get an additional 25MB. This is an easy way around paying the extra money for an upgraded app, especially since unless you are going to broadcast your presentation to 10 people, the core features are present on all three versions.
How to Upload your PowerPoint to SlideShark
There are three ways to upload your presentation to your SlideShark account. Email is the easiest, but the least optimal of the three due to size limitations of your mail server and connectivity speeds. Second, you can use cloud storage like Dropbox or SkyDrop. Being an Apple customer, I mistakenly thought I could just download my presentation somehow to my Apple account for iCloud and have it accessible. This was not the case. It seems that you cannot store documents in your iCloud, only music, videos and photos. Third, you can upload your presentation from your desktop. Uploading directly from the desktop is the fastest route to go.
In the bottom right side window of SlideShark, there is a gage that shows how much of your storage you have used. Simple presentations use little storage, but since we live in the age of "visual content," multiple presentations that contain video or lots of graphic images made exceed your storage limits.
Download to your iPad or iPhone
Next, from your SlideShark account, click on the presentation that you want to download to your device. For example, I downloaded my presentation to my iPad and my iPhone. My iPad was the device I had project to a larger screen for group viewing, while I set up my iPhone to use as a remote device. The benefit of downloading to your device is that you can access your presentation without an Internet connection.
You can use this app with just an iPhone too. However, if you are needing to look at your PowerPoint notes, it would be hard to see them on your iPhone screen.
When downloading to your device, be sure to have a good wireless connection. Any break in the wireless stalls or stops the download and you have to start over. Also, videos can take a long time to download. The app froze several times for me when trying to download. When it froze, it was nearly impossible to reset. I had to completely disconnect my wireless connection, turn my iPad off and then delete the file, try uploading again and then restart the download. It was quite time consuming. It may have been my connection, but there are other reviewers out there who had similar experiences.
Use Your iPhone as a Remote
SlideShark features the ability to sync your iPhone with the app to enable it as a remote device to advance your slides. This is another handy feature of SlideShark, and a key differentiator versus the Microsoft Office for iPad App. Using the iPhone as a remote, you can now easily move about the room when conducting your presentation.
How to Project PowerPoint Using SlideShark
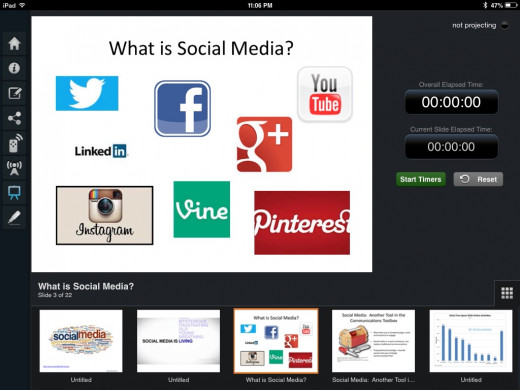
First, connect your iPad via AirPlay or the appropriate cable required to project it onto a larger screen. Once you have opened SlideShark and downloaded your presentation, you should be able to see it under "My Content." Just click on it to play. The rest is not so intuitive. Once in the "Play" mode, swipe up from the bottom to see more options. There are icons on the left of the screen that allow you to:
- View slides as thumbnails.
- Reorder slides or hide them.
- Enable sharing.
- Use your iPhone to act as a remote control to advance slides.
- Broadcast to an audience for a video conference.
- Select how you want the slides to appear on your screen--current with notes, notes only or full screen. The presenter mode allows only you to see your notes.
- Use annotation to add emphasis to your slides as you present.
All the options work quite well. The only limitations I found were in trying to use animation and links with the notes in view. When trying to click on my animated links, it would advance my slide instead. The only way I could get this to work properly was in the full screen view--then I was able to click on links and see the animation work correctly.
Video Requirements on SlideShark
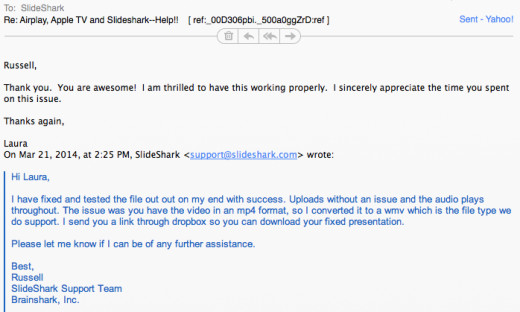
For videos to work properly with the SlideShark app, you must embed them in your PowerPoint file, not just link to them. It is also important to note that SlideShark only supports the Windows Media Video (.wmv). At first, I embedded a YouTube video in my presentation. It seemed to work just fine until halfway through the video, the sound disappeared. It was only with the assistance of SlideShark customer support did I find out my video was in the wrong format, however, it does clearly state the video requirements in the FAQ.
SlideShark Customer Service
The downside of SlideShark's customer service is that there is no live body to have an online chat with or to call. The only option is to contact them via email. Sometimes, you just need to talk with someone in a timely manner and not wait for an email to be returned. In my case, I could have saved a lot of time had there been someone for me to communicate in real time.
On a positive note, the day after I gave my presentation, I received another reply emailed from customer service regarding my issues. I responded and told the rep that my big meeting was over, so no need to continue. He pleasantly surprised me and offered to troubleshoot my issue anyway. WOW! I was impressed. Thank goodness for Russell in the SlideShark Support Team! He sent me a dropbox location to deposit my file so he could troubleshoot. Not only did he discover the issue with my video, but he fixed it for me. What a great way to take my SlideShark skepticism and turn it into advocacy for this app and company.
What is Your Favorite iPad App for Presentations?
New Development: Microsoft Office for iPad
Recently, Microsoft made available Microsoft Office for the iPad. With the free version of the app, you will be able to view and present your PowerPoint presentation from your iPad. With a paid subscription, you can create new documents and edit PowerPoints on your iPad. If you are on a tight budget and want to go the "free" route, SlideShark is still the way to go.
SlideShark: A Powerful iPad Tool
SlideShark is the best app I found in trying to use an iPad to deliver a PowerPoint presentation. There is nothing else quite like this app, that works as well. It's a free app, so give it a try! Just give yourself ample time to download the presentation and workout any kinks that may occur.


