Step By Step: Capture, Record And Save Your Computer Screen Actions Into Video

Computer users have commonly wanted to capture their "moves" on their computer screen into a video file; it is particularly interesting to be able to grab your videogame action and upload it on the web, or creating software tutorials by not only describing the way it is done in text, but also showing off the exact steps that need to be followed. After all, a picture is better than a thousand words and we could also add that a video is better than a thousand pictures. Most, if not all of us have found videos on YouTube where the computer user is showing his screen and guiding viewers into following what he is doing. With BB Flashback Express 2, it is very easy to do.
The application works same as a video recording piece of software; after starting it up, user must adjust the settings to his preference and it can start capturing what's going on in the screen, one window or a particular region of the screen. It can capture anything, be it a videogame, a media player, or a web browser and then save it on AVI format with any coder the user chooses or on Flash which can easily be embedded on websites.
In the next steps you will be guided into setting the application and letting it record your screen; however, the guide will not go through the coder settings, because the options are too many to be described.
Step One
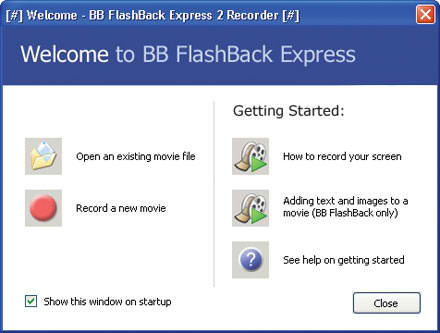
Run the application BB Flashback Express 2 Recorder, the software which is used to capture the screen. Choose Record A New Movie and you will be asked to adjust the options of the recording.
Step Two
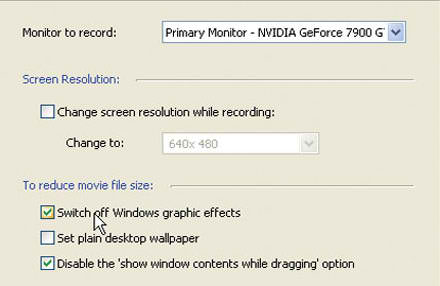
You will be asked to choose the monitor, in case you have more than one connected on your computer system. You can opt to change the resolution from the relative drop-down menu (with lower resolution you can achieve better playback experience and smaller video size). Leave the rest options at default.
Step Three
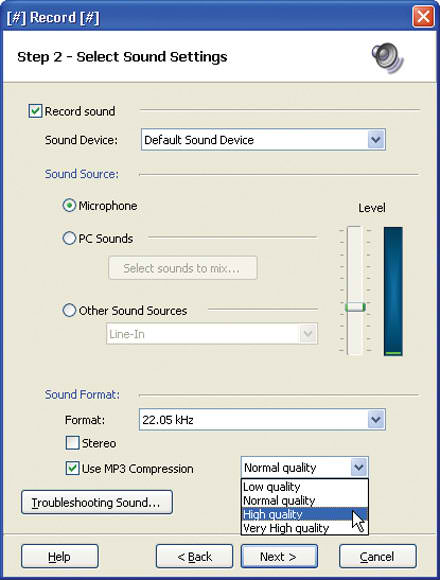
If you want to add your own voice-over, enable the sound recording; with a high quality microphone, you can opt to increase the sound quality at Sound Format. It is also possible to record video from a web camera, if the relative option is enabled and the settings are adjusted.
Step Four
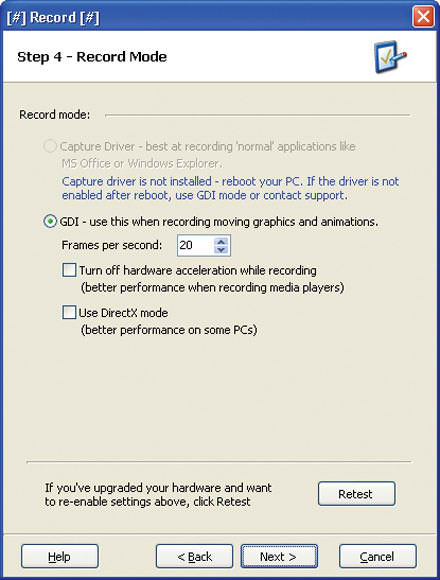
The capture mode is to be setup on this step. The best option is the Capture Driver of the application, which handles very well and creates a high quality result file. If this for any reason cannot work well for you, the recording will be done in GDI mode. It is advised that you experiment a bit with the options here to achieve the best result for your capturing needs.
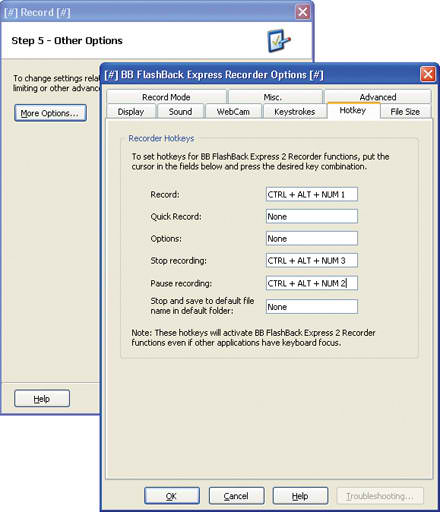
Step Five
Choose More Options and click on Hotkey. You can setup three keys combinations for the Record, Stop Recording and Pause Recording actions, and it will offer you convenience and speed of use. In Advanced, you can choose if you prefer quality or smaller vido size by adjusting the Movie Compression level.
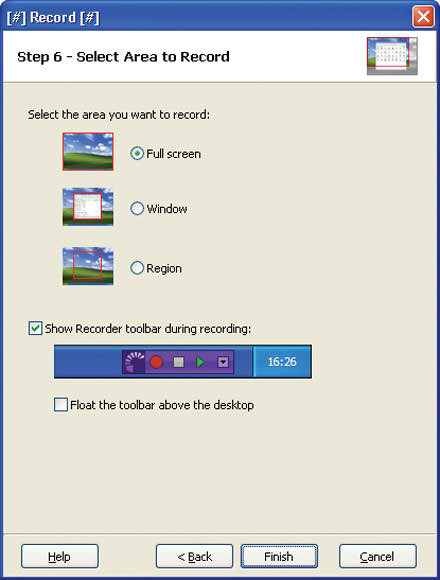
Step Six
You are ready to move on with the recording; choose now if you want to grab the whole screen, the active window or a particular area of the screen only; doing so, you will be asked to show which area. You can disable the recorder toolbar if you have already set the hotkeys so it will not appear on the resulting video. Click Finish and then Record.
Step Seven
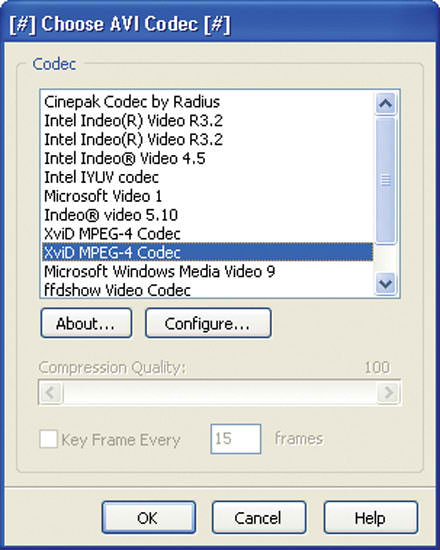
When the recording has been completed, you will be asked to choose the filename and you will be moved into BB Flashback Player. Choose from File menu if you want to save the file as AVI or Flash; first is ideal for offline playback on computers through a media player and the second is perfect for websites. On AVI, you will be asked to choose which codec you want to use.
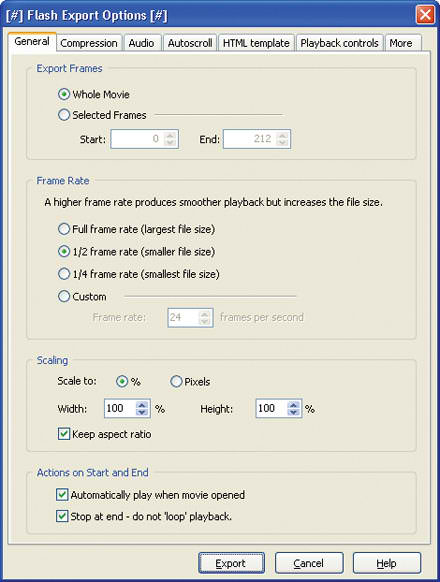
Step Eight
Both save options have several settings to be adjusted, but most of them are common. At General tab, you can decrease the framerate, set the video size from scaling option, the presence of sound or not and the compression level. Click Export and your file is ready to be played!


