- HubPages»
- Technology»
- Computers & Software»
- Computer How-Tos & Tutorials
Build a Super Simple Power Supply

How I Built My First Power Supply
Buy a Buck Step Down Converter
My favorite place to buy electronic components is eBay. You can buy all kinds of things like circuits to bump down your power supply from 40 V down to 3.3 V so you can work on small low voltage projects.
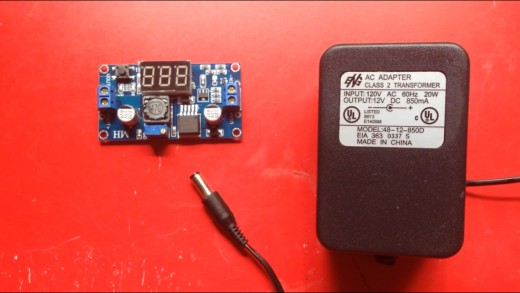
I found a DC to DC buck step-down power converter (LM2596) for $2.79 with free shipping and from China on eBay. It was a really good deal and I didn't have to build the circuit. It was a great way for me to create a power supply without worrying too much that my own DIY circuit would hold up.
I'm still new to building homemade lab circuits. Finding some of the shortcuts early while I'm still learning the basics is a great way to make something happen even though I may not have all the knowledge.
Make Sure You Know How it Works
The Circuit Board I got in the mail did not have any paperwork. This is not a big problem though. I knew what the product number was and I was able to look up the spec sheet for it online without any trouble. Most components you buy on eBay can be found this way online.
The companies that build them make sure you have the information you need so you can use their products. If you can't use their products, they know you will go somewhere else to buy what they are trying to offer to you.
The easiest way to find this information is to search for the product number. In this case we would search the part number LM2596 and the words “Spec Sheet”. Texas instruments has a 45 page document on the circuit that came up as the first page available on that search. I doubt you will read everything on this document but if you ever have any questions about the circuit you can go to this page to find the information you're looking for.
Link for the Spec Sheet from TI
Find a Power Supply
The next part of this project I needed was a power supply. I needed a way to get a voltage under DC 40 V into the circuit. I could not just plug it directly into the wall because American wall socket standard is AC 120 V.
I went digging in my shed, looking through a box of old cables and power supplies that I had collected over the years. Many of them I probably don't even have the electronic device for anymore. I found a nice 12 V brick plug and I took it inside the house.
Cut Off the Ends
I took my wire strippers and cut the connector off the end of the wire. I needed the wires bare to fit into the circuit. I wasable to pull the two connected wires apart with just my fingernails.
Using the wire strippers I was able to pull the insulation off the tips of the wires. This allowed me to place the positive and negative leads into the correct terminals on the circuit.
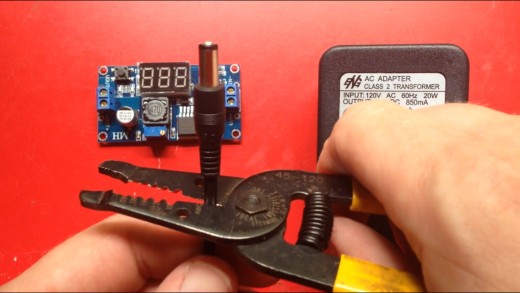
Figure Out Which Wire is Positive
I was pretty sure which wire was the positive wire but I did not want to connect it and risk burning out the circuit because I hooked it up backwards.
You must be careful when checking live wires. Just plugging it in and touching the wires with the probes is probably not the best idea. That can lead to a nasty shock and possible burn. Before I plugged it in I twisted each wire around one of the probes. I plugged it in and turned on my multimeter.
I connected the probes from my multimeter to the wires in no particular order. I did not look at the wires before checking them. Realizing the voltage was in the negative I flipped the leads, with it unplugged of course.
The back of the plug says it outputs about 12 V. The reading on my multimeter said almost 17 V. My guess is this because there was no load on the circuit.
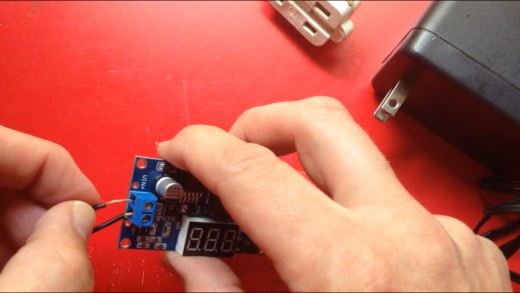
Connect Your Wires
Now that you know which wire is positive and which is negative, you can secure the wires to the circuit. Make sure everything is unplugged. Then attach the positive wire to the positive terminal and the negative wire to the negative terminal.
Once you are sure everything is attached properly, plug in the unit and watch the voltmeter built into the circuit light up. When I was connecting mine, I realized the voltmeter blinked on for a moment. This is because there was a charge held inside the brick. This is why it is important to check the power sources before you touch the wires with your fingers. I was lucky not to get a shock. I want to find a way to drain circuits and capacitors before I start working on them in the future.
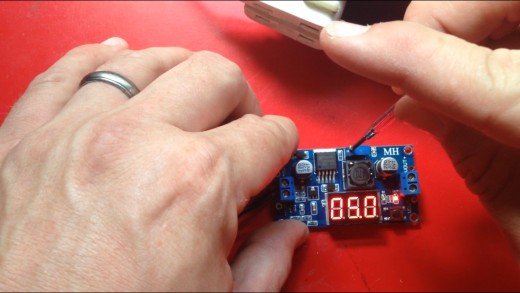
Adjust Your Output Voltage
Now that your circuit is powered, you can adjust the output voltage. I know a lot of my projects are going to be either 5 V or 3.3 V, so I dropped my voltage converter to 5 V. I noticed it took a few turns counter clockwise before the number began to decrease. This is because it is able to handle an input voltage of 40 V. I was only providing16 V.
I am looking forward to trying new projects with this power supply. Next I want to test a voltage divider using resistors. I think this will help me learn a bit more about how they work.
Watch Me Construct a Blinking Circuit
Related

A Guide to Disassembling and Assembling a Computer System

Computer Tools needed for computer maintenance, troubleshooting, upgrades and repairs

Beautiful Wire Wrapped Jewellery - How to Wire Wrap a Faceted Gemstone Pendant

Make Your Own Wattmeter With A Microcontroller
 Is Failing")
How to Know If Your Computer Power Supply (PSU) Is Failing


