Using GIMP Tools
GIMP Select Tools
GIMP, is an acronym for Gnu Image Manipulation Program. It is very similar to Photoshop, and the image manipulation tools it has available, except there's one important difference, GIMP is free. Free to download, free to use, free to upgrade, plain and simple, free.
There is so much functionality, within the GIMP menu's, that even now, after five years of daily usage, I still haven't used every option available. The on line help center is packed with information explaining exactly how each tool works. Plus running a Google search for help with GIMP brings up 16 million topics!
You can purchase image editing software that may have a few more options, but GIMP does everything I'll ever need and then some.
To get started using GIMP first download the program here: www.gimp.org/downloads.
After the download is complete, go to the folder you saved it in and click on it. Follow the installation instructions being sure to either okay a link on your desktop or on the toolbar (makes it easier to find and launch).
After GIMP is installed and ready to go, locate it on the desktop or toolbar and start it by double clicking the icon.

Shortcut Keys Worth Remembering
Everybody likes a short-cut! These combo key strokes will come in very handy when you're editing with GIMP.
Ctrl + Z = This will undo the last key strikes you did on at a time. This can go back many, many strokes. Comes in so handy when you erase something by accident!
Ctrl + i = When working with Select Tools invoking the ctrl + I will invert the selected area, so instead of editing inside the selection, it will be reversed and you will only be able to edit the outside of the selected area. It's a toggle key so switch back and forth as you like.
Get Started.
Above you can see the GIMP main page. There's a watermark of Wilbur the mascot on it. There is a tool menu to the left and a layer, gradients, patterns and brushes menu on the right. Both of these menus can be closed via there respective x. They can be reopened via the tool bar at the top under Window, Dockable Dialogs.
The tool options seem endless in GIMP. Besides having every tool known to man, there are multiple settings within each tool! Going over every tool and every option for that tool would be beyond the scope of a hub, so let's go over the tools you would need to create and edit an image.
If you are going to edit an image: Click File -> Open and navigate to the image. If you are going to start a new image: Click File -> New and select the dimensions of the image you want or accept the default size of 640 x 200. You can also choose: File -> Create and choose from one of the preformed templates offered.
I'll be editing a photo I have of my favorite boy Georgi.
Editing Georgi Boy
Click thumbnail to view full-size


Rectangle and Ellipse Select Tool
The rectangle and ellipse select tools work in the same fashion. The only difference is one is rectangular and the other circular.
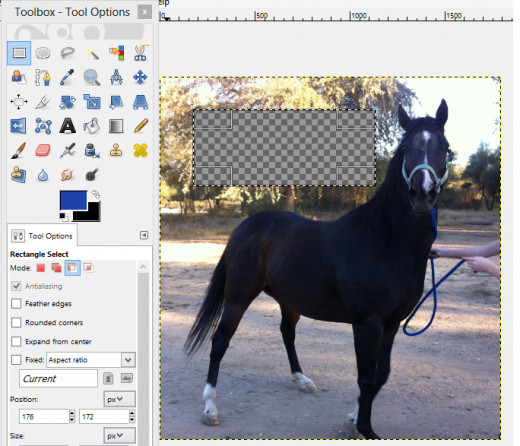
- Now that we have our image up highlight the rectangle select tool.
- Select an area on your canvas by left clicking and then dragging the box to the opposite point where you wish to stop.
- By clicking on delete the area within the rectangle will disappear leaving a checkered (transparent) background or
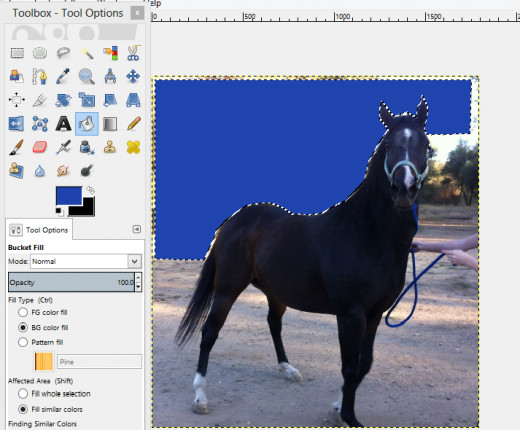
- You can use the bucket tool and fill it with any color you choose from the color selection.
These two tools, rectangle and ellipse, will leave a vibrating edges around your selection, just pick up another tool and it will go away when applied to the canvas. If not, on the tool bar across the top choose Select -> None and this will remove the vibrating edges.


Free Select
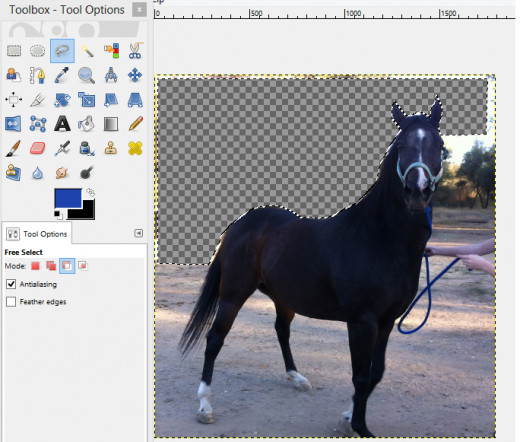
- Select the lasso looking tool.
- Place points along a path you desire. Beginning with a specific point and ending at that same specific point.
- When the points are connected to the last one (1st one you started with) the area will highlight with a vibrating line along you points. The area within is editable or erasable. Use the ctrl + i to switch to editing just the outside of the area and back and forth.
- Hitting delete will remove everything within the selected area leaving a checkered (transparent background) or use the bucket fill and your favorite color to fill it in.


More Tools in GIMP
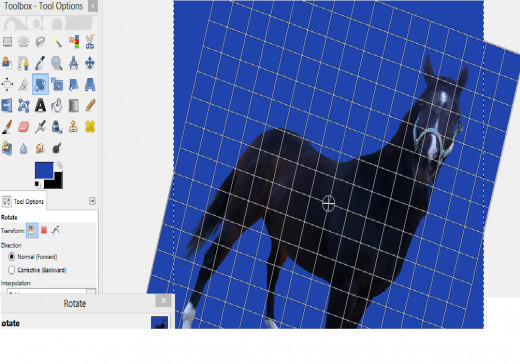
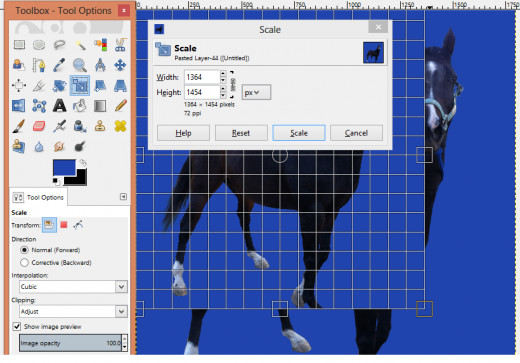
Rotate, scale, fuzzy select, select by color, reverse, shear and perspective can be best described within a table.
Fuzzy select and select by color are two tools that act like the rectangle select and ellipse select where the ctrl + i will make it switch from editing within and editing outside of the selected area.
See the table below for a brief description of the other tools. Keep in mind that all of the tools have further tools options below their menu.
GIMP Editing
Tool
| Action
|
|---|---|
Rotate
| Turns the canvas around in a circle.
|
Scale
| Enlarges or shrinks the canvas.
|
Fuzzy Select
| Selects all colors that are exactly the same and touching each other.
|
Select by Color
| Selects all the colors in the image that match what you select.
|
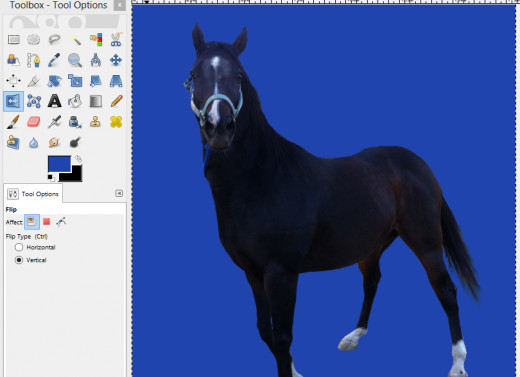
Flip
| Flips the image horizontally.
|
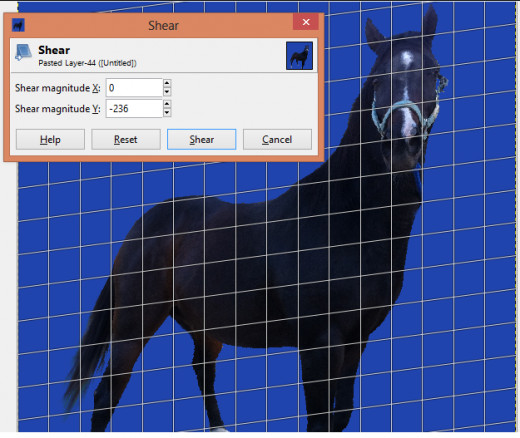
Shear
| Tilts the image according to where you left click and drag the image.
|
Perspective
| With this tool left click on any part of the image to twist and turn it.
|
The Text Tool
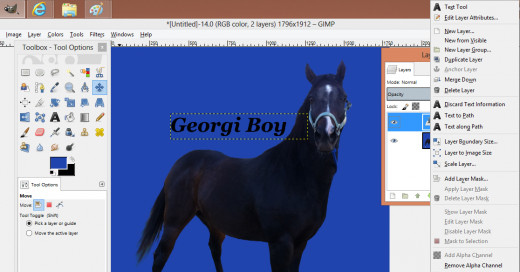
The text tool is a little more challenging. When you click on the capital a on the tool box a box appears on your image where the words or phrase is going to be placed. To manipulate the size of the letters you wish to type go to the Tool option window below the Tools window and select the size. This is where you will select the color of the font and the type of font you wish to use.
To move the word, or phrase, place you cursor anywhere along the edge of the box and an arrow pops up and you can then left click and move that section. This is the same for all four sides and four corners.
Once you have written in the area the box will still be around the text. This is called floating. The text you just typed isn't on the page yet. You must go to the right side menu and select the floating text box (picture 2) -> right click on it -> select merge down from the menu that pops up. Now the box disappears.
Any time a box won't go away on the canvas check the tools on the right, like we just did, to make sure it isn't possibly floating and needs to be anchored or merged down.
Floating and Merging Text

You have a good foundation now to start creating and editing with GIMP.


