GIMP Tool Box Tutorial
GIMP 2.8 Tool Box Tutorial
The GIMP photo editing tools are used to draw, make selections, transform images, create bezier paths, change colors, add text, gradients and patterns. Like a carpenter you will rely on the tools to fix, build and create graphic art.
Learning how the tools work and what you can achieve with each one will increase your photo editing possibilities, so take some time to become familiar with each tool in GIMP's tool box. Every tool has settings that can be tweaked and adjusted to meet specific needs, and there is a tool options dialog for all of GIMP tools.
Photo Credit: VscorpianC
GIMP 2.8 Paint Tools
Tools for Painting and Drawing
The tools used to paint, draw, erase, clone etc. are used together to achieve many artistic styles and creations. These tools will probably get the most wear and tear because you'll use some or all of them constantly, so should know how to access and use each one and have a good understanding of the capabilities of each one.
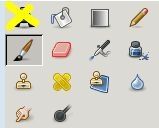
The image shows the icons for the paint tools and I'll cover the basics, the short-cuts are in bold.
GIMP's Paint Tools
Bucket Fill - (Shft + B) This tool is sometimes call the paint bucket, it allows you to fill areas with either color or patterns
Blend Tool - (L) Also called gradient tool, this allows you to fill layers, masks, selections and areas with color gradients; colors that are smoothly blended together in many ways
Pencil Tool - (N) This pencil brush draws lines that are hard-edged even if using a soft edge brush
Paintbrush Tool - (P) Probably the most used tool, this paints or draws smooth strokes
Eraser Tool - (Shft + E) Erase pixels on image or layer to background color or transparency. Note: Erasing the b.g. layer (bottom) will reveal replace erased pixels with the background color; this is because this layer has no alpha channel by default. You can, however add an alpha channel then it will replace erased pixels with transparency
Airbrush Tool - (A) This tool is similar to spray painting, it's pressure sensitive. If you click and hold the brush over one area it will continuously build up the amount of paint applied
Ink Tool (K) This tool works best with drawing tablets because it responds to pressure and tilting, but it can be used for calligraphy style painting using a mouse
Clone Tool - (C) This tool copies pixels or patterns from a selected area to where you click or paint. Ctrl + L-Click to select the source then paint where you want to clone
Heal Tool - (H) Used to heal or fix image irregularities
Perspective Clone Tool - (no short-cut) Clones image source after you apply a perspective
Blur & Sharpen Tool - (Shft + U) This tool allows for selective blurring or sharpening using a brush; click to blur, ctrl+click to sharpen
Smudge Tool - (S) This tool allows you to drag pixels and smudge/smear them; it is similar to when you finger paint
Dodge & Burn Tool - (Shft+D) Using a paint brush you lighten pixels (dodge) or darken pixels (burn), this is a great tool for creating shadows and highlights
The paint and drawing tools work hand-in-hand so be sure to learn how to use each tool to enhance your artwork, photos and projects. These are the main tools, but as mentioned there are many other advanced tools that you will learn to use. This may seem like a lot of information but once you begin using the tools it won't feel so over-whelming.
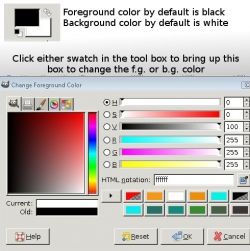
GIMP 2.8 Foreground & Background Colors
How to change colors
The image shows the two squares that are in the tool box at the bottom, the top is the foreground color which is black by default, the bottom square is the background color which is white by default. With the GIMP you can change either or both very easily. Simply click on the f.g. square or b.g. square and the pop-up box shown in the screenshot will allow you to choose any color you like.
You can click and drag in the big square or move sliders to create a custom color, type in values if you know them, or even use the color dropper to pick up and use a color from your image. Preview current and old color in the bars below the big color box until your happy then click OK to accept the new color. Note that the f.g. and b.g. squares in the tool box will now show your new colors.
To return to the default colors, click the little black and white icon in the tool box on the bottom left of the squares, to swap f.g. and b.g. colors at any time click the double arrows. The short-cut for the default colors while your mouse is on the canvas is D and X will switch b.g. and f.g. colors quickly.
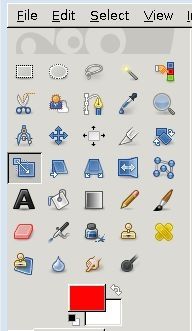
GIMP 2.8 Tool Box Window
GIMP Tools can be grouped into categories based on their functions
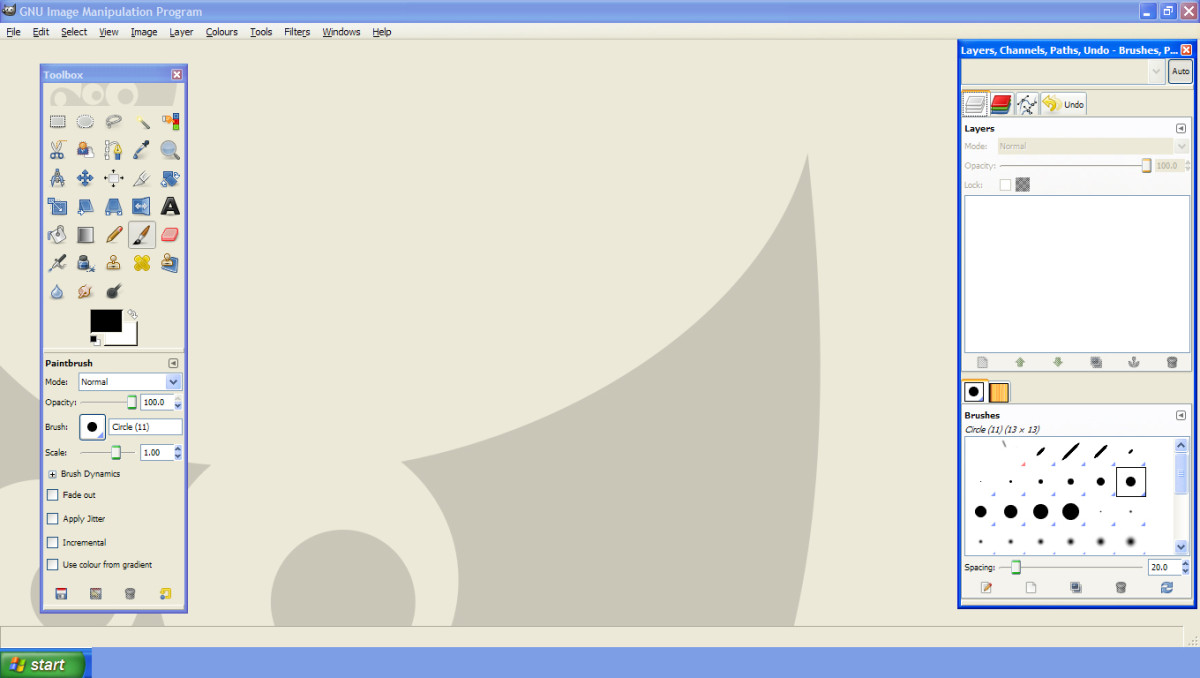
When you start GIMP the tool box will be in the upper left-hand corner it contains the main tools you will use. The short-cut key to open the tool box is Ctrl + B. There are other tools that you will learn and use such as the levels, curves etc., however understanding how the main tools work is important. So, let us focus on the tool box for now. The tools can also be accessed under the "Tools" menu in the main screen, or by R-Clicking on the canvas through the fly-out menu.
Starting from the top left I'll briefly explain each selection tool (first 8 icons) and its purpose. Short-cuts for each tool is in bold.
GIMP's Selection Tools
Rectangle Select Tool (R) - This is used to make selections that are shaped like rectangles or squares
Ellipse Select Tool - (E) Similar to the rectangle select tool but this creates oval or circle selections
Free Select Tool - (F) This tool allows you to draw selections around area
Fuzzy Select Tool - (U) This will make selections that are contiguous, selected area is based on pixel value; color basically. You click on an area and depending on the threshold setting the selection will be made
Color Select Tool - (Shift + O) Selects area with similar colors
Scissors Select Tool - (I) This tool is intelligent, you drag to make a selection and as you click points the lines will snap to the edges
Foreground Select Tool ( no short-cut) This selects an area with foreground objects
Paths Tool also called; Pen Tool or Bezier Tool - (B) This is used to create curves and lines that are editable paths
There is more to learn about each selection tool, but as you can probably tell there are several tools to help you achieve your editing goals. Next we will look at the transform tools.
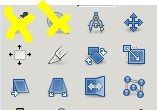
GIMP 2.8 Transform Tools
Cage Transorm Tool is New in 2.8
You will find yourself using transform tools often, these tool allow you to change many aspects of selections, images, and even layers. When using your tools is is recommended that you have the Tool Options dialog opened because that is how you tweak each tool. In the screenshot shown there are 10 transform icons, I'll briefly describe each tool. The short-cut will be in bold, so let's get started.
GIMP's Transform Tools
Measure Tool - (Shft + M) This tool is used to measure distance and angles
Move Tool - (M) As indicated this moves selections, layers, objects and its used to pull guides out from the vertical or horizontal ruler
Alignment Tool - (Q) Use this tool to align layers, objects and selections
Crop Tool - (Shft + C) This tool allows you to crop images and it can be used to re-size
Rotate Tool - (Shft + R This will rotate selections, layers or paths
Scale Tool - (Shft +T This transform tool allows you to scale/re-size layers, selections or paths
Shear Tool - (Shft + S) This tool allows you to shear the layer, image, selection or path (soft of like distorting)
Perspective Tool (Shft +P) Change the perspective of a layer, selection or path
Flip Tool - (Shft + F) This is used to flip a selection, image, layer or path horizontally or vertically
Cage Transform - (Shft + G This is a new tool in 2.8, it deforms selections with a cage
These are the main transform tools, each one can be fine tuned using its tool options. Next we will look as some of the paint tools in GIMP.
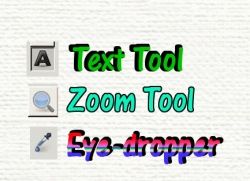
Text, Zoom and Eyedropper Tools in GIMP 2.8
Zoom Tool & Eyedropper Tool
Here are 3 more tools you will learn to use and appreciate as you enhance your photo editing skills. I'll give a brief description of each, the short-cut for each is in bold.
Text Tool - (T) Used to create or edit text layers. The new text tool in version 2.8 is easier to use and allows for on canvas text editing. This is a tool you will find many uses for.
Zoom Tool - (Z) Also called magnifier, drag a selection over and area on the canvas and quickly zoom in. This tool is great for doing close up edits that need precision. The plus and minus keys on the numpad can also be used for zooming in and out, but this tool zooms to the selected area.
Eye Dropper Tool - (O) Picks up pixels from an image where you click and changes the f.g. or b.g. color, a handy tool for matching colors to those in a photo or image quickly
These are your basic tools in the tool box. The GIMP has many more tools available to use, but I recommend that you practice using the basic ones until you are comfortable, know how to access them and understand what the purpose of each tool.
Consider this tutorial and the previous one on the new features as the foundation of learning GIMP, just like building a house you need to have a solid foundation build your new skills upon. Follow along with the next tutorials in this sort of series, and I'll share with you what I've learned and how I did it. Enjoy the learning process because anything in life worth having is worth working for, right.


