- HubPages»
- Technology»
- Communications»
- Smartphones»
- iPhone
iPhone 5s Tutorials: How to Film Slow Motion, Improve Security With The New Touch ID Sensor, and How to Master Control

How to Film slow-motion video with the iPhone 5s
Use the Slow-Mo camera to capture amazing events
One of the coolest new features of the iPhone 5s is its ability to capture video at 120 frames per second. Most cameras, and the iPhone’s standard video recording mode, capture video at 30 fps, and play back at normal speed. The new model can capture more frames for every second of footage, so when you play the video back, you can slow the video down and still maintain a smooth frame-rate to get video at a slower speed.
The 5s lets you do this manually. Simply activate Slow-Mo mode, record your video and you’ll be taken into a custom menu. Here you can slow down or trim all the footage, before sharing it with the world.
1 Set up and shoot
First, open the Camera app and use the mode selection area to open Slow-Mo mode, which sits on the far left. The camera will automatically switch to 120 fps, so all you need to do is hit the record button.
2 Editing mode
Once you’ve finished your video and stopped the recording, you’ll be taken to this screen. Here, you can drag the black bars across the timeline to adjust the point at which the slow motion kicks in and fades out again.
3 Precision editing
You can get really precise with your timing, too. Tap and hold on one of the two black bars and the whole timeline will expand, almost like you’re zooming in. Your dragging will then move the bar a few seconds at a time.
4 Trimming
The timeline at the top of the screen is the video itself. You can drag the white bar within it to move around the timeline, and tap and drag the arrows at the edges to trim the clip. Use this to capture just the action.

How To Improve Security With The New Touch ID Sensor
Use the iPhone 5s’ Touch ID sensor to add a fingerprint and make your phone even more secure
Security is a constant concern for most iPhone owners, and rightly so. It’s easy to worry about someone taking your expensive and treasured device, or be concerned about having someone looking through all the contact information, photos and documents on your device. Thankfully, there are a few options that keep you safe, such as iCloud backups, Photo Stream, Find My iPhone and, more importantly, the trusty passcode lock feature. Now, though, there’s a new way of securing your iPhone.
Touch ID is a fingerprint sensor built directly into the home button of the iPhone 5s, and it can be used to lock and unlock your device, as well as purchase content from the iTunes Store. The system lets you scan your fingers at a variety of angles, and saves all the information as encrypted strings. These strings are only stored inside the chip of the iPhone, too, so there’s no way for any other devices or users to access information.
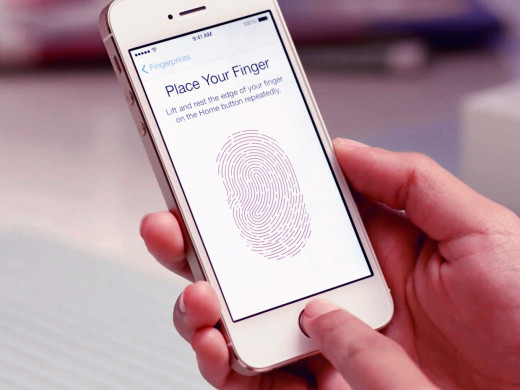
Step-by-step Set up Touch ID on iPhone 5s
1: Original setup
When you first activate your iPhone 5s, you’ll be asked whether or not to set up Touch ID. Choose Set Up Now, then place your finger on the home button to start the process.
2: Learning process
You’ll need to continuously raise and replace your finger on the sensor to let the device learn your print. Move it around very slightly as you do this so the sensor reads a larger area.
3: On the edge
Once the iPhone has learned the main area of your fingerprint, you’ll be prompted to scan the edges so it will work even if you unlock your phone when holding it in one hand.
4: Scan complete
The greyed out fingerprint will slowly start to fill itself in with red lines as you scan your print. Make sure you touch the sensor and keep your finger there for long enough.
5: Success!
When you have done enough scans for your iPhone to have learned your print, you will get a message saying that the Touch ID is ready to unlock your device.
6: Buying power?
You also have the ability to set up your Touch ID scan to work as a password for your iTunes purchases. If you want to be able to buy with a touch of your finger, do it here.
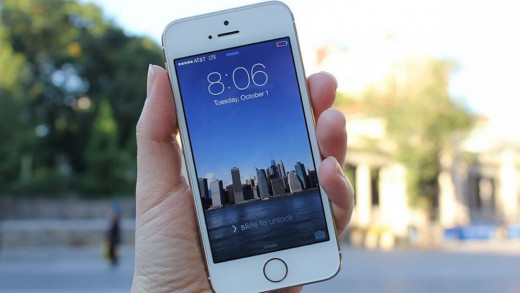
7: Unlocked
Finish your setup and tap a button to show the lock screen; you can now unlock with a touch. If anyone else, or any other finger tries, they’ll be politely told to try again.
8: Finger management
To manage the settings of the Touch ID sensor, open the Settings app and choose General. Scroll down and you’ll find a new section entitled Passcode & Fingerprint.
9: Multiple fingers
You can save up to five fingerprints to your device; either five of your own, or five different people. You can also remove and rename them to avoid confusion by hitting Edit.
How to Master Control Center and Multitasking
iOS 7 makes switching between apps more intuitive than ever Apple’s latest update to iOS may have caused something of a stir with its radical new look, but there’s no denying that some of the changes are for the better. In this case, it’s the all new Control Center and a redesigned multitasking interface. These may sound complicated, but they’re the most effective ways to get around.
Control Center gives you quick access to a number of commonly used settings that were previously hidden away behind a myriad of menus; now they’re easily accessed via a simple swipe up from the bottom of your iPhone’s screen. Multitasking, on the other hand, isn’t a new feature, but iOS 7’s redesigned multitasking interface is a huge improvement, with full previews of every app you have open and a quick gesture to shut down apps that are running in the background. Together, they’ll speed up the everyday tasks that you need to perform, so read on and we’ll show you how to make the most of these incredible features.
Step-by-step Learn to use the new tools
1 Swipe to start
To access Control Center from any screen inside iOS 7, simply swipe up with one finger from the bottom of your iPhone’s display to reveal the quick access controls.
2 Tap and enable
Some of the most commonly used settings such as Airplane Mode, Bluetooth and Wi-Fi are at the top of Control Center. Tap their icons once to enable and again to disable.
3 Shine a light
As well as useful settings toggles and quick access to apps and tools, Control Center provides a torch. Just tap the torch icon and your iPhone’s LED flash will light up.
4 Tap it twice
To access the multitasking view, double-tap your Home button. This should feel familiar as this action has been in place since iOS multitasking was introduced back in iOS 4.
5 Swipe to switch
To move between apps, swipe from left to right in the multitasking view. You can see a preview of each app that’s open and tapping on it will take you into the app.
6 Quit the app
To shut down the app, swipe the preview up towards the top of the screen with one finger and ‘flick’ it away. Do this regularly with unused apps for better battery life.
Conclusion
The iPhone 5s is one amazing smartphone, I hope that one or more than one of these tutorials has been of help to you.
Has any of these tutorials been helpful to you?
Related

How to Use the Perfect Photo App to Edit Pictures on an Iphone

My Iphone Home Button Doesn't Work. How Can I Fix It for Free?

iPhone Unlock Using Ultrasn0w, Gevey, R-SIM, IMEI Number & SAM

Top 4 Accelerometer Apps for iPhone and iPod Touch

How to Make Stop Motion Video: Ideas for iPad Movie Projects
")

