Replacing the Power Supply in an iMac G3 333Mhz (Tray Loading) computer


It was a dark and stormy night!
While rearranging the cords under my desk I accidentally unplugged my iMac G3 (333Mhz) computer while it as on. I thought nothing about it until I pressed the power button and didn't hear that familiar chime and observed that my iMac was not powering up.
Don't panic!
After the initial panic subsided, I was finally able to calm myself down enough to perform some queries on the Internet, the majority of discussion groups pointed to a bad power supply board as being the culprit.
It is not easy replacing the power supply board in an iMac G3 (333Mhz) computer
Although you can get to the logic board/drive assembly with the removal of a couple screws, it is much harder to get at the power supply board. I think Apple purposely made the replacement of the power supply board difficult as they didn't want any novice replacing it and want users to take their iMac to an Apple Authorized Service Center. But with a little determination and some free time you too can bring you iMac back from the grave.
Safety First!
Please make sure your iMac is unplugged before disassembling it. I would also let it sit for at least an hour in order to discharge any residual high voltages used to power the monitor.
Caution!
Replacing the power supply board in an iMac G3 (333Mhz) computer is not for the faint of heart, it is almost a complete tear down of the iMac computer. It took me four hours to dis-assemble my iMac, just to get at the power supply board, and another two hours to replace the power supply board then re-assemble it.
Work Space
You need plenty of room for the dis-assembly/re-assembly process; I used a 24 inch by 48 inch folding table that I knew could hold the weight of the G3 iMac. So as not to scratch the case of the iMac, I recommend putting down a soft towel on the table, I used a car chamois.
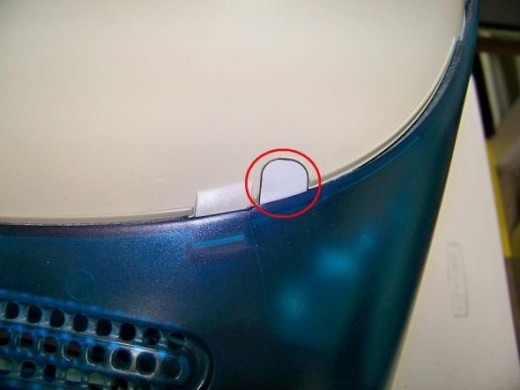
Dis-assembly - Step 1
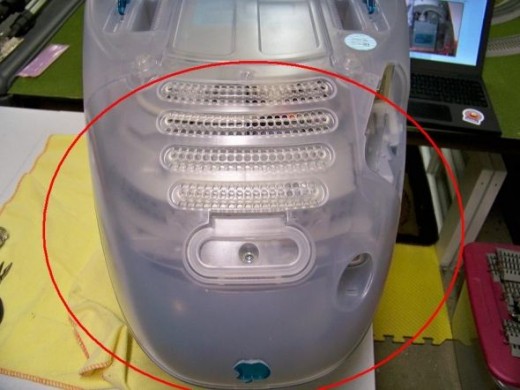
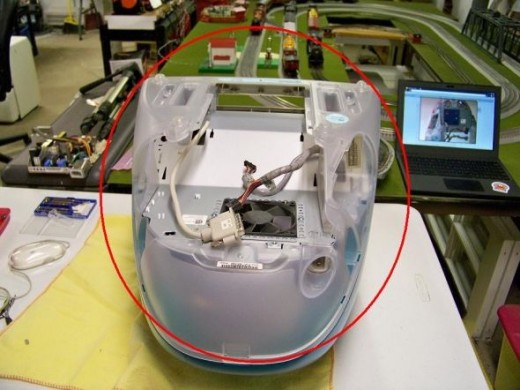
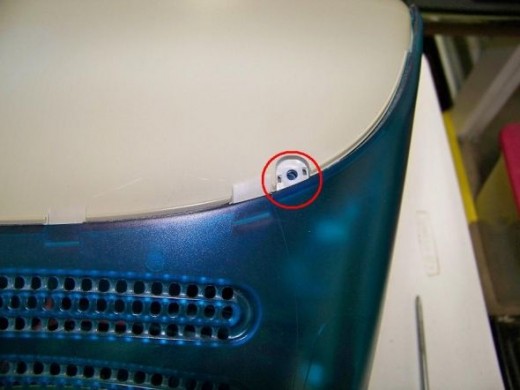
Actually I didn’t think to take any pictures until my iMac was already disassembled so I am going to show you the pictures in reverse.Turn the iMac upside down on the soft towel that is covering the table. The first thing that needs to be done is to remove the bottom cover. The cover starts at the blue Apple logo and ends where the two feet are located just past the last vent. See area circled in the picture.
Dis-assembly - Step 2
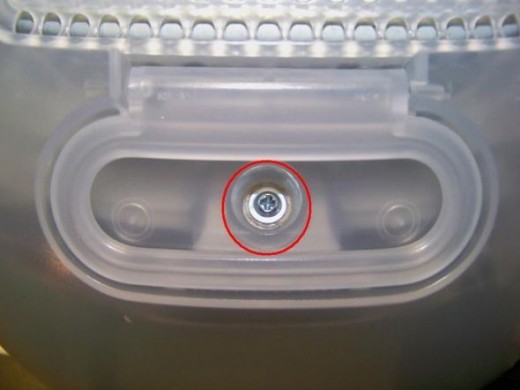
Remove the screw between the handle/stand toward the back of the iMac. Pull the bottom cover away from the computer. This will expose the logic board/drive assembly. See area circled in the picture.
Dis-assembly - Step 3
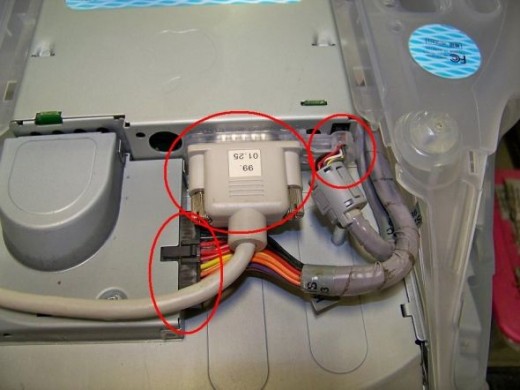
Disconnect the three cables at the bottom of the logic board/drive assembly; see areas circled in the picture.
Dis-assembly - Step 4
Remove the two screws inside the handle that hold the logic board/drive assembly in place. See areas circled in the picture.
Dis-assembly - Step 5

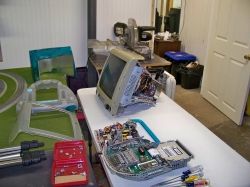
With one hand on the plastic handle, gently pull the logic board/drive assembly straight back being careful not to pinch any wires. Here is the picture of the logic board/drive assembly removed from the iMac.
Dis-assembly - Step 6
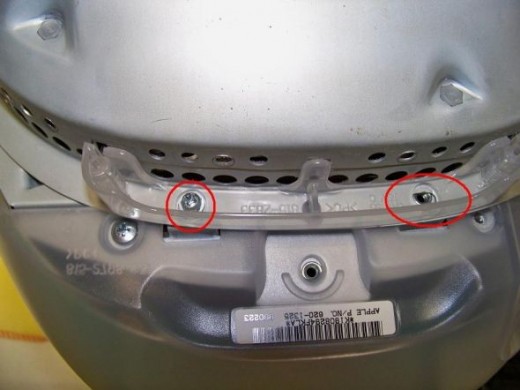
Remove the screws holding the outer bottom cover of the iMac. There are two screws on both the left and right side of the iMac. See areas circled in the picture.
Dis-assembly - Step 7
Remove the screws holding the outer bottom cover of the iMac. There is one screw on both the left and right side of the iMac.
Dis-assembly - Step 8
Use a small flat-head screwdriver to release any tabs that hold the bottom outer cover to the top rear cover being careful not to mare the surface. Remove the outer bottom cover by angling it toward the front h of the iMac then pulling straight up. The area circled in the picture is the outer bottom cover.
Dis-assembly - Step 9
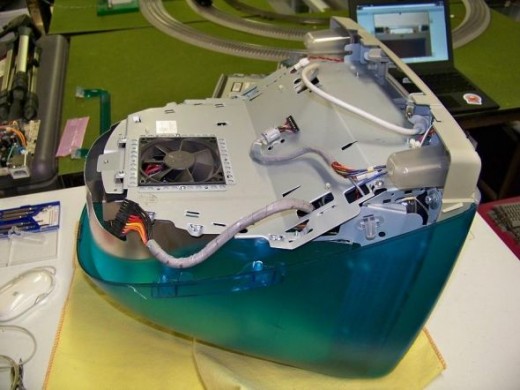
Here is a picture of the iMac with the outer bottom cover removed.
Dis-assembly - Step 10
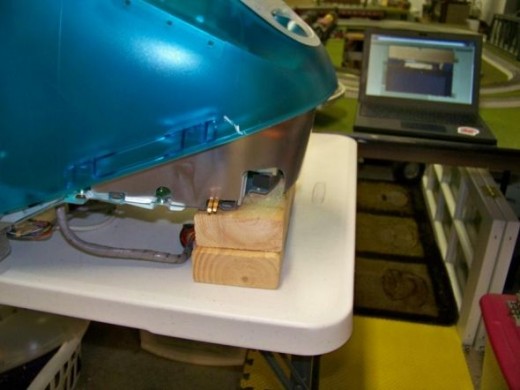
Turn the iMac right side up, using two scrap pieces of 2x4 lumber to prop up the rear end of the iMac. See picture.
Dis-assembly - Step 11
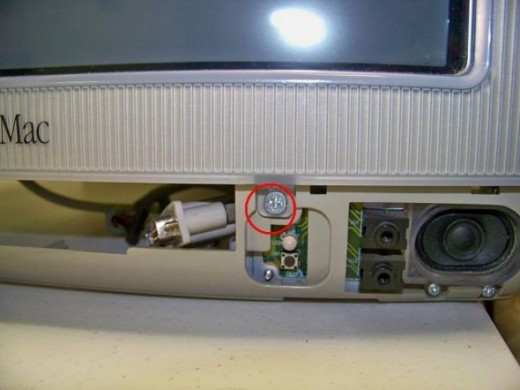
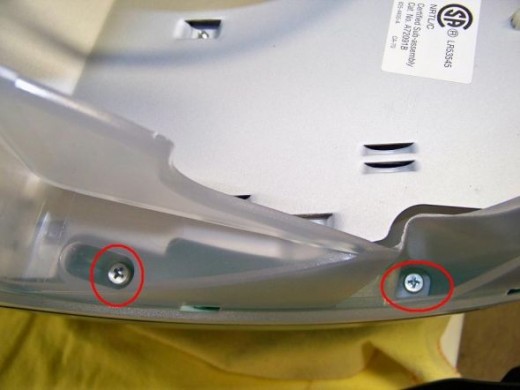
Remove two screws right below the monitor. See area circled in the picture.
Dis-assembly - Step 12
The front top cover is held in place by the two screws you removed in step 9 and by small tabs around the edge of the cover. Use a small flat-head screwdriver to release the tabs being careful not to mare the front top cover.
Dis-assembly - Step 13
To remove the rear top cover, use a small flat-head screwdriver to remove the screw covers. There are two of these covers one toward each side of the iMac. See area circled in the picture.
Dis-assembly - Step 14
Remove the screws under the screw covers. There are two of these screws, one toward each side of the iMac.
Dis-assembly - Step 15
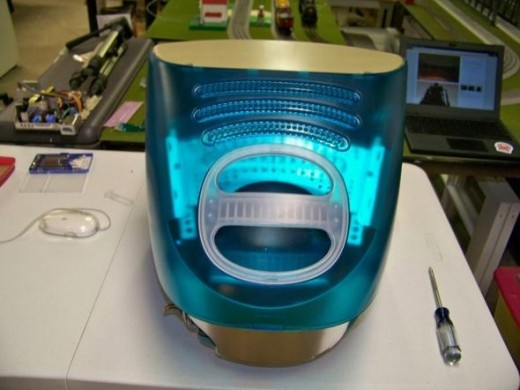
Here is a picture of the rear top cover, use the handle to pull straight up to remove it.
Dis-assembly - Step 16
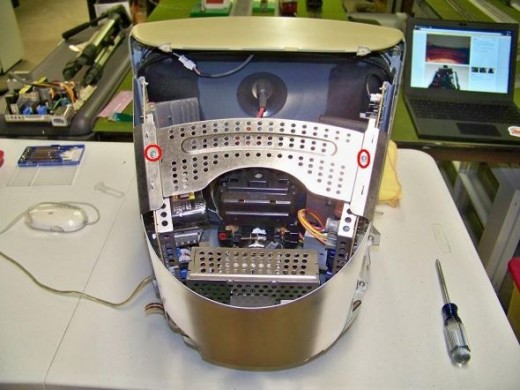
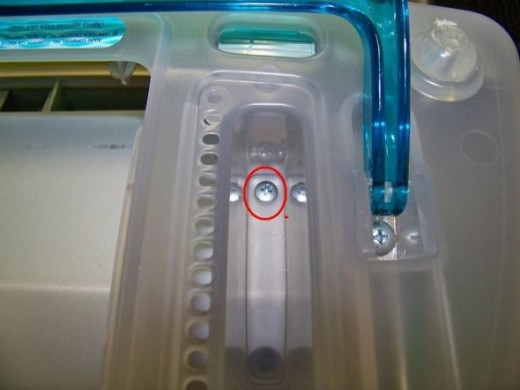
Remove the top metal shield; there is one screw on either side holding it in place. See areas circled in the picture.
Dis-assembly - Step 17
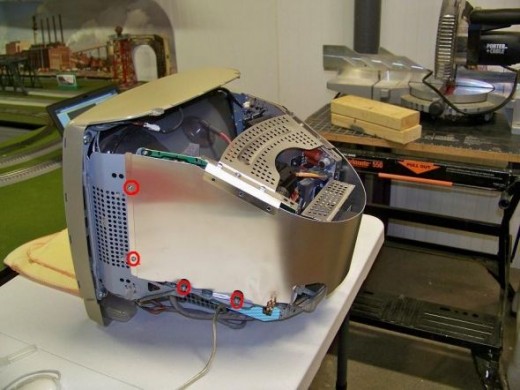
Remove the outer metal shield, it is held in place by eight screws total, four screws on each side. See areas circled the picture.
Dis-assembly - Step 18
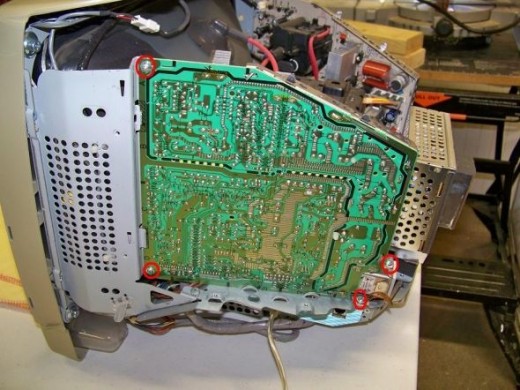
Finally, we get a glimpse of the power supply circuit board. Remove the four screws that hold it in place and disconnect any connectors from the board making a note of where they are connected. See areas circled in the picture for the screw locations.
Sourcing a new iMac G3 power supply board
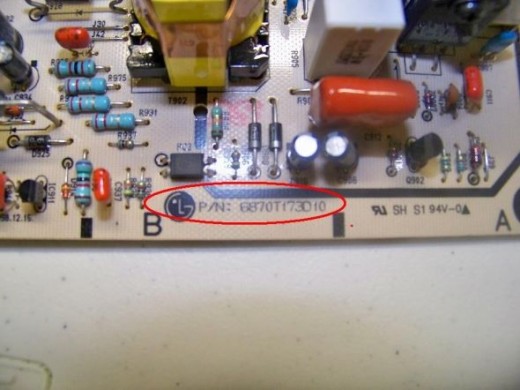
Locate the part number on the power supply circuit board, in my case the part number was 6870T173D10. I went to eBay, typed in the power supply part number in the search text box and was able to find a used power supply board for a mere 24.99 at a "buy it now" auction. This auction included free shipping.
Test before you re-assemble
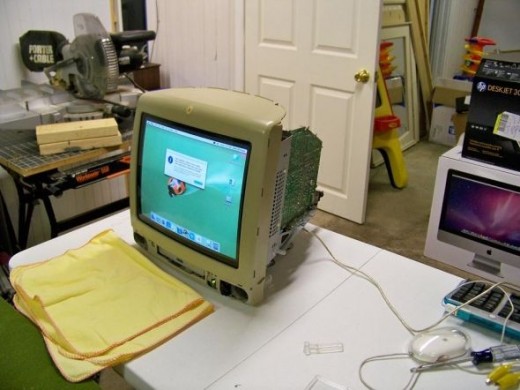
Before I completely re-assembled my iMac, I decided to test it with the new power supply board installed. In order to do this I attached the cables to the proper connectors on the power supply board then mounted the power supply board with four screws. I then temporarily installed the logic board/drive assembly into the iMac chassis then attached the three cables to it.I connected the power cord to an AC source then pressed the power button on the front of the iMac and SUCCESS! My iMac powered up.BE CAREFUL NOT TOUCH ANY OF THE EXPOSED COMPONENTS WHEN DOING THIS TEST AS IT COULD RESULT IN A NASTY SHOCK! Disconnect the power cord after performing this test. Also you will need to disconnect the three cables from the logic board/drive assembly and remove this assembly prior to the re-assembly process.
Re-assembly
Reassembling the iMac G3 is the opposite of the dis-assembly process, start with Dis-assembly - Step 17 and countdown to Dis-assembly Step 1.
Conclusion
With a little determination and some free time, you too can bring your iMac G3 back from the grave!


 computer")


