- HubPages»
- Arts and Design»
- Photography»
- Photography Instruction & How-Tos
How to Make a Pinhole Camera


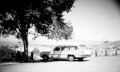
A spinoff of the very first image projecting devices, pinhole cameras combine both ancient and modern technology. Like its ancient ancestor, the camera obscura, the pinhole camera uses a simple hole to project an image upon a blank surface within a dark box. However, unlike the camera obscura, modern pinhole cameras can create photographs by simply incorporating photographic film or paper. In addition, almost anyone can make a pinhole camera out of regular household materials.
What You'll Need:
- Shoebox, coffee tin, oatmeal can or any other opaque container of similar size
- Non-glossy black paint/spray paint, black construction paper or aluminum foil
- Sharp pin or needle
- Scissors or box cutter
- Tape
- Photographic film or paper
Making the Camera
Step 1
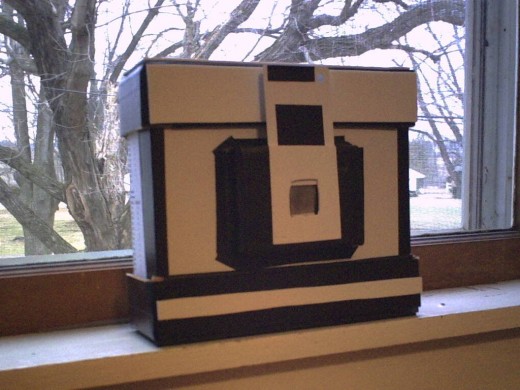
Completely black out the can, box or other container that you are going to use as the camera housing. You can either paint the inside and outside completely black or tape black construction paper to all of its sides. If you don’t have either of these materials, you can wrap a few layers of aluminum foil around the box or can.
Step 2
Cut a hole in the center of the bottom of the cylindrical container. If you are using a shoebox, cut the hole in the center of one of the sides. The size of the hole is not really important; in fact, you can simply cut off the bottom side of a cylindrical container.
Step 3
Cut out a separate piece of black construction paper or tin foil, big enough to cover the hole you just made in the camera housing. Then flatten it out and hold it taut.
Step 4
Pushing slowly, and slightly twisting the pin or needle, make a hole in the center of the paper/foil. The size of the hole you want depends on the length of your camera box, front to back. According to Kodak, the diameter of the pinhole should measure about 1/75 inch (midpoint of a number 10 sewing needle) for a housing length of 3 to 6 inches.
Step 5
Tape the paper or foil to the end of the camera tube/box, over the hole you previously cut. Make sure the pinhole is centered.
Step 6
Tape another small piece of paper or foil over the pinhole—this will act as your manual shutter.


Taking the Picture
Step 1
Tape a piece of photographic film or paper to the center of the inside wall of your camera, opposite the pinhole, with the glossy, reactive side facing forward. If you have used a cylinder with a plastic lid, you can simply pop off the lid and tape the paper/film to the inside of the lid. If you’re using film, you must complete this step in complete darkness. If you’re using photo paper, you can do it under a safelight or in a darkroom.
Step 2
Now you’re ready to take the picture, so figure out what you want to shoot. You will have the best results taking the picture in a brightly lit area.
Step 3
Position the pinhole towards whatever you are shooting. You will probably need to set it down or prop it up on something, as the exposure process is relatively long with pinhole cameras, and it will be hard to hold the camera steady.
Step 4
Lift the taped-down paper/foil shutter and expose the pinhole. If you are using film, the required exposure time usually ranges from 1 to 16 seconds, depending on the lighting. Photo paper requires an exposure time of roughly 2 to 8 minutes. Since it is not an exact science, you should always take a few pictures at different exposure times.
Step 5
Develop and print the film or paper negatives at your local photo store, or do it yourself, if you have access to a fully-equipped dark room. If you don’t know how to develop film, we’ll, that’s a whole different lesson…
Resources
- Oatmeal Box Pinhole Photography by Stew Woodruff: How to Make an Oatmeal Box Pinhole Camera
- photo.net: Pinhole Photography
- The Pinhole Gallery: International exhibits of Pinhole photography
- Kodak: How to Make and Use a Pinhole Camera
- HubPages: The Wonderful Camera Obscura
- HubPages: The History of Photography