How to Make Your Own TARDIS in Twenty Minutes


To help the Whovians warm up to Matt Smith as the eleventh Doctor Who, he did a video teaching us all how to build a TARDIS birdfeeder. The sample feeder presented at the beginning looks brilliant. The work in progress varies in quality throughout the video until, through the magic of editing, a lovely final product is shown. If you don't have that exact juice box, an A4 printer, and several hours to kill then the odds are already against you. Even if you do manage through the wonders of math and determination to craft your way into something similar to his example, know that squirrels are heavier than Mod Podge is strong. Trust me on this one. After much hard-ish labor I put the Matt Smith TARDIS out on my porch. It didn't go well for long and even worse when I screamed, "Run," David Tennant didn't cross my yard at full speed. Such is life. From these sad circumstances the duct tape TARDIS design emerged.
But you probably want to see Matt Smith and I'd hate to disappoint you.
In The Beginning
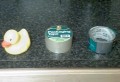
Step One: Assemble Your Materials
You'll need one large, empty rectangular container; one color of duct tape for the exterior, one color of duct tape for the windows, and one color of duct tape for the lower panels; and a pair of scissors. If you plan to hang it instead of placing it on a table then you'll need wire, string, or magic to make that happen.
Step Two: Cut and Tape
Make sure your container is empty and clean and then pry open the top. You'll cut down the corners just like Matt did. You'll also want to cut out the juice spout. It won't tape quite flat enough and won't be centered enough to be the light on top.
Tape the flaps down with your desired outer color to form a flat top. You'll also want to center the juice spout and tape it down but don't tape over it. The color of the spout or the cap for the spout will be the color of your light on top unless you choose to cover those with duct tape too.
This model of a TARDIS has a flat top. Consider it a streamlined ode to Doctor Who rather than a faithful rendition of the blue police box as it was in any particular series or season. If you want to bump it up to 30 minutes then follow the directions in the video above for making the upper panel and cover it in your outer tape color.
Midway through step two


Step Three: Layer in color
Cover the top of your TARDIS with the final outer color. Below that place on a strip of duct tape all the way around in the color you've chosen for your windows. Below that, cover the box with the color you've chosen for your inset panels. Cover the bottom of the box with your final outer color.
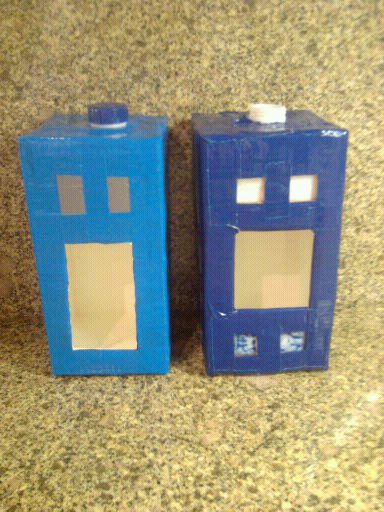
The model displayed to the right eventually became the finished product at the top of the page. You'll note that the final outer color, medium blue, is visible on the top and bottom and the window color, gray, and panel insets, a darker blue, are visible below. These layers of color will create the illusion of depth in the final project.


Step Four: Add Horizontal and Vertical Lines
At this point you'll need to eyeball your TARDIS and decide how wide you want your strips of outer color to be.
Horizontally you'll want to end up with eight stripes of relatively equal width and a ninth stripe on top that is slightly larger than the others. Vertically each side is essentially divided into five strips. The first, third, and fifth are the color of the outer box. The second and fourth panels will continue to show in parts as they are now.
So, over-think that for a minute and then decide if you want to rip your duct tape strips half as wide as the roll of tape or one third as wide. One quarter wide tends to fray and go wonky as you work with it. Any other measurement requires too much calculation and will add to the time required. I promised a TARDIS in twenty minutes and I like to keep my word. For this model I used half strips around the box and on the sides and one-third wide strips up the center.
Step Five: Add a door
In some ways selecting the door height is the worst part. A true Whovian wants an authentic door that opens at ground level. How awful would it be to sprinting to the safety of the TARDIS and then trip as you cross the threshold? Not only is it graceless but just about everything in there is either hard, pointy, or both. Thank goodness it's bigger on the inside because it probably needs an extensive medical suite.
Now that I've made a few of these I suggest putting the door above the lower panels as is shown in the dark blue model. It is a bird feeder after all. The lower the lip, the less it holds and the more easily it spills. A higher threshold on the door lets you fill it and sweep up less often. No matter where you choose to put it, grab something sharp and cut a square or rectangle.
Since I am revealing both models, the dark blue was my second attempt to follow the directions from the Matt Smith craft. The templates are available Craftster. It was a pain to do, took forever, and my beautiful blue paint wouldn't stick to the gluey layer below, thus the odd streaks of color in the inset panels. I bought duct tape to patch over the oddly matched cardboard bits and at least make part of it the right color. It works quite well, makes the cardboard a bit more durable and the yard critters don't destroy it while eating.
Load and Hang It
The last step should go without saying, but it's the internet so I'll say it. Add a hanger to the top of your TARDIS if desired. Add birdseed, breadcrumbs, or other animal food. Put the TARDIS outside. Watch and laugh giddily as squirrels dive headfirst into the TARDIS. I hope the miniature Doctor Who you keep in the yard has a full charge on his sonic screwdriver!


")