Dark Souls II Walkthrough, Part Thirty: Brightstone Cove Tseldora - Prowling Magus


One giant rat down, you're off to new areas. The Royal Rat Authority is finished, and in its wake you have to find a different path through the Doors of Pharros. Lucky you, there's one right at the entrance of the place - and it leads to an area you may already have heard of from a twitchy man with a vengeful streak.
Doors of Pharros
- Assuming you just beat up the Royal Rat Authority, zip from the Ordeal's End Bonfire to Gyrm's Respite and return to the entrance of the Doors of Pharros area. This time, get out of the water and explore the passage to the right of the fire.
- Go up the stairs to the right. Who else is here but Gavlan, drinking gaily and willing to buy your stuff. As far as I know, Gavlan stays here from now on. Beside Gavlan is a corpse that carries a Lifegem.
- Go up the ramp near Gavlan. In the next narrow passage, at the far end, is a Gyrm that will hurl axes at you. Hold back and wait for the axes to land harmlessly in front of him before rushing the guy.
- Past the next torch is a jewelled creature, and it will flee as soon as you approach the doorway. A bow is recommended for killing the thing. (Once I figure out what it has I'll edit it in. Stupid little thing keeps running too quickly for me to get to it.)
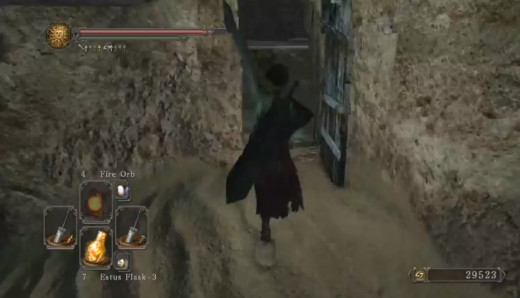
- There's a waterfall along this ledge, and you can walk into the path of the stream to your right. There's a small creature here inspecting the floor beside a torch. Kill or ignore him as you wish.
- The path bends ahead. Wander along it, kill the Gyrm warrior barring your path, and climb the long sets of stairs ahead. You'll come to an exit ahead, near the remains of a fountain; smash the urns near the fountain to find a Radiant Lifegem. This path ultimately leads to...

Brightstone Cove Tseldora
- This place has seen better days. The camp in front of you looks empty, but there are creatures lurking in the tents. Nothing terribly tough, but they can surprise. Move through the tents here, wiping out the hollows within. You'll also find some piggish hollows back near the large fire between the rearmost tents. The weapons of the humanoid enemies here will inflict curse, so do your best not to get hit.
- Speaking of fires, there's a Bonfire, Royal Army Campsite, in the largest tent of this area.
- in the rear of the camp is a hollow beating on some dead bodies with a huge hammer. Take it out and check the bodies for a Large Soul of a Proud Knight and three Souls of a Nameless Soldier. Take out the rickety tower near the bodies and a corpse carrying 15 Lacerating Arrows will drop down for your perusal.
- The remains of a small house sit in the rear of the camp. Smash through the urns beside it to find a Large Soul of a Nameless Soldier.
- A well near the Bonfire tent is home to a corpse. Check it for a Titanite Shard.
- Return to the entrance of this camp and head right. You'll find a path along the cliffside leading to a ladder. Approach slowly, as a huge boulder will fall down in front of you. After it's safely away, check the corpse by the ladder for a Soul of a Nameless Soldier. Another boulder waits just beyond the first.
- Past the ladder are four soldiers. Either charge and kill them, pull them back and kill them, or escape up the ladder and kill them from above. Be careful of a fifth soldier up on the ledge. There's also a corpse up here that holds a Soul of a Brave Warrior.
- Follow the path back on the ground. You'll see torchlight ahead; look to the edge of the cliff to your right before proceeding to find a corpse that holds a Large Titanite Shard. A door awaits in the distance, and three more soldiers guard it.
- Pop open the door, admiring its lovely arachnid motif. It leads into the ground.
- The first room you enter is empty; the second has spiders, and far more than you can initially see. Creep into the room enough that one to your right drops out of its hole, then retreat up the tunnel. This will allow you to kill the things in roughly single-file. There are a lot of them, but they're not terribly strong. The chest in this room is trapped; roll away from it once it's open, then check inside for 20 Heavy Bolts.
- There's a door ahead, and through it a doorway filled with mist. Boss!
Prowling Magus and his Congregation
Weird, weird fight. This battle isn't much different from a normal brawl, though it'll have you on your toes a teensy bit more. The Prowling Magus is a standard, if weak, boss, while the Congregation consists of two clerics and a horde of roving hollows that slowly follow you around the room. Each time you kill a member of the Congregation, their health bar drops a bit. Simple enough.
The key to this battle is to dodge almost immediately after you enter the room. The two clerics here are the real threat, as they fire incredibly-fast bolts of energy at you, and both of them are in range to do so seconds after the fight begins. Even with a high magical defense this can kill you immediately. Spread out in the room as the Congregation gets to its feet, kill the clerics as fast as possible, then work on whittling down the Prowling Magus and the remaining Congregation. The Magus has a few magical attacks, including an annoying shockwave that will knock you off your feet if you're too close, but his HP is so low that five or six hits should wipe him out. So long as you don't get mobbed by the Congregation they're no stronger than, heck, the enemies in the tutorial areas of Dark Souls II. Have fun!
- For defeating the Prowling Magus and his Congregation you'll earn a Titanite Slab. Not as good as a Soul, but not bad either.
- Pop out the rear of the Magus' little cathedral after finishing the lot off. You'll wind up outside. Before departing, check the facade of the building to find a ladder leading into its attic. Up here you'll find Cromwell the Pardoner, who will sell you items and grant you pardons for sins. Check the corpses surrounding Cromwell for a Bonfire Ascetic, a Cleric's Small Shield, a Skeptic's Spice, and three Fading Souls.
- Back outside. Enter the cave across the grass to find some stairs. Check the narrow ledge to the left of the stairs. You'll discover the Chapel Threshold Bonfire. Spark it up, then head down the stairs.
- Before going on, look at the edge of the cliff near the temple's entrance. There's a jeweled lizard down here to kill, and if you fall carefully you can get to a corpse that holds a Titanite Chunk and a Twinkling Titanite. You're pretty much dead if you do this, as there's nowhere else to go. Homeward Bone!
Related
-
Dark Souls II Walkthrough, Part Six: Heidi's Tower of Flame - Heidi's Ruin
-
Dark Souls II Walkthrough, Part Twenty-Two: Earthen Peak - Mytha, the Baneful Queen
-
Dark Souls II Walkthrough, Part Forty-Six: Undead Crpyt - King Vendrick
-
Dark Souls II Walkthrough, Part Three: Forest of Fallen Giants - The Crestfallen's Retreat

ZombiU walkthrough, Part Sixteen: The Tower of London


