Dark Souls II Walkthrough, Part Two: Majula


Welcome to Majula! Perhaps the only section of Dark Souls II which offers you near-unrestricted refuge from the terrifying lands elsewhere, Majula is your home-away-from-home. Unfortunately, it's also the portal through which you'll reach other places that are... not so friendly... still, there's some handy stuff to be found here which will make your journey a little easier.
Majula
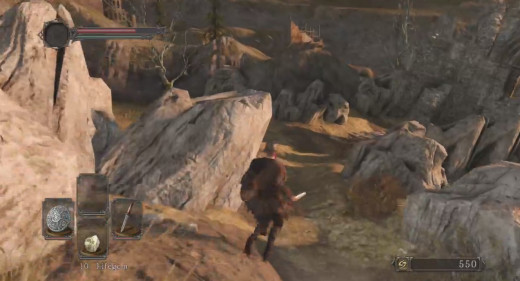
- Head down the path towards the ruins in the distance. Check the field to your left as you go down the hill - there's a body beside a gnarled tree containing a Divine Blessing.
- Picturesque Majula looks abandoned, but there are people about. Don't worry about them just yet, though - your first priority is to light the local Bonfire. It's in a large, stone fire pit almost straight ahead from where you enter the village, in the shadow of a tall stone monument.
- Look along the cliff edge near the Bonfire. A cloaked woman here will give you an Estus Flask, as well as cryptic advice about 'the king'. She recommends you return to her, which is indeed wise - she is the Emerald Herald, and she'll allow you to level up your character using the souls you've accumulated. Souls are such fleeting things in this game, so it's not a bad idea at all to return to her once you have a decent stockpile and upgrade your stats.
- Speaking of good ideas, make sure you equip that Estus Flask beside your Lifegems stock. The Estus Flask is a healing agent, and you can recharge it whenever visiting a Bonfire. A single surefire healing agent that will fully restore your health is always welcome.
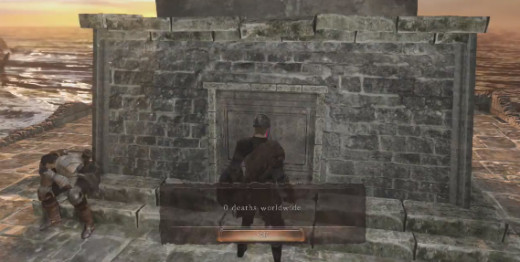
- Climb up to the monument. Check it to see how many times you've died. (This number will become a badge of shame as you progress, trust me.) A man sitting next to the monument will give you some rather depressing news about the world. Keep talking to him and he'll offer to let you join the Way of Blue covenant. Covenants offer items in exchange for completing certain tasks.
- Head back towards the village and check the house nearest the entry gate. Inside is a woeful armourer named Maughlin who will sell you armour in exchange for souls. At the rear of his house is a ladder; climb it to find a chest containing a Titanite Shard.
- A deep, wide well stands in the middle of the cluster of buildings near Maughlin's home. Stay away from it - you fall in, you're probably done for.
- There's a large building in front of the well. You can't get inside yet, and if you check the right alley beside the building you'll be accosted by tiny creatures. They're hard to hit, they have a lot of health (for this early in the game, anyway), and they offer up barely any souls. Stay away from 'em. Approach the well out front and knock the rock resting on the lip into the well to bring a corpse into view; it carries an Estus Flask Shard, allowing you to upgrade that Estus Flask you just received. This allows you to carry two health charges.
- The last building here contains a talking cat. Huh. She's Sweet Shalquoir, and she'll sell you items. She'll also allow you to take up or abandon Covenants. We'll get to those shortly.
- There's a tent next to Shalquoir's home. Inside is a corpse containing a Lifegem.
- Also back here are two paths, one leading into the ground and the other along the side of a cliff. If you descend into the ruins you'll find Majula's sewer system. You can't do much down here right now, but you will find a chest containing a Crimson Parma on the long, swirling staircase down to the bottom.
- Check the cliffs to find Victor's Stone. Interacting with it will allow you to embark upon the Company of Champions covenant.
- Beside the Victor's Stone is a body. Check it for a Homeward Bone.
- Return to Majula. No doubt you have a pressing question at this point: where now? You have multiple options, all of them dangerous. We'll start by heading belowground.
- Follow the edge of the cliff near the Emerald Herald to find a path leading underground. Check to your right upon entering the tunnels to find a chest; inside is a Rusted Coin. Wander through the pillars to find a passage on the left.
- Ahead is a gate with a switch. Hit the switch and get under the gate as it creaks upward. It'll close quickly enough if you take too long. Plod on through here and you'll reach the edge of a river.
- Cross the wooden planks ahead. You'll see a downward-sloping path nearby that leads outside. Ignore it for now and look beneath the bridge for a much more treacherous set of wood planks. They lead to a chest containing a Human Effigy. - - Look downriver. You'll see the glow of a body nearby. Performing a running leap onto the rocks below to reach it. Check the corpse for a Homeward Bone and a Soul of a Lost Undead.
- Follow the water out of here to reach the next major area: the Forest of Fallen Giants. Gee, that doesn't sound dangerous at all, does it?
Return Trip
- You can buy Lenigrast's Key from the crone merchant in the Forest of Fallen Giants, by the Cardinal Tower Bonfire, for 1,000 souls. Use this key on the house nearest the stone monument in Majula and its owner, Lenigrast, will open up a Blacksmith's shop. You can use this shop to upgrade your weapons and armour, as well as repair anything that's too far gone to use properly. There's also a Short Bow to grab from a chest in his house.
Related
-
Dark Souls II Walkthrough, Part Thirty-Five: Black Gulch - The Rotten
-
Dark Souls II Walkthrough, Part Forty-Seven: Nashandra and New Game +
-
Dark Souls II Walkthrough, Part Twenty-Nine: Doors of Pharros - Royal Rat Authority
-
Dark Souls II Walkthrough, Part Thirteen: Huntsman's Copse - Undead Refuge
-
Dark Souls II Walkthrough, Part Forty-Five: Memory of Jeigh - Giant Lord


