Merida and Robin Hood Costumes

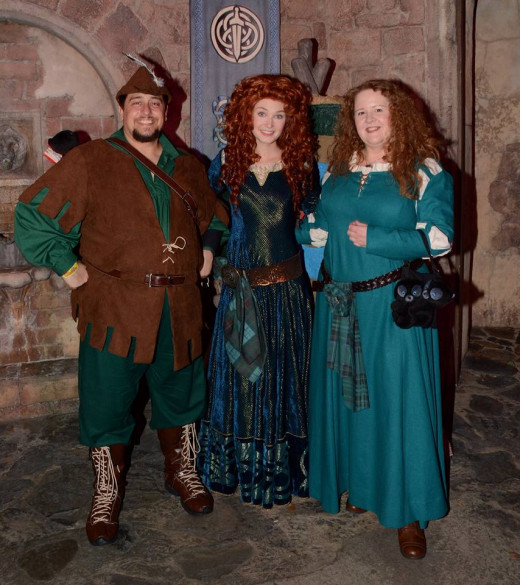
So, like we do every year, we go to Mickey's Not-so-scary Halloween Party and every year we dress as different characters. See some of our previous costumes in my earlier posts.
This year, due to Hollie's hair being a certain length, she wanted to go as Merida from Brave. I thought that it was a good idea, but who would I go as, since Merida doesn't really have a boyfriend? We thought at first some of the suitors would be fun, and it would give me a chance to wear a kilt, but in the end we decided that there would be only one man who could be Merida's equal: Robin Hood.
Merida
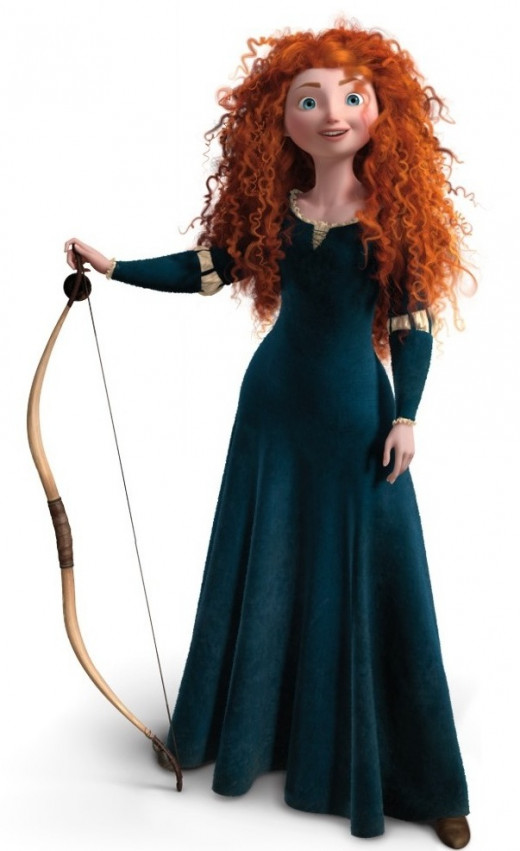
As you can see, Merida wears a blue dress, over a white chamise which is seen at the shoulder and elbow joints.
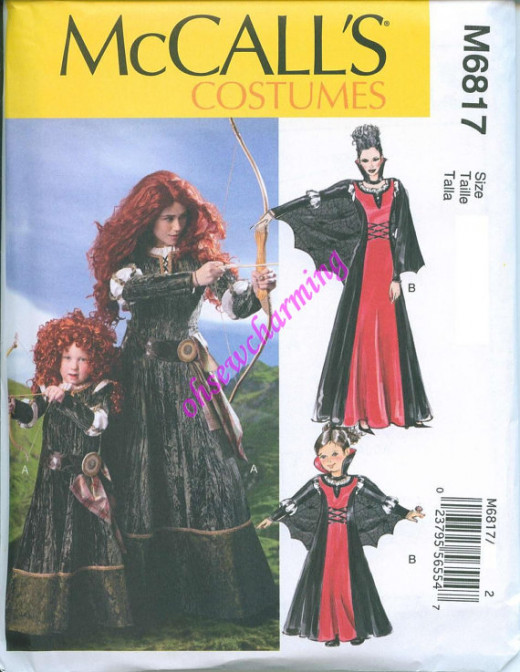
Now there are patterns that Disney as licensed with Simplicity, but they are only for children. Luckily McCall's decided to put out their own version of the pattern. However, there were complications. for some reason, McCall's pattern wants you do try to make the white puffy parts of the sleeve to be attached to the blue sections, which we tried, but made the arms very tight.. So we opted to try a different method instead.

The dress body itself was fairly straightforward. It has long panels that can be taken in to make the dress more form fitting. Instead of a separate chemise, the neck is a gathered piece of material sewn directly on the to garment.

Later, I added grommets in the front to lace with leather.

I made each individual strap and sewed them on to the dress at the same time I sewed on the sleeve, giving the illusion that it was two separate pieces. Then each part of the sleeve was attached to the straps. I repeated this with the forearms.

The back of the dress was closed with a zipper, which, while practical, was not appropriate to the time period in which Brave is set. Her costume in the film is laced us, but that would be impractical, so we created a false back. The zipper remained, but it was covered with a pane; that had laces in it and closed by velcro.
To make this I tool a piece of the white fabric as the body of the panel, then made two strips of the blue material and inserted grommets. Once sewn together, the left side of the panel was sewn to the dress while the other side closes with velcro. A leather cord was then laced through the grommets. Together, it gave the illusion that the dressed was laced over the chamise, when in reality, it was simply zipped up.

For her belt, Hollie wanted to create a tartan to hang from the buckle. We found a broach with a Celtic design that she wanted to use. She found a tartan patten that she liked, but clashed with the fabric of the dress. So for the first time, we experimented with fabric dye. The end result was a tartan that was closer in hue to the dress. I made a fabric rose and panel to attach the belt.

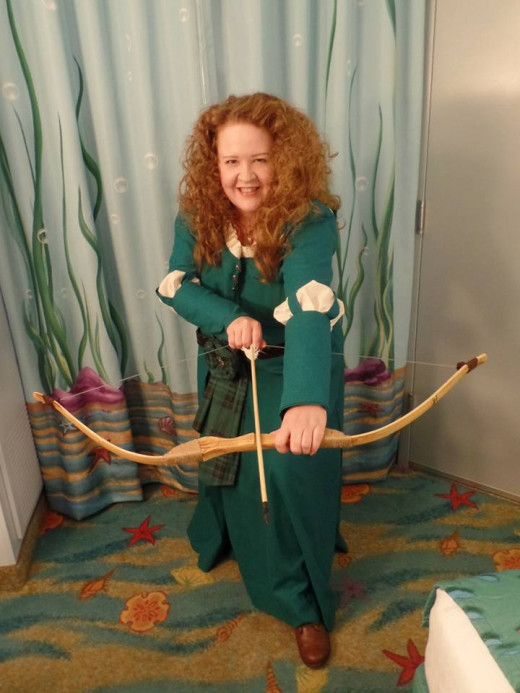
A couple of hours of hair teasing later, Princess Merida from Brave made her appearance!
Robin Hood

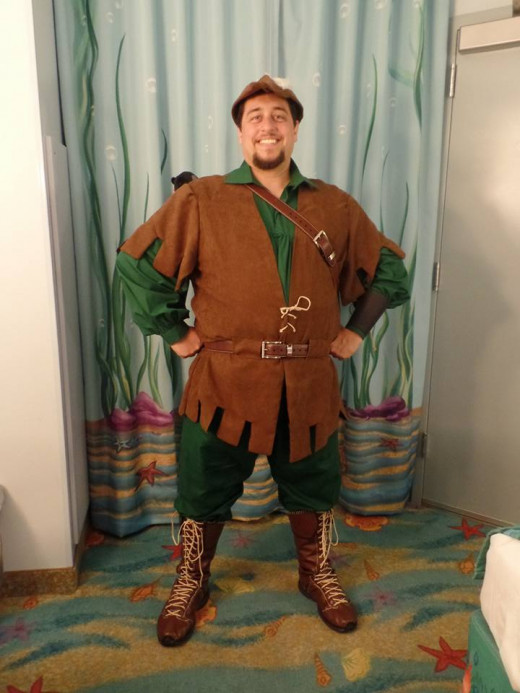
Now while Disney has their own version of Robin Hood, in my mind there is only one true Robin Hood, and that is Errol Flynn from 1938's The Adventures of Robin Hood!
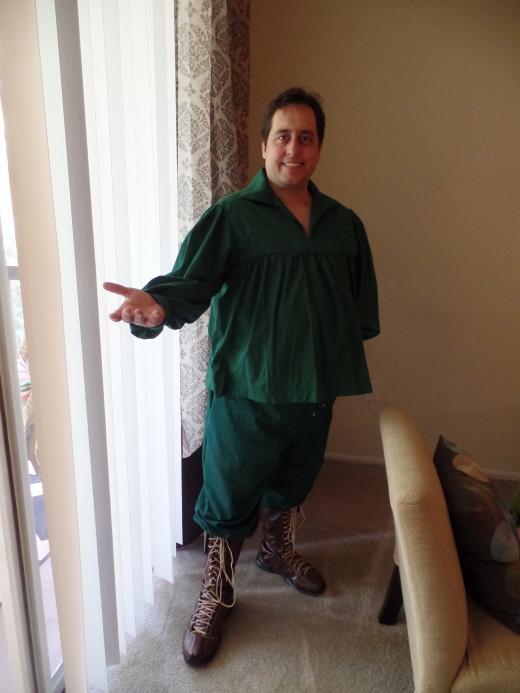
The actual clothing for Robin posed little challenge. A simple top and pants in green with a brown tunic. In fact I already had the shirt, but I and to remake the pants (which is why they are slightly darker) The tunic was a simple vest pattern made out of microsuede. I added the sleeves and made the ends with the squares on the finish.
Like I said the clothes were easy. It was the accessories that proved a challenge.
Notice the boots. They just don't make boots like that, so I had to make them myself. Rather than use leather, which would have cost an arm and a leg, I used an old trick. I took and old pair of sneakers and covered them with brown vinyl. I modeled each panel after a corresponding panel on the shoe and used both glue and thread to attach them. I wanted it to look like a boot that someone from the 12th Century would make, so it was okay if it looked a little rough. I added grommets to each side of the boot to lace it up with leather. I added flaps on the top and finished all the edges with black bias tape.

Robin Hood has to have a quiver of arrows, but you can't take arrows into a theme park. So, instead, I made the quiver based on an idea I found on Pinterest. They suggested using a mailing tube covered with leather. This would give the quiver stability to hold arrows, but I thought that the ends of the tubes could be used as a false top.


First, I drilled holes in both the lid and in the fowls that I was going to use for the arrow tips. I took a little time to watch youtube videos on how to fletch your own arrows. Fascinating, actually, there are a lot of tools to use to make the arrows perfect for flight. Since I was just making the tips for show, I used a banana clip to hold the cut pieces of the feather in place while I superglued the feather to the dowel. I used a red feather on each one as the guide feather. Once that was done I used a black ribbon to better disguise the homemade nature of the arrows. I screwed the finished arrows to the lid, which I had painted black.
The reason I did it this was was because in order to enter the park, you have to have your back checked. This enabled me to take the lid off, demonstrate that the quiver was empty, and then replace.


The quiver body was covered in the same brown vinyl I used for the boots and sewn up the back with artificial leather thread. I cut a belt in two and used brass rivets to attach the ends of the belt to the quiver.
In order to make the costumes tie together, we bought three of the stuffed bears for Merida's brothers: Hamish, Hubert, and Harris. We sewed Hubert and Harris into a purse, while Hamish was tied on to the lid of the quiver, making it appear that he's gotten into that as well.

Top it off with a simple hat pattern. Add a feather, a belt and a leather bow guard and you're ready to rob from the rich and give to the poor!


When we got on the tram, a young boy turned to his mother and said, "He's Robin Hood, and she's pretty." You can't ask for better praise than that.
We already have ideas for next year!