How to Start Growing Onions from Seed

Growing onion from seed allows you to choose from different varieties that aren’t offered in onion sets. Of course variety is just one of the benefits of starting from seed. Onions grown from seeds tend to perform a lot better than the onions that are grown from sets. If that’s not enough they are also less likely to get disease, they store better and they even make bulbs faster. So the real question isn’t why, but how should you start growing onion from the seed.
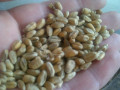
Choosing Your Onion Seed Variety
The first step to growing delicious onions is first deciding which ones you want to grow. And yes there’s a ton of different types. To be exact I believe there is about 300 different types!
But one thing that is incredibly important when choosing your onion variety is that you have to pick the right type for your area. If you live in the northern U.S. you will need to choose long day onion varieties. If you live in the south, you need to choose short day onions. If you choose the wrong type the bulb won’t develop very well and you just won’t enjoy your results. If you want to know more, then just read below.
Short Day Onions Vs Long Day Onions
If you grow the wrong variety in your area you could face some big problems. Like if you use short day onions up north they will make the bulb too early and won't get very big. The only time you'll want something like is if you plan on pickling your onions or maybe going for pearl type onions. If you grow long-day onions in the Southern states your results won't be so good. As in it'll only put out leaves and no real bulb! So just try to make sure you choose depending on your area!
Once you figure out which type of onion is right for you, it'll be time to pick the onions by taste! Make sure you grow delicious varieties of onion!
Germinating Onion Seeds
In order to start growing onion from seed, you’ll have to germinate them. If you want to get nice big tasty onions, you’ll need to start them off on the right root (see what I did there?!). Germinating your onion seeds isn’t too hard and doesn’t take long.
There are several different ways you can germinate your onion seeds. Some people will just throw the seeds straight in the ground. I don’t really recommend this because a) they need room and b)onions start off in the cold even though seedlings don’t really tolerate cold weather that well. So what do you do?
We’re going to be growing our onions from seed indoors! Well at least until they get strong enough to handle the colder temperatures. This will really help because onions won’t start if the temperature is less than 70 degrees F.
So let’s get on to planting those onion seeds.
When To Plant Onion Seed
If you plan on eventually growing your onions outdoors then you should plan on germinating them between January and February. If you don't want to wait, you can think about growing them indoors! Some varieties require different times so just make sure you refer to the seed package to make sure.
Germinating Guide
When you're ready to start germinating the onion seeds, you'll want to dig a hole about a ¼ inch down. You can use your finger if you want. Throw a few seeds in there and cover with soil. Make sure that you don’t push down on the soil too much.
After you're done that, place a piece of plastic over the top of the plastic planter. This will help increase the humidity for your little seedlings.
Try to keep the flat in a place that's above 70°F and get’s plenty of sunlight. A lot of people will place their planter on their window sill.
Once you can see the tops breaking through the soil you can remove the plastic and start watering them. They will be pretty thirsty so make sure you keep the soil moist. Try not to over water them because they're really sensitive.
In order to get really healthy sprouts, you'll need to start using water soluble fertilizer at half strength. You should feed it about every other time you water.
Transplanting Onions
When the blades on the onion get about 5 to 6 inches tall then it’s about ready to start transplanting.
Try to be careful when you handle the plants as they’re still pretty fragile. The best way to remove them from the flat is to turn the planter over and give the bottom a good pat. Then turn it back over again.
The first thing you’ll want to do is separate the seedlings. We’ll be using a six pack planter in order for the onion to get a stronger root system. To pull them apart, gently hold the leaf blades and tug on them. If they feel like they aren’t budging, you might have to carefully remove some dirt. Just try not to break any of the roots.
Once you have your seedlings pulled apart, add a little dirt to the six pack planter and place each sprout in its own cell. By taking this extra step, the sprout will be able to grow a better root zone; this will help the onion grow bigger and stronger.
When you’re done transplanting all of your seedlings, you should cut the leaves back to about 4 inches or so. This will get the onion seedling to spend time developing roots instead of growing the leaf.
Remember to keep watering the soil the same way you did when you were germination. You’ll want to keep it moist but not completely wet. Try to fertilize it every other day at half strength.
Moving Outdoors
You should all ways read the information that came with your seeds as each variety has different planting times. If it’s time and your onions are ready to be planted outdoors, then you’ll first need to prepare all of the soil.
Preparing Soil for Growing Onions
When you want to start preparing your soil, you should start by digging a trench about 4 or 5 inches deep. Once you do that line the trench with a good compost or manure. Doing this is called banding fertilizer. By doing this, you're giving the onions a good source of organic nutrients early on in their life. This is important because this time is the plants most active growing stage.
How to Transplant Onions Outdoors
Once you've prepared your soil it's time to start planting your seedlings in their final home. If you're planting a single row of onions, you should try to keep each one about 4 to 6 inches apart depending on how big the bulb is supposed to grow. If you're growing a smaller variety you can get away with 4 inch spacing. If you plan on growing multiple rows, keep each row about 1 or 2 feet apart. This extra space will come in handy when it's time to pull your weeds.
Place each plant on top of the soil where you're planning on growing them. You should transplant the seedlings about 1/2 an inch down in the soil. After you're done transplanting all of them, give yourself a pat on the back and start watering them.
Watering Schedule
Your onions should be getting around an inch of water per week. You want to make sure the soil is staying somewhat moist. You really want to make sure they're getting plenty of water as the onions are starting to enlarge the bulb.
Feeding Schedule
In order to grow nice big and more importantly delicious tasting bulbs you're going to need to feed them. You need to make sure you're using a fertilizer rich in potassium or the necks will thicken. If this happens then they won't store as well.
Maturing
When the bulb begins to mature, you should remove the soil around it. You want to keep the bulb above the soil. It should look like it's just sitting on the surface. The only thing that needs to be in the soil is the roots. This will help later on when the outside gets that outer papery layer.
Harvesting
Around the end of August you should start seeing that the onions stop growing. There won't be new leafs. The neck will also start to weaken which causes the tops to bend over slightly. If this starts happening don't freak out, you didn't kill them! Just leave them alone and don't mess with them.
When the tops have started falling over a lot and the outer layer develops a tough skin you should tip over the bulb to break the roots. This will help reduce the time it takes to dry out.
Curing
When the weather stays clear for a couple days and the tops have began withering away you should pulling the bulbs up. Place them in a warm and dry place. You want to make sure that the spot you choose won’t be in direct sun and will get plenty of fresh air. Many people will spread the onions over a screen inside their porch. You can also dry them out in your shed or garage as well.
You want to keep it out of the sun because it will bleach it and cause the outer layers to get soft. This will give you higher chances of it going bad. It can take up to 3 weeks to properly cure the onions.
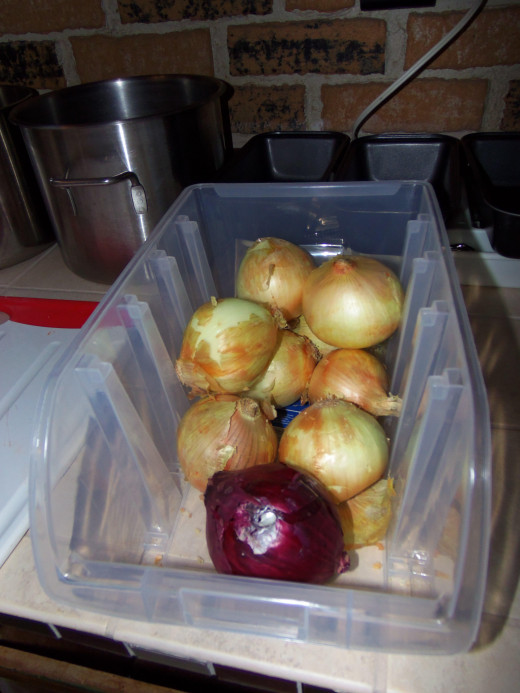
When they're done curing you should cut the top foliage off. Trim it so that there is only 1 or 2 inches of the top left. Then place it in a cool and dry place to store it. The area should have plenty of air. You can either use a more traditional onion bag or box with newspaper between each onion.