Repair A Leaking Faucet

Few things are more annoying than a leaking faucet. The leakingbathroom sink faucet is also a money taker. All that dripping water canadd up to hundreds of gallons over a months time which increases yourwater bill. Most bathroom faucets use a cartridge that distribute thehot and cold water through the faucet. To repair a leaking faucetrequires replacing the cartridge within the faucet. Repairing a leakingfaucet requires just a couple of hand tools and about an hour of yourtime. It is a good idea to remove the old cartridge from the leakingfaucet first, and take it to a home improvement center. This way youcan make sure that you purchase a cartridge that matches the currentone.
To repair your leaking bathroom faucet, you will need the following:
Flat-head screwdriver
Phillips-head screwdriver
Channel lock pliers
Replacement cartridge
Go under the sink and turn off the hot and cold water supply shut-off valves. The valves connect the house plumbing lines to the faucet water supply lines. Turn the valve handle clockwise to shut off the water to the leaking faucet. Go back to the sink and turn the faucet handle onto allow any water remaining in the line to drain out. Turn the faucet handle off when no water is draining through the leaking faucet.

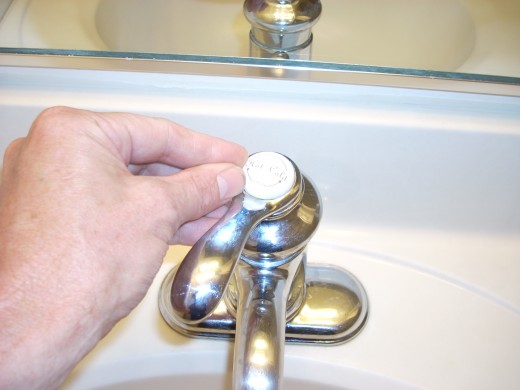
Remove the decorative cover that is hiding the handle securing screw. Insert a flat-head screwdriver between the edge of the cover and the top of the faucet handle. Pry the cover off the handle and set the cover to the side.
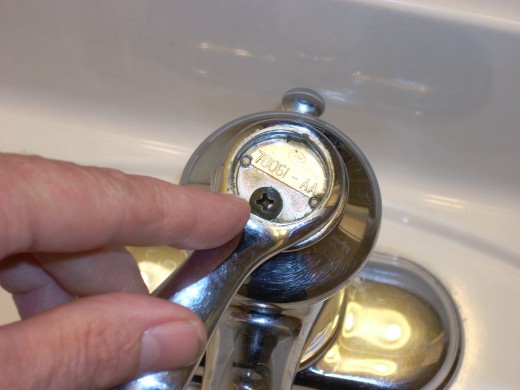
Remove the screw securing the leaking faucet handle to the cartridge with a Phillips-head screwdriver. Turn the screw counterclockwise to remove the screw. Place the screw in a safe location so that you do not lose it. Pull t
Remove the decorative sleeve that covers the cartridge locking nut.
Turn the sleeve counterclockwise and set the sleeve off to the side.
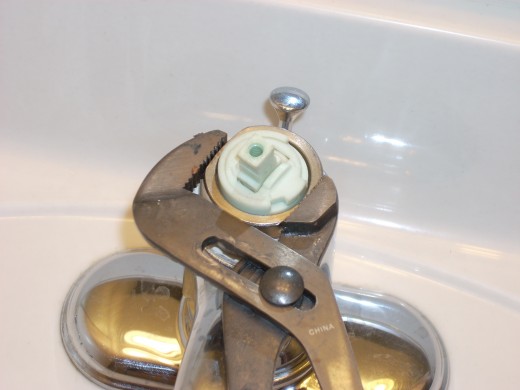
Locate the two flat edges on the cartridge locking nut. Place a pair of
channel lock pliers over the two flat edges, and turn the nut
counterclockwise until you are able to turn the nut by hand. Unthread
the nut by hand and remove the nut from the faucet.
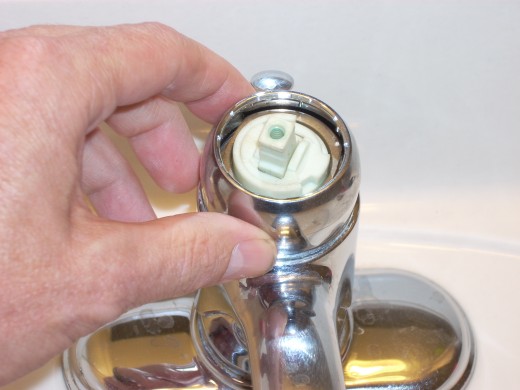
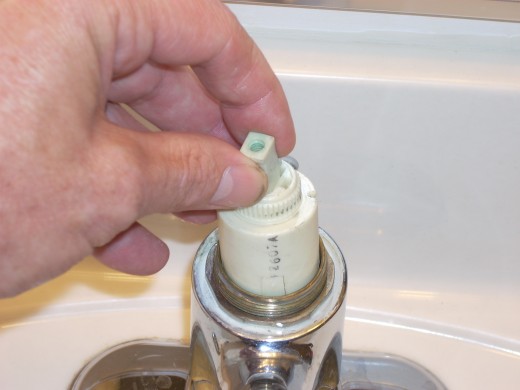
Grasp the end of the cartridge with your fingers, and pull the
cartridge out of the faucet. Look inside the faucet body and remove any
large pieces of sediment, if there is any in the body. These pieces of
sediment can damage the cartridge or the seals in the bottom of the
faucet body.
Take the cartridge to a home improvement center. Look for a cartridge
that matches the size and shape of the current cartridge. The
cartridges are in the household plumbing aisle with the sink drain kits
and other faucet repair parts.
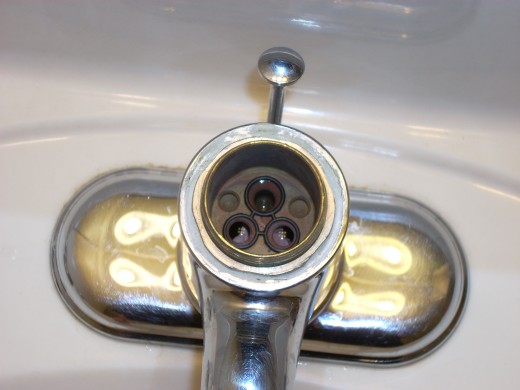
Set the new cartridge into the faucet body. There are two protruding
pins on the bottom of the cartridge that will fit into two grooves in
the faucet body. Thread the cartridge lock nut back over the cartridge and faucet body
until the nut is hand tight. Turn the nut another 3/4 turn with the
channel lock pliers. Thread the decorative sleev over the lock nut
until the sleeve is hand tight.
Position the faucet handle over the cartridge and decorative sleeve.
Secure the faucet handle to the cartridge with the securing screw.
Place the decorative cap back on top of the faucet handle. Turn on the
water supply shut off valves. Turn the handles counterclockwise to turn
on the water supply.
There will be some variations depending upon the model of your faucet. Some cartridges will have a c-clip securing the cartridge to the faucet just like a shower faucet. However the disassembly and assembly is generally the same.


