How to Share a Hard Drive on Your Network

If you have more than one computer on your home or company network, chances are you'll want to share the data that is stored on one computer with the other. In order to do this, you must set up what is called a Network Share on your Windows computers. Sharing a hard drive with the network is risky if you have personal details stored on it, so make sure that before sharing a drive you secure your wireless network or add encryption.
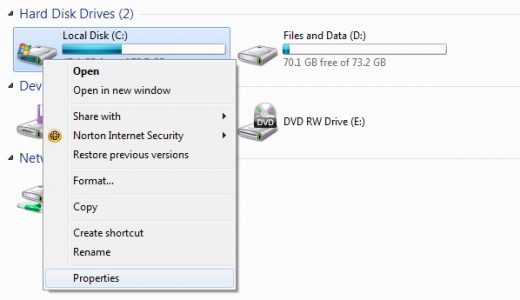
To begin, log into the computer you want to have as the host computer. This is the computer whose data will be shared. Sharing the hard drive of this computer is simple. Open "My Computer," and right click on the drive you wish to share. Then choose "Properties."
Now click on the sharing tab. Click "Advanced Sharing" and then check the box that says "Share this folder."
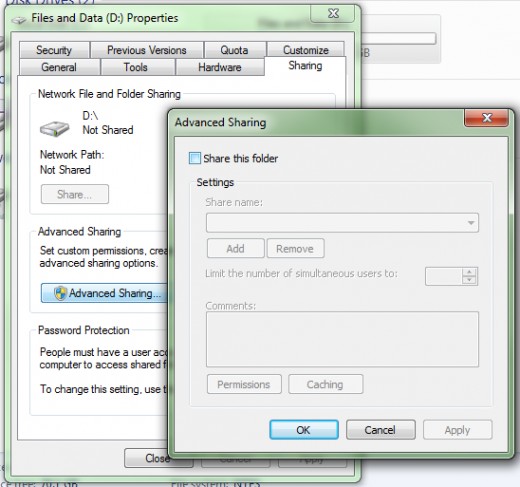
Give the shared drive a name that will show up on the network. For example, call it "C on Kitchen Computer." Then, click Apply and exit the window. Once that is finished, you are done with that computer.
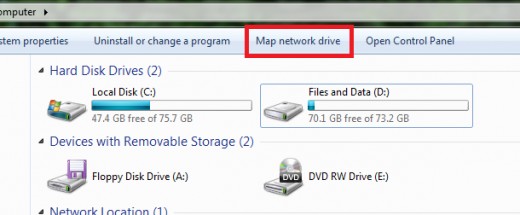
Go to the next computer which is the one you want to use to access the drive you just shared. Log in and go to My Computer. At the top, click "Map Network Drive."
Now, pick a letter that will represent this folder on your computer. It doesn't matter what letter you use, as long as it's available. I will use 'Z' for this example. Next to the word "Folder" click "Browse" in order to find the drive you just shared. From there, open the computer the shared drive is on, then select the folder you shared from earlier. Click OK.
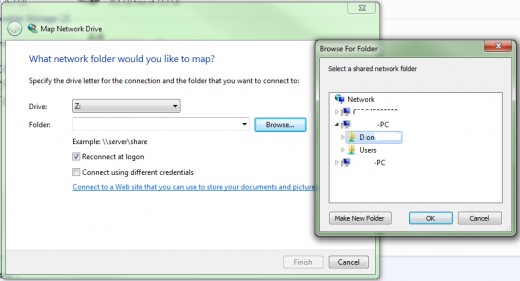
Check the box that says "reconnect at logon" and then click "Finish." With that, you will notice a new shared drive added to your computer. You can save and make changes to it just as if you were using it from the original computer.
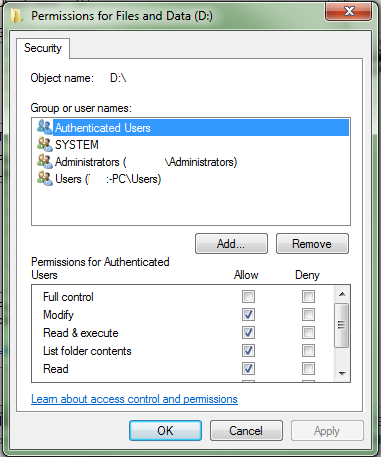
If you run into issues with saving or editing files stored on the drive, you may need to check your permissions. To do that, go back to the first computer, open My Computer, right click the drive you are sharing, choose "Properties," and click the "Security" tab. Then click "Edit" and change all the permissions to "Allow" for everyone. Click OK and you are finished.
You can now work on your other computers as usual. That's it! You successfully shared a network drive.
Tags: sharing your network drives, shared network drives, sharing on a network, how to share a drive, sharing hard drives, shared locations, security for shared drives, how to make drive shared, how to share windows drive, windows drive shares, shares for windows, windows hard drive sharing, sharing a folder in windows, how to share windows folder, how to share a folder on the network, how to share a folder on computer, how to share a folder on the wireless, wired sharing, wireless sharing, wireless drive shares, wireless network shared, shared locations, shared folders on pc


")

