Multiple Signatures for Blogger Team Blogs

This information is meant to be used on the Blogger.com platform. If you have a blog on another platform, it's unlikely this code would work, so please know that before you read any further. Also: This tutorial is not meant to explain how to make the signatures themselves; this will explain how to insert them into your code.Now then; team blogs are fairly popular in the blogging world, especially for bigger blogs that have a lot of info posted on a regular basis. Custom signatures are also popular and there are several blogger tricks for signatures available. Unfortunately, most of them only apply to non-team blogs. I know this, because I searched high and low not that long ago when I was looking for precisely that. I even contacted a few bloggers to see if they could advise me, but they either couldn't, or they didn't reply at all. Determined, I started to tweak the code myself, and I eventually sussed it out. Please note: You will need to access your blogger XML template to do this -- if you're not comfortable with that (as one error can make the entire blog unreadable) you may want to ask someone more technically inclined to help you.
Color Coded
Custom Signature Code
Step one:
Login into your blogger account and access your Blogger Dashboard.
Step two:
Go from Dashboard > Layout > Edit HTML
Step three:
Check the box that says Expand Widget Templates. It will expand the code.
Step four:
Scroll down until you find the code that says <div class='post-header-line-1'/>
Step five:
Scroll a tiny bit more until you find the code that says <div class='post-footer'>
Step six:
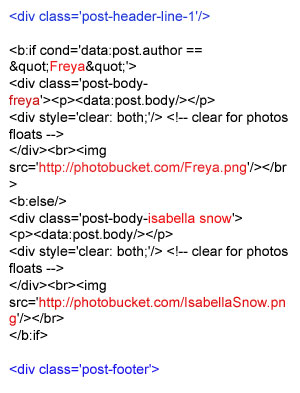
Your new code is going to be pasted in-between these two bits of code, which are highlighted in blue in the photo to the right. The black and red code is what should be pasted between these two bits of code.
Step seven:
The code that is highlighted in red in the image to the right will need to be replaced with your own relevant code. The team member names I have used here are Freya and Isabella Snow.
The Code
<div class='post-header-line-1'/>
<b:if cond='data:post.author == "Freya"'>
<div class='post-body-freya'><p><data:post.body/></p>
<div style='clear: both;'/> <!-- clear for photos floats -->
</div><br><img src='http://photobucket.com/Freya.png'/></br>
<b:else/>
<div class='post-body-isabella snow'>
<p><data:post.body/></p>
<div style='clear: both;'/> <!-- clear for photos floats -->
</div><br><img src='http://photobucket.com/IsabellaSnow.png'/></br>
</b:if>
<div class='post-footer'>
Personalizing Your Code
Step eight:
Replace the names you see here with the names of your team bloggers. Remember you have to do it more than once for one of them.
Step nine:
Replace the images urls with your own image urls. These are the photos of your own custom signature that you've already created, as this tutorial isn't meant to teach you how to make them, but only how to place them into the code.
Step ten:
PREVIEW your template before you save anything! If you like it, go ahead and save it -- and enjoy!
Tips:
- If your signature background colors don't match your blog background, save them as a .png file, which will make the signature background transparent.
- If you don't have a website to host your image files, save them on photobucket: it's free and very easy to use.