Adobe InDesign CS4: How to Make a Template for a Publication

Back in the day a publication was laid out using a method called “paste-up”, utilizing hot wax and blue layout sheets. Now, most businesses use computers and layout software such as Adobe InDesign. This move forward has made publishing much more efficient and enables publishing companies to deliver several projects on a tight deadline. As we all know, there are several different formats and sizes for publications, ranging from a small glove box size booklet to a full broadsheet newspaper. Although most programs have built in presets for a variety of sizes, it is important to know how to create a template from scratch. In this hub, I will be going over how to set up a template for a publication in Adobe InDesign utilizing master pages, paragraph styles while focusing on a modular style half-tab layout.
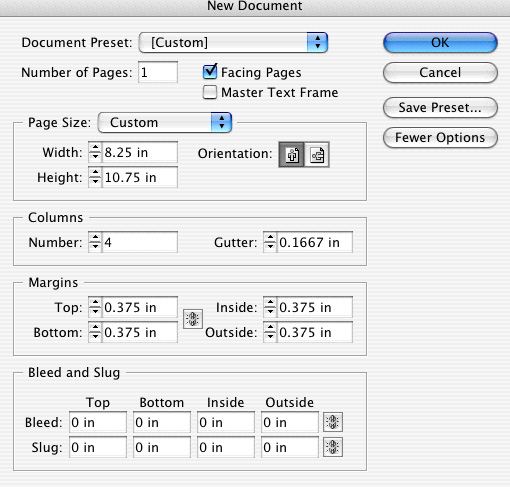
The first thing that you must do before starting the project is to find out what your printer requires for margins and image size. I know that my document size, which is the paper size, will be 8.25 inches wide by 10.75 inches high and my image size will be 7.5 inches wide by 10 inches high. We will be putting a date line at the bottom of each page taking up .25 inch, so the final image size of a full-page advertisement is 7.75 inches wide by 9.75 inches high. Because we are working with modular layout, I have opted to have 4 columns created with a .1667-inch gutter. When you create a new document, your presets should look similar to this:
A dateline is normally where you would place the name of the publication, the publisher name and the page number. This would normally be placed at the bottom of the pages, which is standard, however some choose to place the dateline at the top of the page. It is very simple and quick to be able to create and place a dateline, and have your numbers automatically update as you add pages. You can also find this information as well as other useful tips in Adobe InDesign Tips and Tricks.
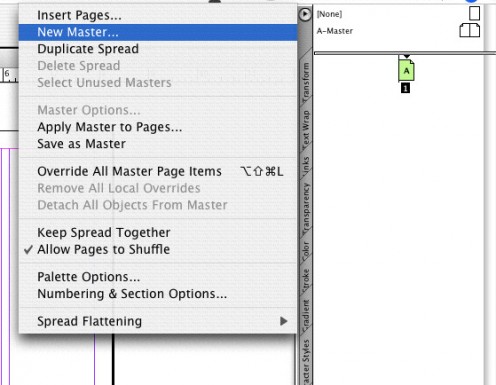
To create master pages, create a new document, go to “window” click to view “pages” and add it to the workspace. From the top triangle that pops out with more options: choose “new master”, and a screen will pop up that looks like the following:
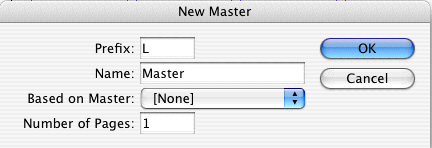
Name your master a relevant name that fits your needs such as “left page” or “right page” and select “ok”. On the page on the pasteboard (which is your master page) add the information that you require on the pages that need the repeating information. From there, click the master page in your “pages” window and drag it onto the pages that require the master.
To set up automatic page numbering for your document, select the master page that you want to put the automatic page numbers on in from your “pages” fly out. Select the page number that you want to replace, or insert the curser where you want the automatic page number to be placed.

Go to “type” -> “Insert special character” -> “Auto Page Number”. This will place the letter you named your master on your master in the place of the page number, which will appear as the correct page numbers in your document. If you have a master for both left pages and right pages, you will need to apply the auto page number option to both masters.
Now, each time that you add a page, delete a page or move a page, the page numbers will stay consistent with your changes. If you have a cover that will be going on page 1, just don’t drag a master page over page 1, and you will not have the dateline show up on the cover page. When you do have a cover page, you primarily want to start the next page as page 2, not page 1. To do this, go to “layout” -> “numbering and section options”. You will be presented with a screen similar to this:
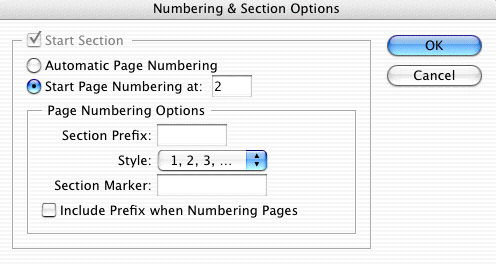
Select “Start page numbering at:” and type “2” because you want the program to start numbering on page 2, beginning with the label page 2.
Another way to make publication layout easier is to have consistency in fonts and headlines. Primarily each publication will stay consistent with a format, and it is helpful to have these as presets so that when you open the document, it will be set up for you each time.
Since you already have your document set up with your master pages and datelines, you can build your paragraph styles within this template. Make a text box anywhere on the document and insert some placeholder text. You can do this by going to “type” -> “insert placeholder text”. This will give you something to format and create your styles.
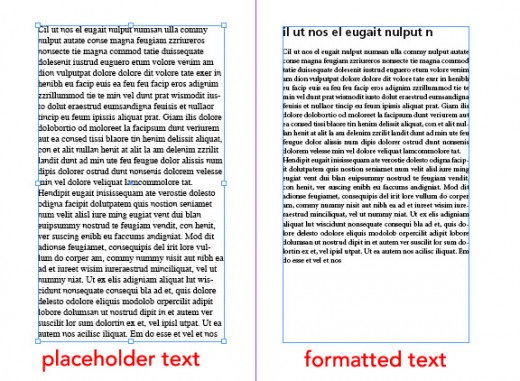
Select a piece of your body copy and go to your “paragraph style” flyout in your workspace. Select at the bottom of the flyout, to create a new paragraph style.
You will notice because you selected the text that you formatted, your Style Settings are already filled out for you. Name your “style name” something relevant such as headline, body copy etc. and continue as needed for your headlines, captions and sub headlines.
When you delete your text box with your placeholder text, your paragraph styles will stay intact. You can then easily select all of your body copy in the publication, click your paragraph style preset, and you can easily change all of your copy to match your selected preset in seconds.
Knowing how to build your own template is important, and opens up several opportunities for design projects and publications. It is important that you do not rely on only the templates supplied by the program, and make sure to check with your printer on their needs before you move forward. Design programs have enabled publishers to be able to produce larger amounts of projects in less time, even under tight deadlines. If you learn the capabilities of your design software, you can be even more efficient without sacrificing quality.
©Copyright 2012 by DAPPLE DESIGNS (MELISSA MILLER)


