Angel Place Cards
How to Make Place Cards
With Christmas just around the corner it's time to think about setting the table for this great family event. There are many Christmas craft ideas around and one is that it can be fun to make individual place cards for each guest. They make a lovely favour for the guests to take home.
This article will show you how to make an angel place card in gold, but they could easily be made in silver, white or in other colours; red or green would be especially suitable.
Assemble the Materials You Will Need
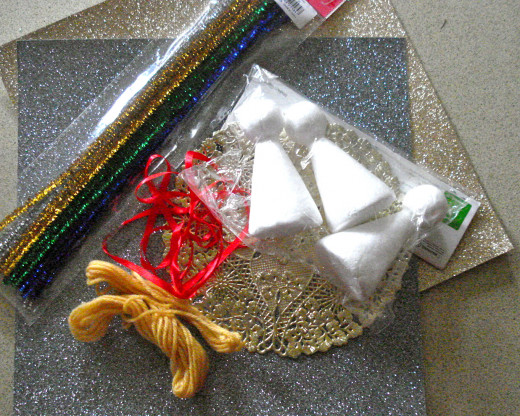
- Firstly, if you have them at hand, assemble the materials you will need for the project. If you don't have everything necessary add them to your shopping list and purchase them before you begin. Craft shops are great places to find all the things you will need.
- A pack of polystyrene 'person' shapes
- Wool for hair
- A pack of paper d'oyleys
- Narrow ribbon
- Pipe-cleaners, sparkly ones are great
- Sheets of card, especially those with glitter
- Plain place cards or business cards
You Will Also Need the Following:
- Felt-tip pens of different colours for drawing the faces and writing the names
- A pencil
- A ruler
- A pair of scissors
- Glue that is suitable for polystyrene
The Angel's Face and Hair
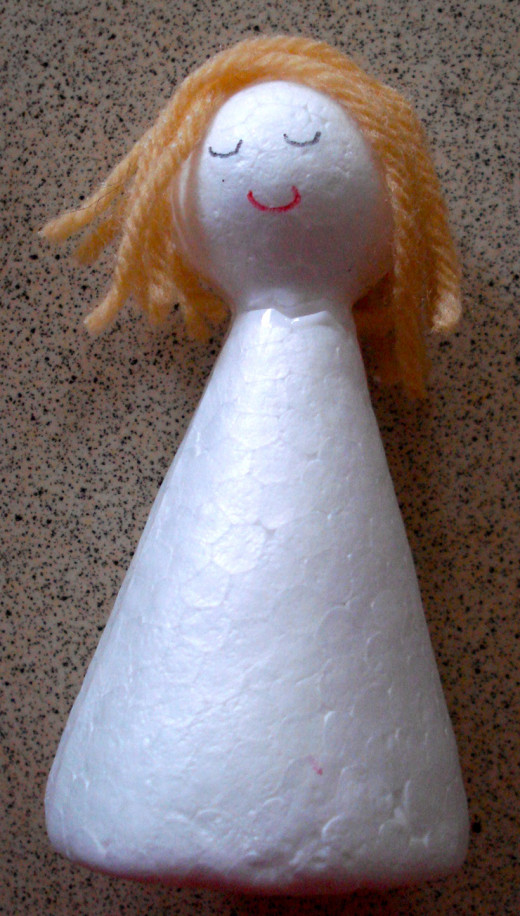
The Face: Begin by drawing the facial features of the angel. You may choose to make them look angelic, or like the person they are are representing. You can have a smile or a mouth that is singing - the shape of an 0 or an O. The eyes can be shy and downcast or open wide. It's your choice.
The Hair: Wind the wool of your colour choice around your hand a few times, depending on whether you want your angel to have long or short hair. Cut the loops at each end and make sure they are even. You may want to tie the hair with ribbon or plait it, or give your angel a fringe. Glue it to the head in the way you want it to be. You may need to hold it there for a moment or two until the glue dries.
How to Make the Angel's Dress
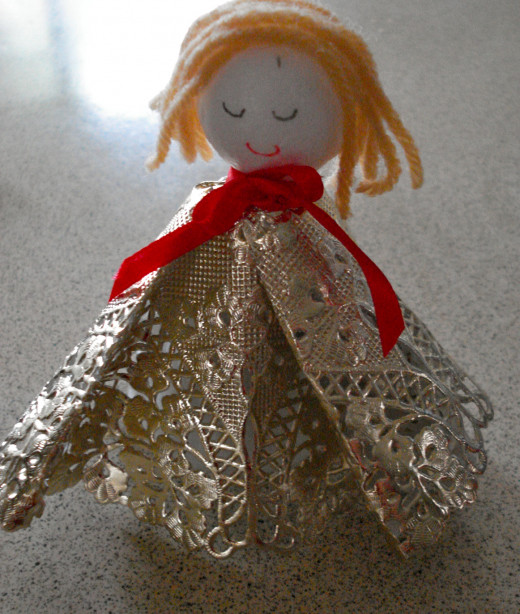
This is where you use the d'oyley shown at the beginning. I chose gold, but it could easily be a silver, white or coloured d'oyley.
- Make a cut straight from the outside of the doyley towards the centre. When you are almost at the centre cut a small circle right around the centre about the same size as the angel's neck.
- Gather the doyley around this and tie it firmly with a narrow ribbon. I chose red, but you may like to use gold or another colour.
- Make a bow under the angel's chin.
- At the back glue the two sides of the cut together and fold the front so it looks like a cape that is hiding the angel's arms. Glue if necessary.
How to Make the Angel Wings
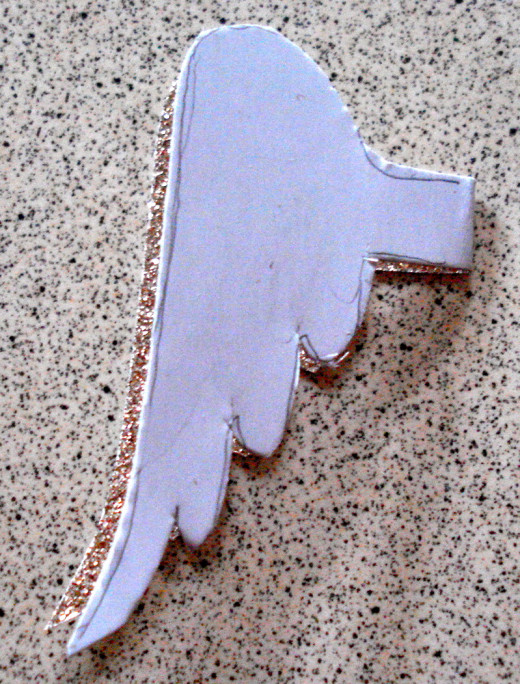
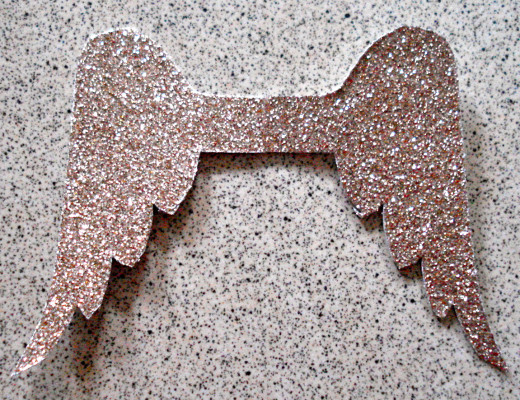
Make Angel Wings
Next, we make the angel's wings.
- Using the card (I used gold glitter card) draw one wing as shown in the image (a) above.
- Fold the card about half an inch from the wing.
- Draw a tab across to the fold.
- Following the drawing of the wing cut out the shape.
- Unfold and you have the double wings with a tab between them (see image (b) above).
- With the glitter side facing the front, glue the tab to the angel's upper back.
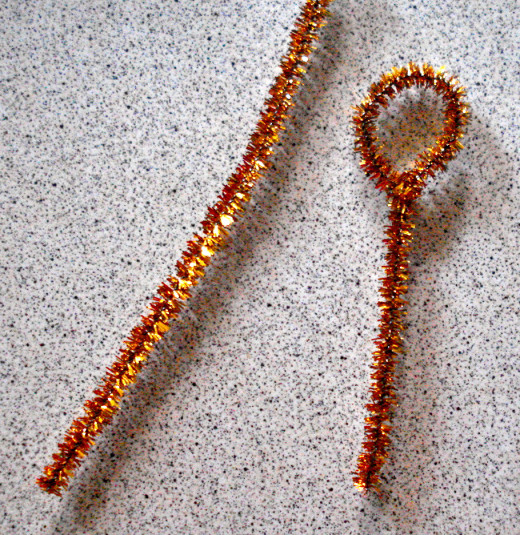
Make the Halo
To make the halo, cut a pipe-cleaner in half. One pipe-cleaner is sufficient for two halos.
- Bend the top of the pipe-cleaner piece around to form a circle.
- Secure the end by bending it around the stem.
- Bend the halo over until it is at right angles to the stem.
- Try it for size. If it is slightly too high, cut off part of the stem.
- Press the end of the stem into the head of the angel. This is much easier than trying to glue it and will keep the halo upright and firm.
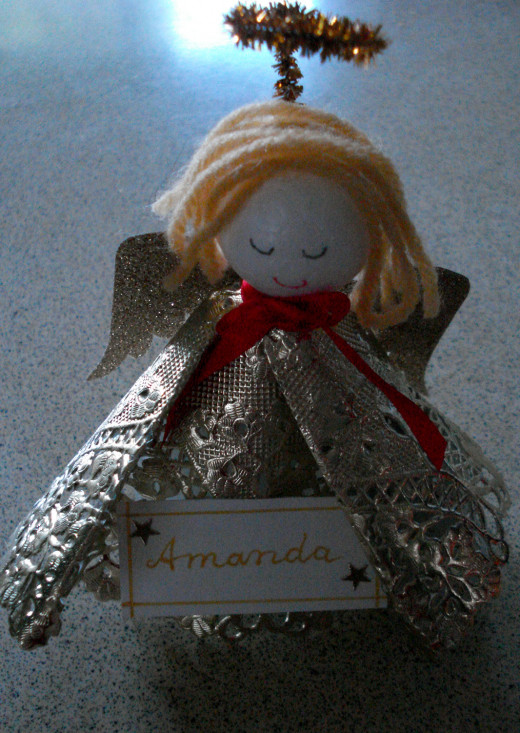
Make Place Cards
For the tiny angel I made here, the blank business card was too big, so I was able to make three from the one card.
- Design the Place Card: It is easiest to make the decorations and write the guest's name before cutting the cards apart. Decide how you will decorate the card. I ruled some edging with a gold ball-point pen, wrote the name in the middle and then added a couple of stars.
- Cut the cards apart.
- Glue to the front of the angel so it appears that she is holding the place card.
If you are doing a number of angels it may be simpler to do them all together, one step at a time.
Now your angel is finished. Doesn't she look cute?
Finally, there is space under the angel's skirt to hide some sweets, nuts or a treat or two to surprise your guests.
Crafts for Children and Adults
- Children's Craft: How to Make Bookends
Instructions are given for making bookends for a children's bedroom using materials found around the home using greeting cards. Creative suggestions are also provided for other materials that could be utilised. - Simple Handmade Greeting Cards
Suggestions for making handmade greeting cards include the use of photographs, purchased stickers and scrap-booking materials, quilling, calligraphy, sketching, drawing and painting your own. You can even make matching gift tags. See the article for - How to do Brass-rubbings
Many cathedrals and churches in Britain have memorial brasses that were set in the stone floors to mark burial places in medieval times. Since Victorian times it has been a popular pastime to make rubbings of these brasses and it can be fun. - Simple Paper Crafts for Kids
Paper crafts are a great way to improve kids' fine motor skills. The equipment is inexpensive and they can have lots of fun paper tearing, folding, cutting, glueing and weaving paper. - Christmas Crafts for Toddlers
This article suggests some easy-to-do, economical ideas that will help to involve toddlers in the exciting lead-up to Christmas. it also provides instructions for these crafts. - How to Make a Tree Invitation
A Pre-Christmas tree-trimming party can be great fun, especially for children. This article gives instructions for making invitation cards for the event and is a good handcraft project for either children or adults. Handmade cards are always a hit.


