- HubPages»
- Arts and Design»
- Crafts & Handiwork»
- Textiles
Beginner Knitting Classes by Lee Tea - Part 2 of 3
Beginner Knitting - Class 2
In our second of three classes in learning how to knit, we learn:
- Finger Knitting, and
- Knit Stitch
If this is your first time joining us, you'll want to start with "Beginner Knitting by Lee Tea: Part 1 of 3."
So let's stretch our fingers with a fun, useful, educational warm up - Finger Knitting!
Knitting With Love
Lesson 4: Finger Knitting
The first time I heard of "finger knitting" was already after I had learned to knit with needles. I thought, "that sounds cool!", cast about 6 stitches on my pointer finger and jumped right in. It wasn't long after I started looping, wrapping, and pulling through that I realized I was out of fingers to knit with! So I decided to go back and read the directions.
Months later after researching "finger knitting" I uncovered a whole new world previously unknown to me of alternative knitting methods - finger crochet, arm knitting, and finger knitting the coziest pieces I've ever seen; from comfy, chunky baby blankets to huge braided infinity scarves. Even after years of knitting, I'm totally hooked (or, unhooked rather) on an exciting new way to knit out loud!
So, here we will learn the first lesson I had in "finger knitting". This method introduces us to pulling loops over other loops, and pulling loops off the needle. It closely resembles crochet.
- Tie a slip knot and slip the loop onto the pointer finger of your left hand.
- Holding the loop in place with your left thumb, wrap the working end of the yarn around your pointer finger, counterclockwise, behind the first loop.
- With the working yarn wrapped around to the bottom of your left pointer finger, hold BOTH loops in place with your left thumb.
- Drop the working yarn from your right hand and use that hand to pull the back loop over the front loop on your pointer finger.
- Continue pulling the loop over your finger and drop it off the end.
Repeat steps 2-5 until you have a beautiful braided chain! In class we finger crochet silky ribbons to tie to the end of a bookmark - an easy, fun, and beautiful keepsake of your first knitting experience!
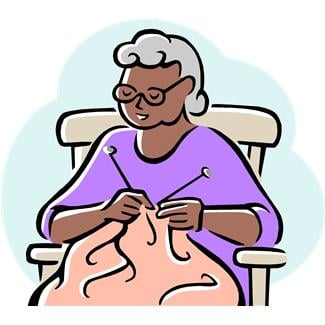
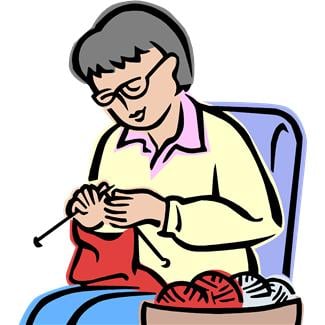
OK I'm Knitting, But I Don't Look Like Cartoon Grandma...
Knitting Cartoon Grandma is a complete work of fiction. While she instantaneously bangs out ugly sweaters and scarves by vibrating the tips of her two needles together, we work over the length of most of our needles, they move, and the ends of the needles actually point DOWNWARD! HA!
So don't be afraid if you don't look like Cartoon Grandma when you knit - if you're doing it right, you won't. We constantly readjust our grip on the needles - as we work each stitch, the stitches will be sliding up and down both needles, and we use our hands, thumbs, and pointer fingers to guide and adjust them as necessary. Adjustments we make include:
- Sliding loops up towards the points of the needles so we can knit them properly.
- Switching between holding one needle in each hand, and holding both needles in one hand (a switch that happens every stitch!)
- Keeping the working yarn untwisted from the needles and free falling from behind the piece before we begin each stitch.
- Keeping the knitted row in a line.
It may seem daunting, but just go for it! We can read and research a new skill forever, but the best way to learn is through actual experience!
Lesson 5: The Knit Stitch
With our warm ups and prior lessons under our belts, it's time to finally learn how to actually knit yarn with needles! It looks LONG and SCARY, but it's really just four moves! Ready to try? Here we go:
- Cast on 10 stitches. Place the needle with the casted-on stitches in your left hand. for the rest of this lesson, we will refer to this needle as the "left hand needle".
- Pick up the empty needle with your right hand. We will call this needle the "right hand needle".
- Slip the point of the right hand needle through the first cast on stitch, the stitch CLOSEST to the point of the left hand needle. Enter the stitch through the bottom of the loop. This is the LEFT HAND side of the loop, the side pointing towards the back of the left hand needle.
- Guide the point of the right hand needle through the bottom of the first cast on stitch and up through the center of this loop.
- Continue sliding the right hand needle up through the loop so that it crosses BEHIND the left hand needle, making and "x" shape.
- Grab both needles in the middle of the "x" shape with your left hand, freeing up your right hand to grab the working end of the yarn. Position the working yarn so that it is falling freely off the back of the "x".
- With the right hand, wrap the working yarn around the point of the right hand needle COUNTERCLOCKWISE. This means the yarn we're wrapping will travel out to the right of the point of the right hand needle, behind it, to the left side, and across the front. The yarn will finally end up lying right alongside the right hand needle, staying behind the left hand needle the entire time.
- With the right hand grab the right hand needle, holding the working yarn coming off the wrap snug and securely with it. Grab the left hand needle with the left hand, placing the palm of the hand over the cast on stitches.
- Pull the point of the right hand needle BACK THROUGH the loop you entered in the beginning, coming out the same way we went in. Keep the wrapped yarn on the point of the needle as you exit the loop - that means we use the point of the right hand needle to pull the wrapped yarn back through the cast on stitch we entered in step 3.
- Finally, remove that casted-on stitch from the left hand needle, dropping the stitch over the point and off then end. Do this by pulling the right hand needle to the right, bringing along with it the casted-on stitch from the left hand needle, until that stitch falls completely off the end.
Congratulations - we've knitted our first stitch! Repeat steps 3-10 for each cast-on stitch that remains on the left hand needle. Once all the stitches have been knitted, switch the needle with all the stitches on it back to the left hand, pick up the empty needle in the right hand, and do it all again!
Knit Stitch - The Video
Poser
Based on a True Story
What IS It?
Is it pretty? Not the first time. In fact, when we first learn knit stitch it is best to leave the yarn on the loose and loopy side so we can maneuver the loops and needles easily. Even after years of knitting my first row or two is usually loose and uneven. That's alright - as your piece of knitted fabric lengthens the size and spacing of the loops will naturally even out.
What it IS after we knit a couple rows is called "Garter Stitch" - a bumpy textured, flexible length of fabric that looks both fun and pretty!
So now you can knit. You knit in garter stitch.
The goal here is not to be perfect - perfection here will make knitting difficult to learn. The goal here is to perform the knit stitch, one time for each and every cast on stitch. It's fun to practice it over and over as we simultaneously create our first knitted piece WHILE we learn!
Knit this practice piece until it measures 4"-6" long. In our third and final "Beginner Knitting" lesson we'll learn how to remove it from the needles so it doesn't become unraveled, and cut it from the skein of yarn to finally complete our first knitted piece - a bookmark! Keep that ribbon you finger knitted at the beginning of this class close by.
Please take one week to master the lessons taught here in Class 1. When you can perform them without looking back to remember how, for several days, you are ready for "Beginner Knitting Classes by Lee Tea: Part 3 of 3".
Happy knitting!

