DIY Crafts: Valentine's Tissue Pompom Garland


Materials
For this craft, here's what you'll need:
- 2-3 packs of tissue paper - they need to have at least 8 sheets per pack. For every 8 sheets of tissue paper, you can make four 6-inch pompoms.
- A needle and thread - you'll need this to string them up, and some for tying around the pompoms.
- Scissors - there's quite a bit of cutting involved.
Also, situate yourself near a trash can. This craft can get a little messy, in that bits of tissue paper you've cut will get everywhere if you don't throw them away right after cutting.

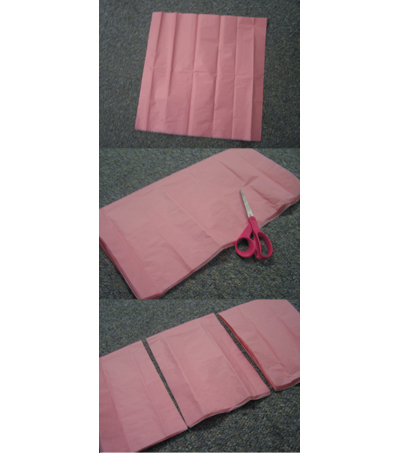
Step 1: Cutting the Sheets
Take 8-10 sheets of tissue paper (leave them stacked on top of each other), and cut them in half longways. Put one half away for later, and cut the other one into thirds.
Each of those thirds will become a pompom! I used eight sheets on my pompoms, but if you use ten, they'll be more full.

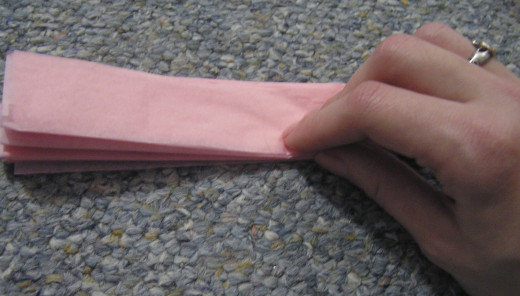
Step 2: Folding
Take one of the shorter ends of your freshly cut stack, and begin to fold it over, 1 inch at a time. Flip the stack over and fold it in the opposite direction. Continue flipping and folding - like a fan!
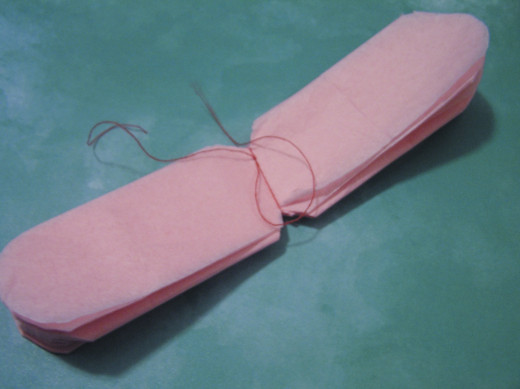
Step 3: More Cutting
Once your stack is all folded up, take some scissors to the midsection. Cut out two v-sections, and tie a string around the middle. If you just want to hang your pompoms, make sure the string is long enough that you can use it once the pompom is fluffed up. If you're making a garland, cut the ends of the string short so they won't be exposed!
Cut out the petal shape that you want on either end - I experimented with a couple different shapes on mine.
Step 4: String 'Em Up
You can either string them now, or once you've fluffed your pompoms out. I did it after. I used a needle and thread to string through them all, and it worked out just fine. I tied loops on both ends so that it could be hung up.
If you're cutting pompoms larger than 6 inches in diameter to string up, I suggest stringing before fluffing. You know, so they don't get all crumpled and stuff.
Get out your needle and thread, and measure about 6 or 7 feet. Tie a loop on one end, and thread your needle with the other. Then, lay out your pompoms in the order you want them. Thread your needle through all of their midsections, and tie a loop on the other end. Now you're ready to fluff!

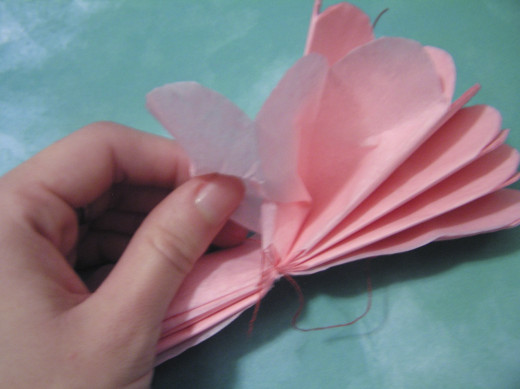
Step 4: Fan it Out
Fan out the ends, by carefully pulling the tissue layers - one at a time. I say this because I ripped several layers... I get a little impatient sometimes. Make sure you keep the ends straight - you don't want them to get crumpled!
Alternate sides when you're fanning the layers out - it's supposed to be a sphere, and it's the best way to keep the sides even. When you're done, fluff it up a bit until it looks full on all sides.
There you have it - a tissue paper pompom garland! These look adorable on garlands, but they also are pretty awesome just hanging by themselves. This looks particularly cool if you make a really big pompom. Keep in mind - the bigger you make them, the more sheets of tissue paper you'll need. You want it to be full!


Looking for More?
If you're interested in more Valentine's décor, or crafts in general, check out my page! You can find articles about incredibly easy Valentine's decorations, as well as more garlands!
If you've got a Valentine gift to wrap, check out these cute ways to wrap presents.