How To Make A Feathered Border in Adobe Photoshop
Quick and Easy Way To Add Life To Pictures

Original Photo

Sometimes a good photo needs a few tweaks to make it a great photo
Sometimes a good photo needs just a few tweaks to make it a great photo and a lot of times people turn to Adobe Photoshop. Although an incredibly powerful photo editing software, there are times that people feel that the more they process a photo the better the outcome. Unfortunately this can mean that they lose the original beauty of their photograph. This tutorial is a quick and simple explanation on how to highlight a focal point using a feathered border. This is a great technique for portraits, creating mystery or emotion or just wanting to crop out other things that don't go well with your photo.
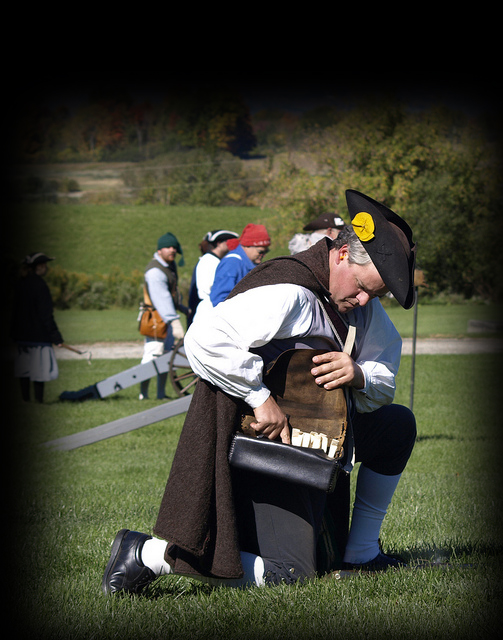
The photo that I am using is from a reenactment event that I shot for the local Chamber of Commerce. Although I liked the original photo I wanted to put more emphasis on the focal point which was the man looking in his powder bag. I chose black for this border, but you can choose any color that suits your picture.
Pay Attention To Your Swatches
Open your photo in Adobe Photoshop (any version).
The color that will be your border is the background color in your swatches. Be sure to choose the background color first. You can see that my background color is set to black, which will be my border color.
In your top toolbar put “25” in the feature box. Once you get used to this you can play around with the amount of feathering; the lower the number the more gentle the feather.
Change the "feather" to 25
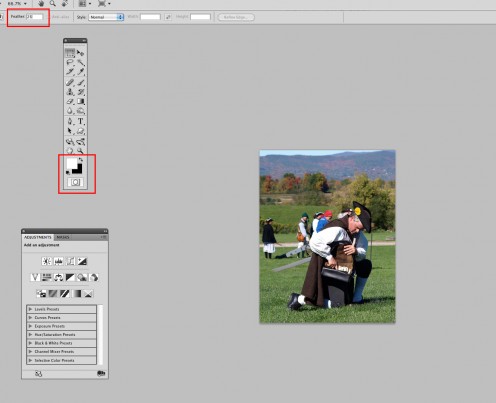
Make your selection around what you want to stay original
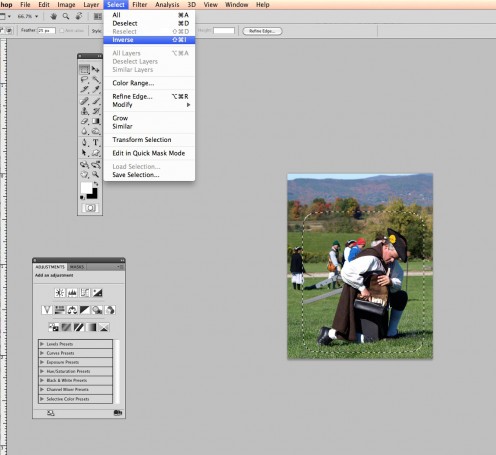
Using your rectangular marquee tool, draw a selection box around the area that you want to keep at its original state. You will see that the edges will be slightly rounded which implies that the feather will show up with this selection.
Select Inverse
Final Outcome
Select the negative space in the photograph
Next choose “select” → “inverse”. This will switch the selection to the negative space that you want to have the border show up. Hit “delete” and you will see that it will be filled with the black color leaving the rest of the photo as the focal point.
Go to “select” → “deselect”. Your photo is now ready to print.
Extra: You can choose white as your border color. When the photo is placed on a white background you will notice instead of a border, the edges have been softened.
You can also use the elliptical marquee tool with the same steps to create a circular feathered border around your focal point.
More Articles About Photography
I took this photo at a local event reenacting the Ethan Allen days in Southern Vermont. Check out this great article that includes tips and tricks for taking photos of history in a modern environment.
Another way to take a photo that is good and make it great is by highlighting specific colors. Check out this great article on how to pull out specific colors in a photograph while leaving the rest black and white.
Sometimes photographers have a lot of photos to sift through and process. Photoshop actions can come in handy when processing a batch of images. This article teaches you how to make your own Adobe Photoshop action in just minutes.

