- HubPages»
- Arts and Design»
- Photography»
- Photography Instruction & How-Tos
How to Master Aperture (F-Stop) and Take Photos Like a Pro
So what the heck is the Aperture and F-Stop exactly?
The Aperture is the diameter of the hole that allows light to enter the lens while the F-Stop is the number that represents the settings of the camera.
Each time you go out and take photos, you must take out a pen and piece of paper to do these calculations. Copy the equation below.
Focal Length divided by Aperture = F-Stop
Okay, while that is the equation to determine the F-Stop, you don’t need to do any sort of calculations.
Lucky for us, today’s DSLRs are quite smart and can do these calculations in milliseconds.
It’s important to understand what is happening when adjusting the F-Stop, but it’s not necessary to be a great photographer!
It’s really not that hard!
Trust Me!
After you read this, you’ll understand exactly how easy the Aperture is and how to use your camera’s F-Stop to your advantage.
First, we need to locate the F-Stop adjustment on the camera. You can either google it or look in that huge user manual that comes with the camera (if you haven’t thrown it out!).
For me, it is located here :
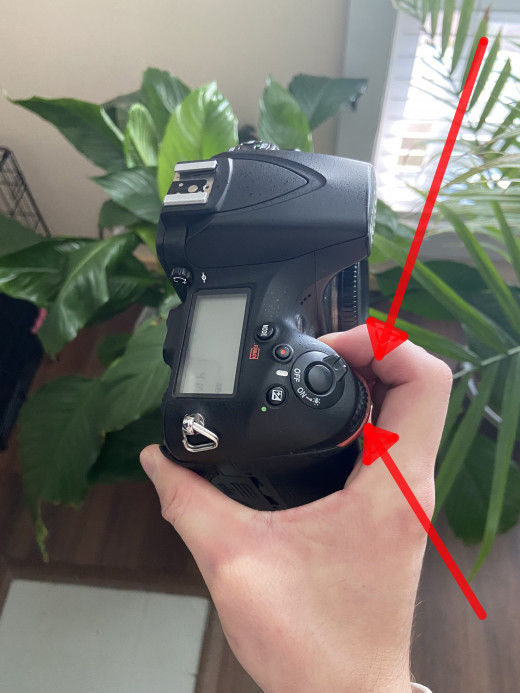
It’s this little turning thing on the front of the camera.
On some of my older cameras, you have to hold down a button and then turn the dial to adjust the F-Stop.
Wherever it is, locate it then jump to the next step!
Next Step
Hopefully, you figured out how to adjust the F-Stop.
Take a few minutes to mess around with it. Notice how when you slide it one way, the number goes up but stops around 30. Then when you adjust it the other way, it stops somewhere between 1.8 and 5 (this amount depends on the lens you have).
Now, zoom in on the lens and watch what happens to the F-Stop.
The lens I have on my camera is F/3.5–4.5.
This might be gibberish but hang with me and it will be as clear as the glass you have on your camera!
So my lens is F/3.5 which means it only has the capability of going down to 3.5 when I dial the F-Stop down a low as it can go. The 4.5 means when the camera is all the way zoomed in, it can only go down to 4.5! So the F stands for Focal Length and the 3.5–4.5 means the lowest amount the lens is capable of from the least zoomed in to the most it can zoom in.
Did I lose you there?
Hopefully not!
Here is a photo of what I’m talking about for all you visual learners out there :
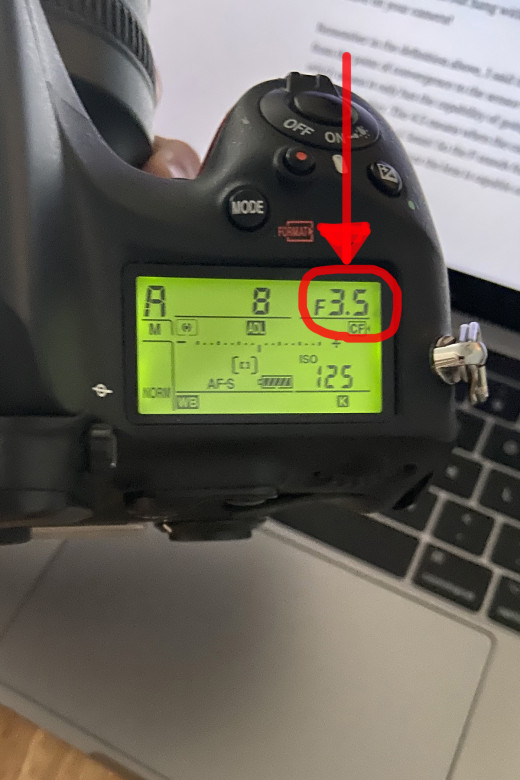
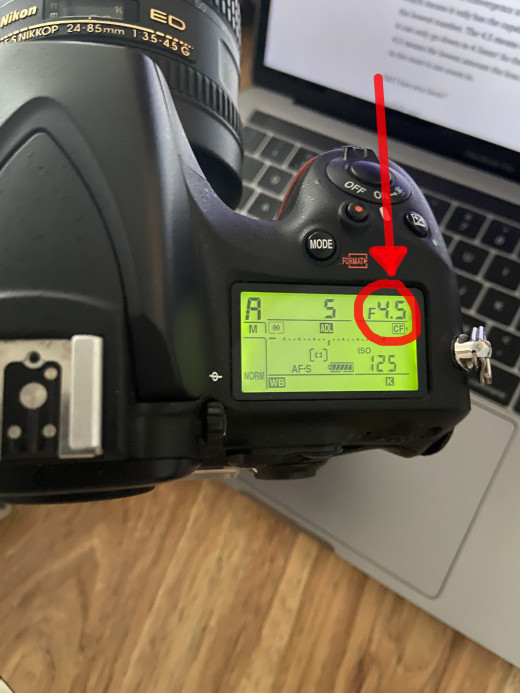
So what is happening here?
When I have the lens zoomed all the way out, the F-Stop is 3.5 but when I zoom in, it goes up to 4.5 without me doing anything.
What is the F-Stop exactly and why do the numbers fluctuate?
The F-Stop is referring to the amount of light coming through the lens, and as I said above, the aperture is the diameter of the hole that is allowing light to hit the sensor. So when I open the lens up, the F-Stop number lowers. When I close the lens and let less light in, the F-Stop number rises.
High F-Stop = Less Light Hitting the Sensor
Lower F-Stop = More Light Hitting the Sensor
This is going to take a while to get used to but hang with me for a little longer and it will click!
(No pun intended…)
How does this affect the outcome of the photos and how can we use this to our advantage?
Let me show you some examples of photos with different F-Stops and we’ll see if you notice anything first.
Here are examples with F/4.5 and F/16 :

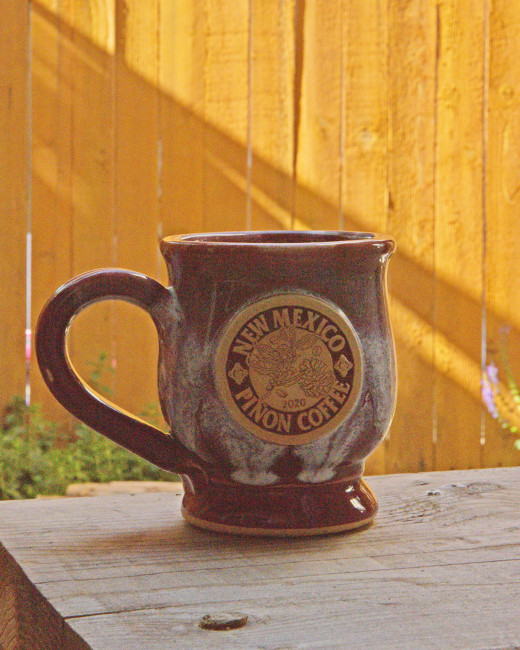
The lighting was bad in these shots but we aren’t focussing on the quality right now.
Do you notice anything going on with the background?
On the left (F/4.5) you have a really shallow depth of field while on the right (F/16) the foreground and background have quite a bit of detail!
Lower F-Stop = Shallow Depth of Field
High F-Stop = Deep Depth of Field
The shallow depth of field is known as Bokeh.
The effect on the left (lower F-Stop) is very popular with portrait photography, while the effect on the right (higher F-Stop) is very popular with the landscape style photos.
Here are some examples of photos with the depth of field at the bottom so you can see the effects.
Examples
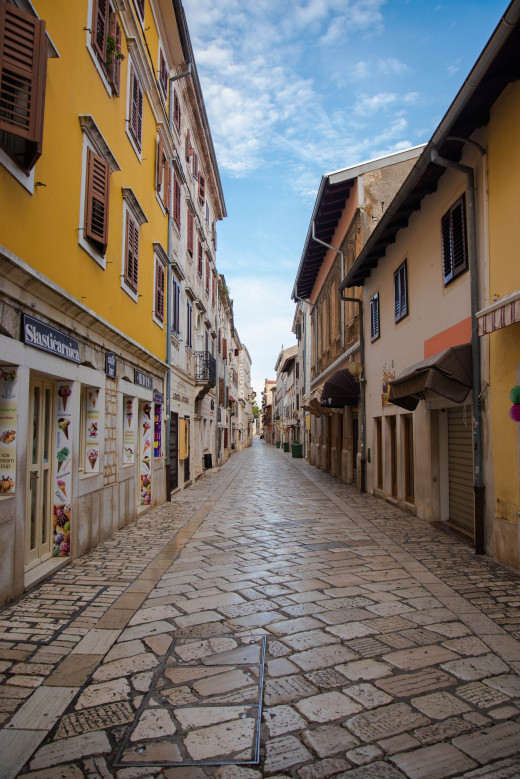

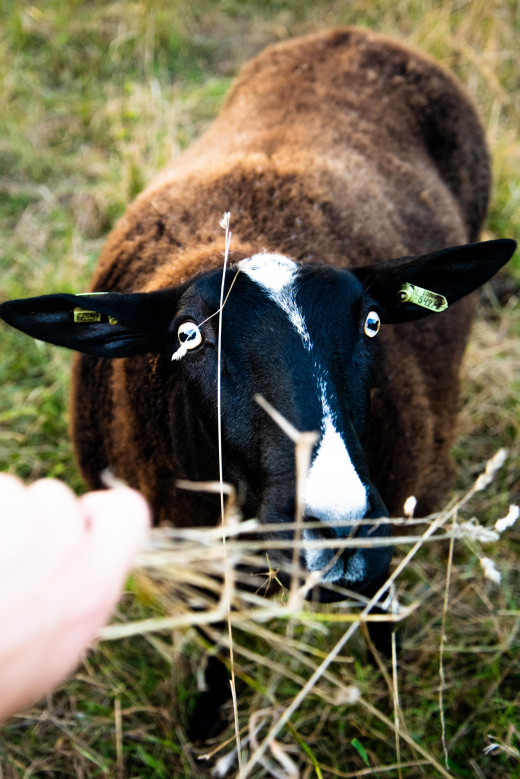
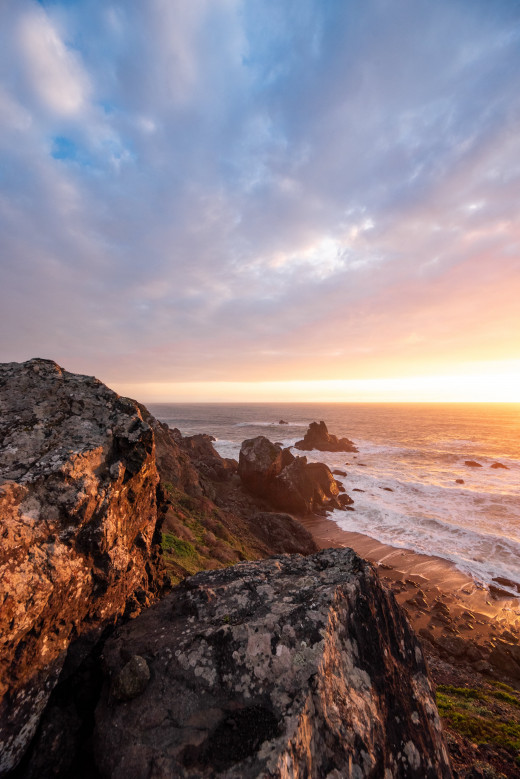

Conclusion
So what next?
Well, that’s the basics for F-Stop and how to use it.
Next, you need to practice. Go take a coffee mug or ask a friend or family if you can take their portraits. This skill will only come with time and hands-on use.
If you want to become a better photographer, then it’s time you learn to use manual mode and steer away from automatic. I still use automatic mode to this day if I am just messing around and having fun. Being able to shoot manual mode will greatly increase your skill as a photographer and will also produce better photos.
You learned that :
- F-Stop is related to the amount of light that enters the lens and hits the sensor.
- High F-Stop = Large Depth of Field
- Low F-Stop = Shallow Depth of Field
That’s really is all there is to it folks!


