- HubPages»
- Arts and Design»
- Crafts & Handiwork»
- Paper Creations
How To Create a 3D Origami Base

what is Origami Base?
Origami base is a very important step in making 3D Origami models. Most 3D origami models consist of at least one base, base gives strength and solidity to the model.
The size of the base is determined by the number of triangle pieces in a row, almost all 3D origami bases are created in the same manner, the only difference is the number of triangle pieces in a row. Bigger models would require more triangular units.
In this hub, I have created a step-by-step instruction with the pictures along with a video to show you how 3D origami base is created. This is the foundation in creating and designing almost any model you like. If you need help on how to make triangular pieces for 3D Origami. Click here to watch the video.
Please like, comment, and subscribe to my channel for more videos.
How to Create Base for 3D origami
Step By Step Instruction
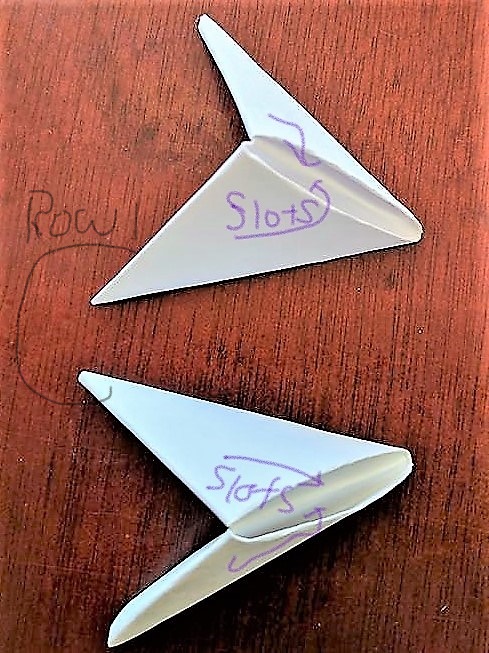
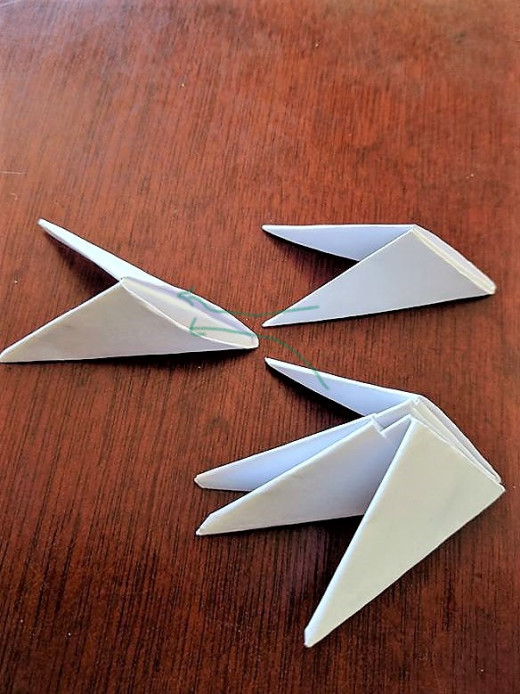
Start out by placing two triangle units as shown in the image.
Slots or pockets are used to connect triangle pieces together.
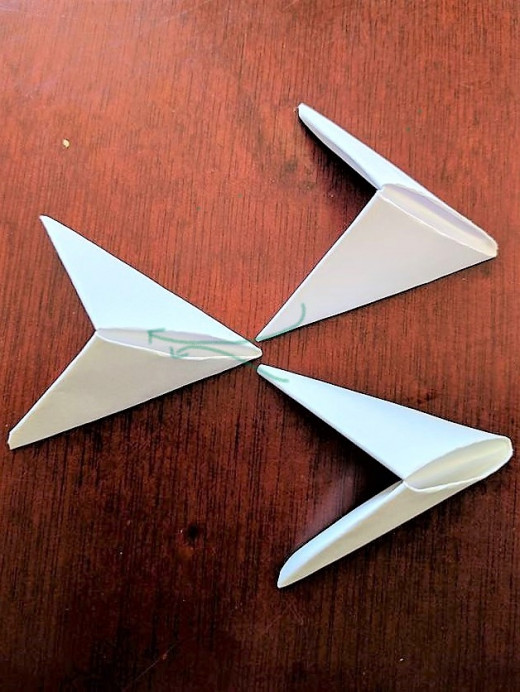
Place row 2 triangle units in the middle of the row 1 triangle units.
Now insert the two row 1 triangle unit legs into the row 2 unit pockets as shown by the green arrows in the image below.
The picture below shows what it looks like after row 1 triangle units are connected to row 2 triangle unit.
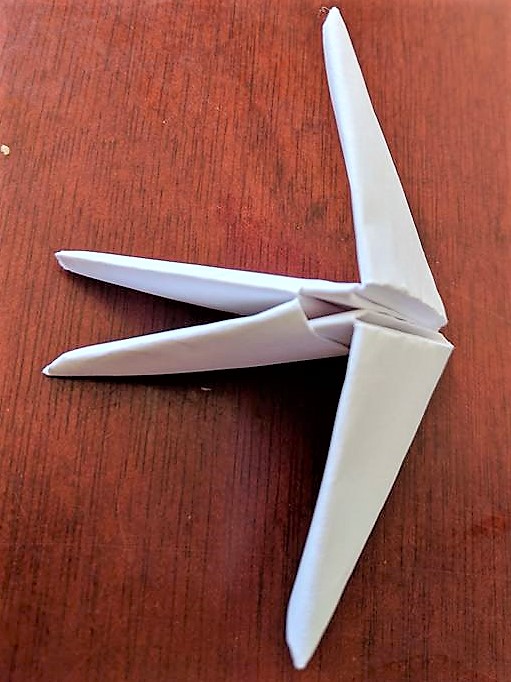
Continue adding triangle units to row 1 by following the green arrows as shown in the picture.
The image below shows what it looks like after another row 1 triangle units are connected to row 2 triangle unit.
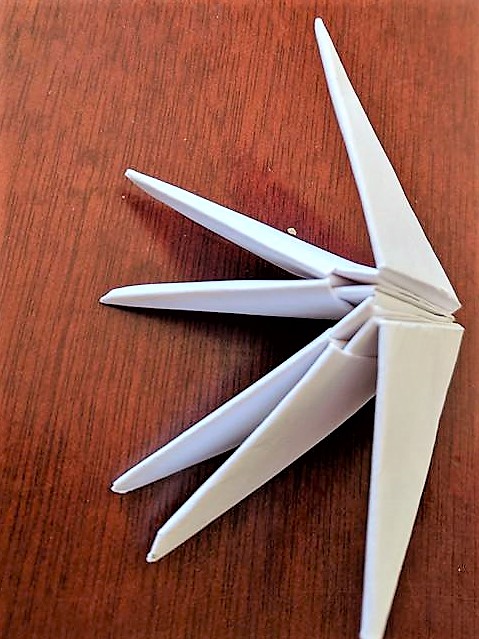
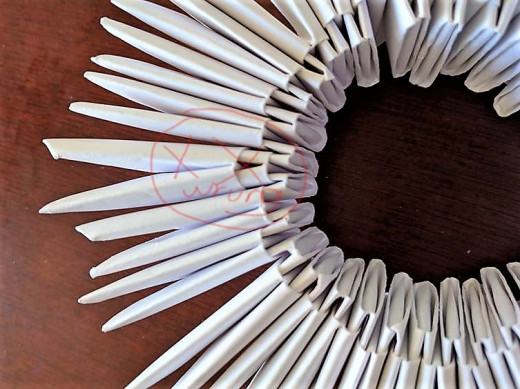
Continue adding more triangle units to row 1. After a while, the structure will start to curve around.
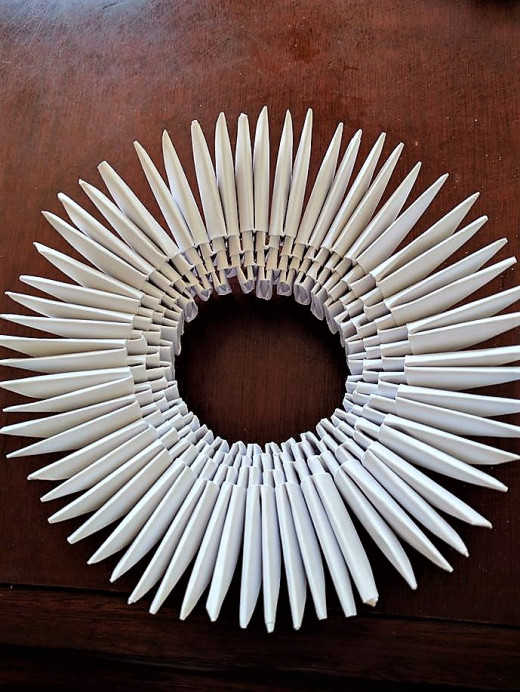
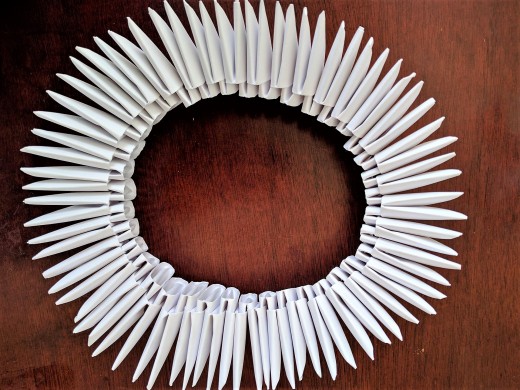
I have 38 triangle units in row 1 connected to row 2.
The number of units to add depend on the complexity level and the side of the model. The smaller models would require less triangle units, and bigger models would require more units.
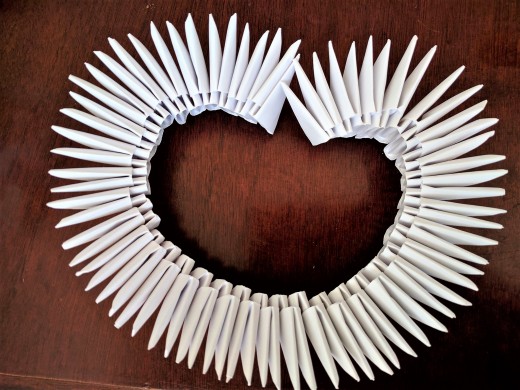
When you have connected 38 row 1 units to row 2 units, use one more triangle unit to connect the structure into a ring shape just as shown in the picture.
This image shows what it looks like when row 1 and row 2 are complete.
When adding triangle units, make sure to connect the tabs or legs of 2 different triangle units into the pockets of one new unit just like in the first image.
It is incorrect to insert a new triangle unit into the tabs or legs of one existing triangle unit.
First image is the correct way to connect, second image is the wrong way to connect.

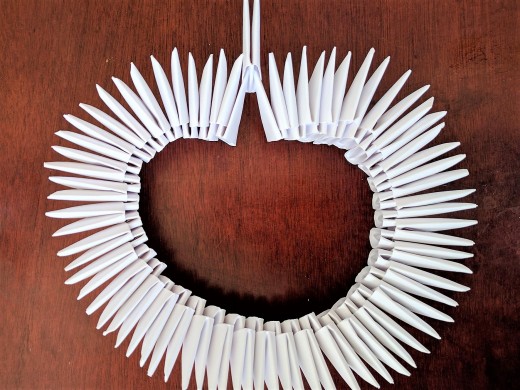
Once you finish row 2, continue to add more triangle units to row 3 all the way around, adding 38 triangle units to each row.
Repeat the same process when adding more rows.