- HubPages»
- Arts and Design»
- Crafts & Handiwork»
- Paper Creations
How to make a German Paper Star
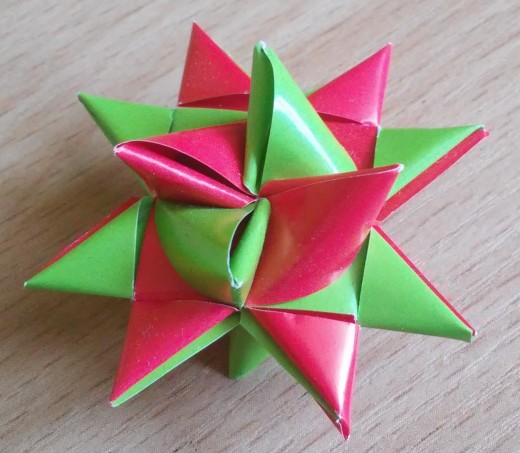
Christmas time coming, so we need....
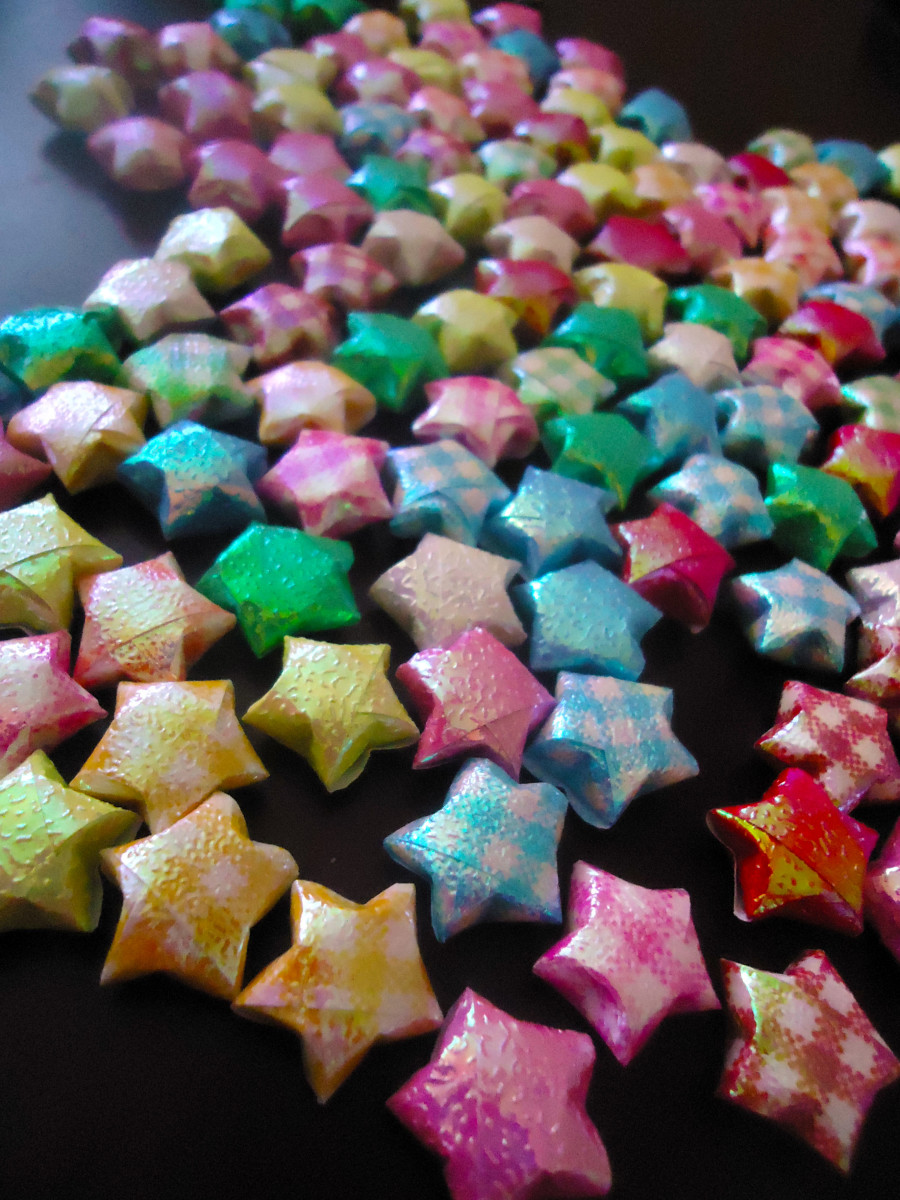
Making a paper star is rather an easy task, but could seem complicated at first glance. But the result is nearly always rewarding. You can buy ready stars in a shop but also have a lot of fun to make it yourself, especially if you do with other members of your family for example children.
Now we could go ahead with stars. All we need is:
- 4 strips of paper - 1 cm x 30 cm - what is important, the width must be the same! There are ready packs of strips in shops, so you can buy it and don't worry about width. Of course, strips can be smaller or bigger than this size, but this is the most optimal for beginners.
- scissors
Of course, later you can decorate stars, for example, add glitter or sew a threads' loop to hang it on Christmas tree or wherever you want.
You can use one, two or four different colours in one star (three looks odd). Making your first star better use four colours, because you will see better where you are and what should do next.
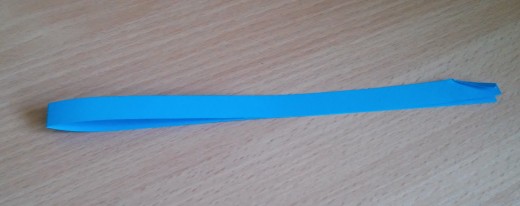
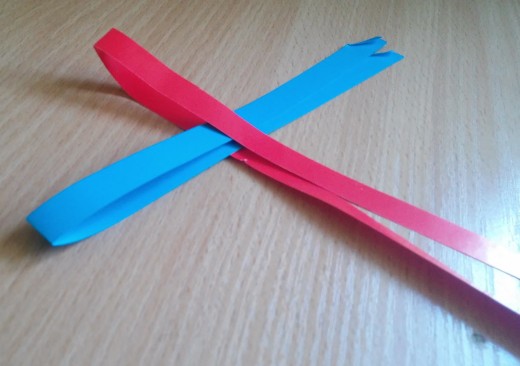
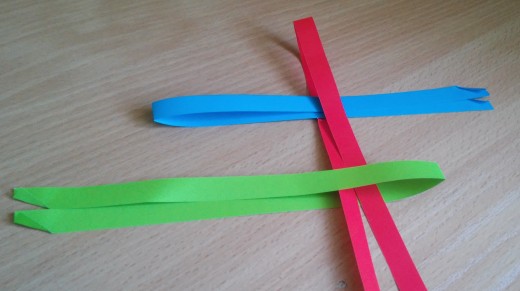
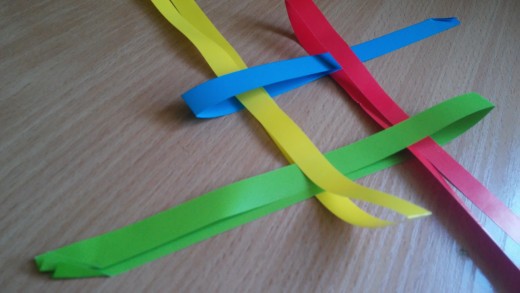
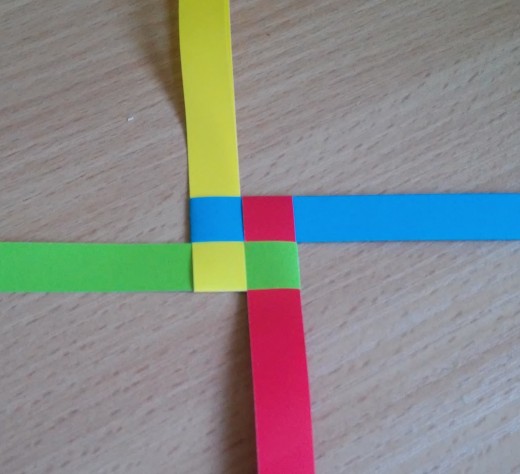
First step - chessboard part one
- Fold all four stripes in half. More or less half, endings go to garbage at the end. Remember only about the same width each half.
- Endings cut or fold diagonally - it is an easier way to working later.
Now you have stripes with, let me call it, double ending (where really endings are) and middle ending (where is the centre of the strip).
- Take the first strip (blue) and lay it on the table horizontally, the middle ending is on the left.
- Take the second strip (red) and lay it vertically, the middle ending is on top and first strip (blue) betwixt the second one (blue).
- Take the third one (green) and lay it horizontally, but the middle ending is on the right and the second stripe (red) is betwixt the third (green).
- Take the last strip (yellow) and lay it vertically, the middle ending is at the bottom. The third strip's (green) double ending is inside the fourth strip's (yellow) middle ending. The last strip's (yellow) double ending is inside the first strip's (blue) middle ending.
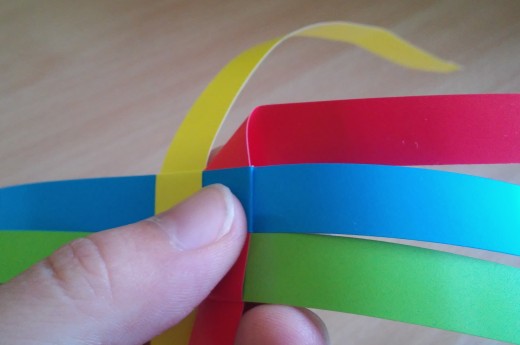
- Pull carefully all double endings.
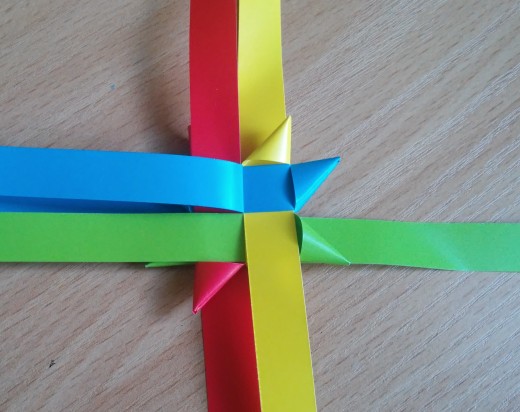
I hope that photos are helpful :) Every strip should have a double ending inside another strip next to a middle ending. And double ending should go in four different directions.
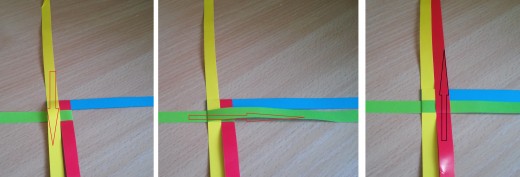
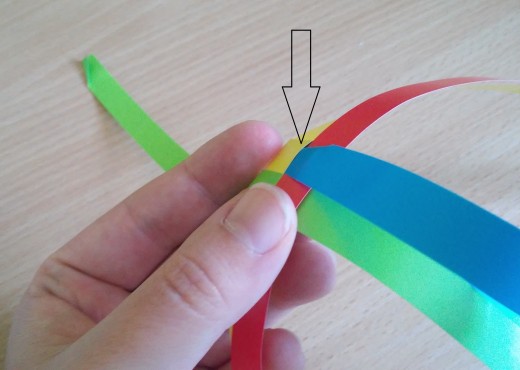
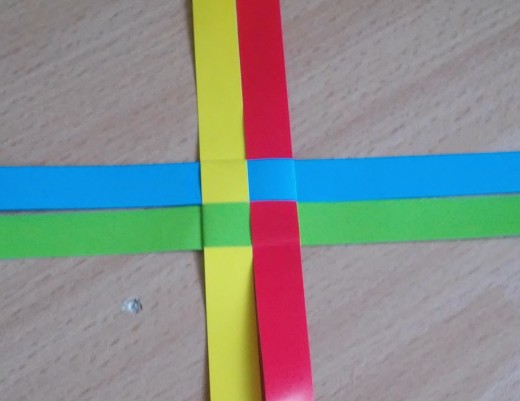
Second step - chessboard part two
Take one strip from each pair and lay it on the second side. Start with one and go anticlockwise. The last strip you should put in the "pocket" made of the first strip.
!!! warning !!! If you do this clockwise you will not have the "pocket".
Now you have a base to make the star - 8 endings and little chessboard in the middle.
Third step - triangles
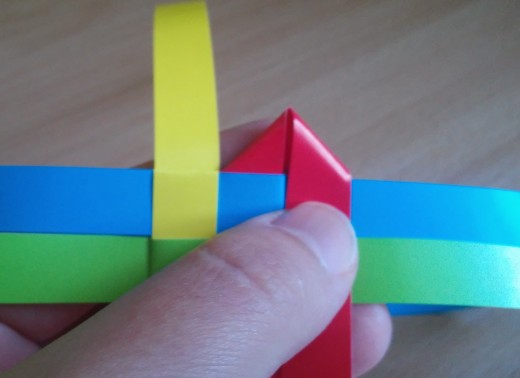
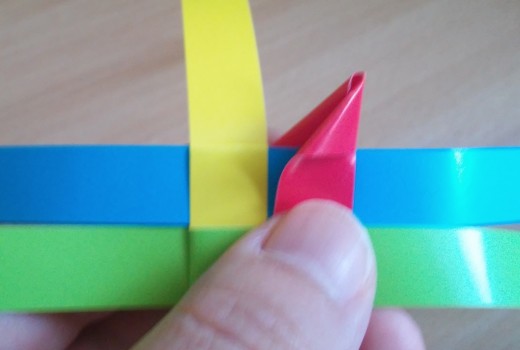
- Take strip (top right) and fold it diagonally. The strip's ending should be on the right.
- Fold it diagonally again, this time, the ending should go down but next to chessboard.
- Fold it in half, the ending still goes down but above the chessboard.
- Deflect little this triangle and put the ending to the "pocket".
- Rotate whole 90 degrees right
- Do the same with next 3 endings.
- Turn on the other side.
- Do the same with next 4 endings.

Fourth step - horns
Now it is the difficult part.
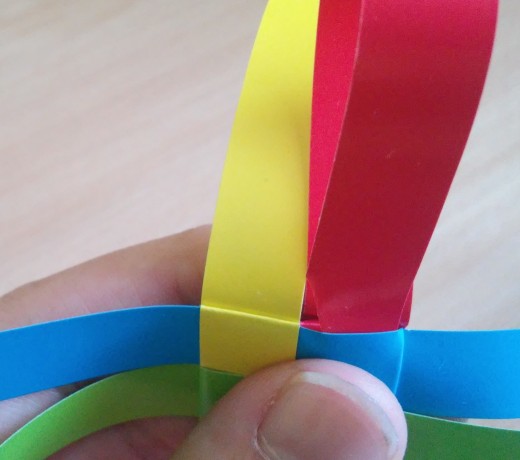
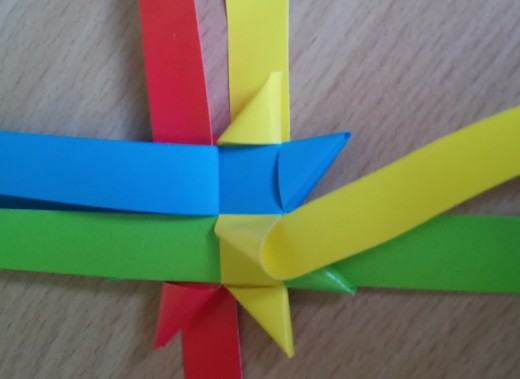
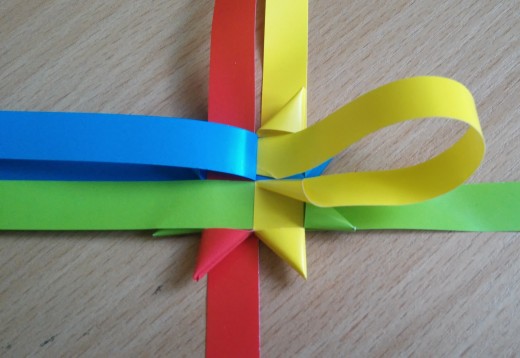
- Deflect one strip (right).
- Take the lower strip and make the little horn.
- Look carefully at the photo! and twist strip a little.
- Then put the ending in the "pocket" under strip which was deflected.
- Pull the ending until your horn looks nice - not too much, but tightly.
- Rotate whole 90 degrees left
- Do rest of horns.
- Do the same on another side.

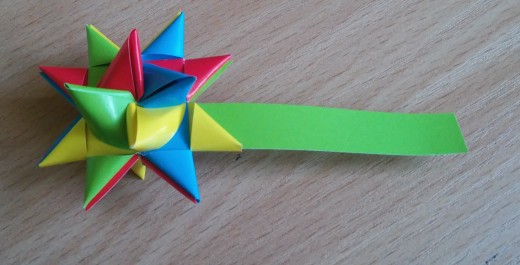
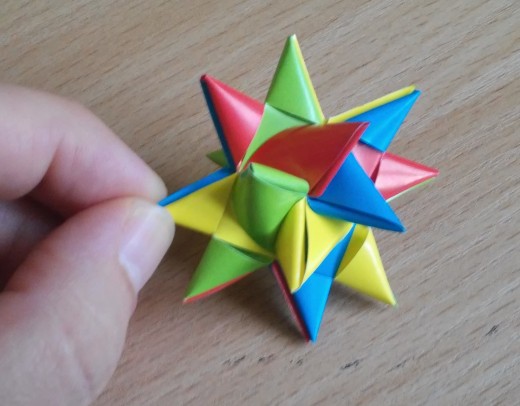
Finish
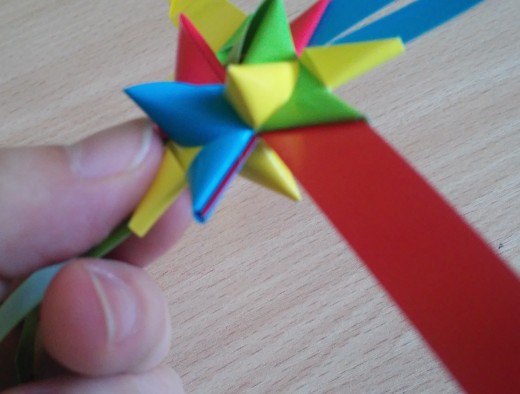
Great, congratulation, you made your first star!
Now your masterpiece needs only a few cuts. If you will use the star as name's note, better leave one string to write a name, but cut only ending which you folded/cut at the beginning.
If you wish, you can decorate the star or sew a threads' loop.
And don't worry that your first star is not as beautiful as you wish - after making few star you will have enough skill. After more practice, you should stop folded triangles in the third step very much, so triangles will be more spatial.
What will you do with paper stars?
Friedrich Fröbel - the inventor of paper star
And at the end few words about the inventor of this star.
Friedrich Fröbel was German pedagogue, lived at the turn of the XVIII and XIX century. He was a creator new trends in small children pedagogy. He noticed that kids have their own needs and capabilities. They need special attention and proper stimulants to grow up and develop. His main tools were entertainment and gifts.
He was a great fan of origami. A folding of a piece of paper teaches patience, accuracy and geometry. It also helps with reading, writing and memory, develops an imagination and hands coordination. And one day he invites how to make a paper star.

