How To Make A Book Marker, A Craft Project Using Recycle

A Recycled Book Marker
This project is fun. The supplies are not expensive and can probably be found for free. The finished piece makes a great gift for a favorite book worm and the personal gratification is worth the 30 minutes spent making a Recycled Book Marker.
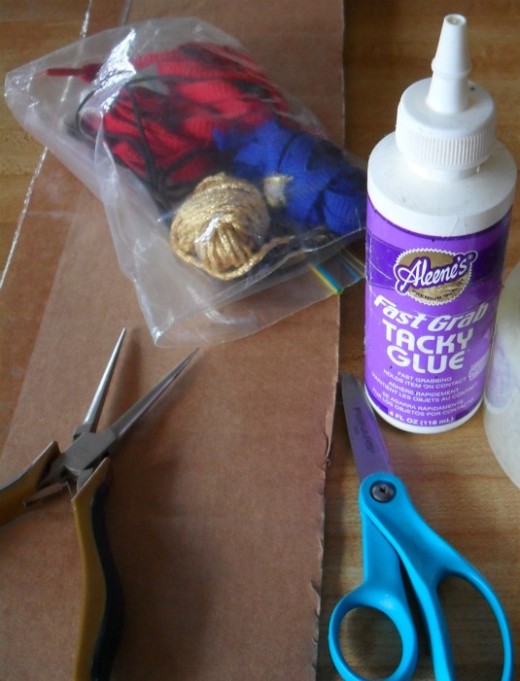
Materials and Tools
- Cardboard
- Cord, yarn, thread, or string
- White Glue
- Scissors
- Needle Nosed Pliers
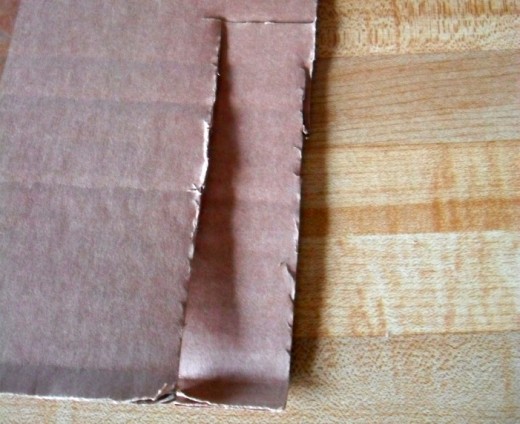


Cut Cardboard To Size
Make the book marker a nice size, not too big, not too small. You can decide. This one in the photo was cut to 1" wide and 5" long. This made a good sturdy book marker and was an easy size to work with.
- NOTE:Cut against the grain of the corrugation. You will be using the holes along the edge of the cardboard to secure the end pieces when you start attaching your material.
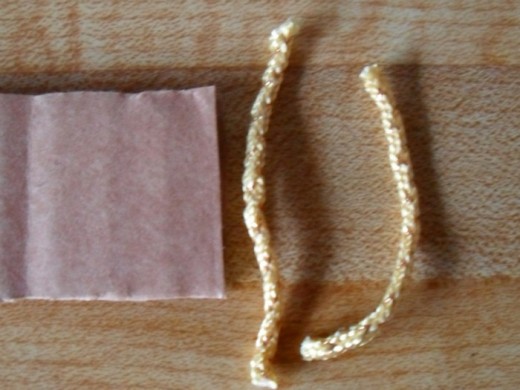
Select the cord or threading material you are going to use to decorate the piece with. This can be done with a mix of different kinds of yarn, thread or string. I used some gold cord I found in my stash of "saves". If you can use something left over from another project that would be great.
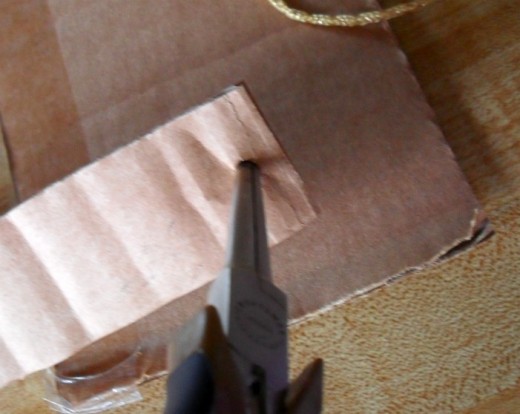
Getting Started
Use a punch to make a hole about 1/4" from one end of the cut cardboard. This will allow a place to attach a tag thread when the book marker is finished. I did not have a punch handy so I poked the hole in with the needle nosed pliers. It works fine so you can do the same if you would like.
Ends of The Book Marker First
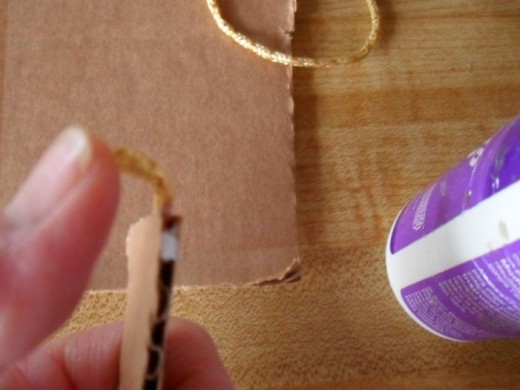
Cut two lengths of your material twice as long as the width of the cardboard base. This will be used to cover both ends. Add a line of glue across the ends and in the last hole of the corrugation in the card board. Use the tip of the needle nosed pliers to stuff one end of the material in to the hole of the corrugation and then lay the material across the line of glue. Finish it by stuffing the other end into the other side of the cardboard corrugation. This will hold the material in place securely after the glue has dried.
Glue and Wrap Your Material
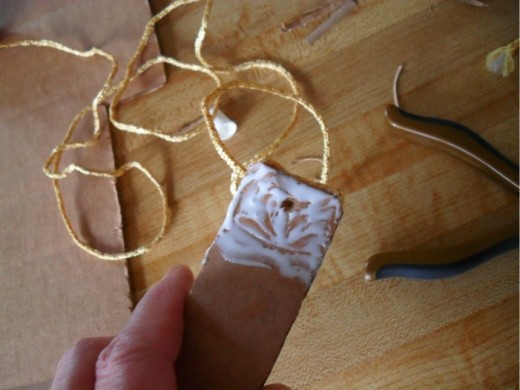
Start at the end where you poked the hole through the cardboard. This will be the top of the marker. As you wrap the material you will cover the hole. For later reference count how many wraps it takes to cover the hole. Later you will have to go back and locate the hole to finish the piece. Try to remember just about where it is located.
Add glue to both sides of the cardboard and along the edges where the holes are. It is best to do a section of glue at a time so you have clean cardboard to hold as you work. Stuff the end of the material in the next hole just under the hole you stuffed with the end piece.
Start wrapping the material around pulling in tight enough to lay nice and flat. Do not pull too tight because you do not want to pull your material out of the starting hole. Wrap up to where your glue ends and carefully adjust the material so it lays close, tight and even. It will slide a little with the wet glue so it can be adjusted with the tips of your fingers.
Use The Photos As A Guide
The photos to the right are posted in a step by step arrangement to be used as a guide. See how the material will lay for you to make a nice neat finished product. It might be that your material is in several cut pieces or different colors of left over material.
Each new color can easily be added by ending the material in one hole and gluing it. The next color can then be started in the next hole by stuffing it with glue and the material, the same way you started. Keep adding glue and material until you come to the end.
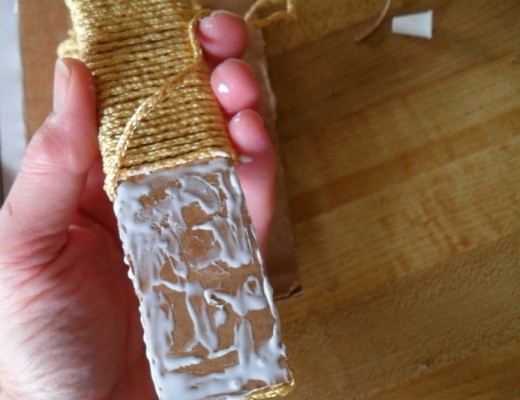
Glue and Wind
Add glue and wind. Continue using the tips of your fingers to adjust the material so it goes on straight. The corrugation will help keep the material in a straight line if you use the indentations in the cardboard as guides. The cardboard will feel a little soft, pliable maybe even mushy. This is good while you are gluing and winding. It allows you to make any adjustments necessary as you work.
Ending The Material
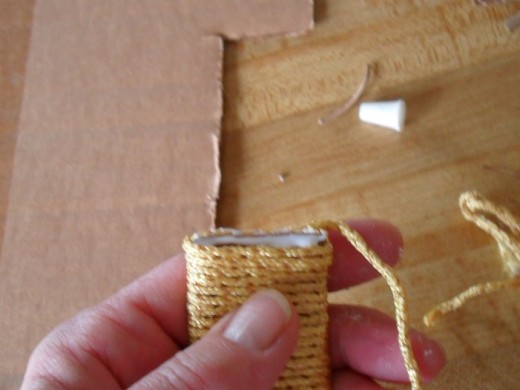
When you have all the material wrapped so there is no cardboard showing at the finished end the material can be cut to size. Leave enough of a tag end so it can be stuffed into the last hole on the bottom edge of the book marker.
It is best to make all the adjustments before cutting. Lay the work flat and check that everything is straight and tight on both sides. When you are pleased with the way the material is laying gently press all across the book marker to set the material tight against the cardboard.
Cut the material off about 1/4" longer than needed so the finished end can be stuffed into the last hole on the bottom edge. You might want to make sure this has enough glue on the end of the material to hold it good when the glue has dried.
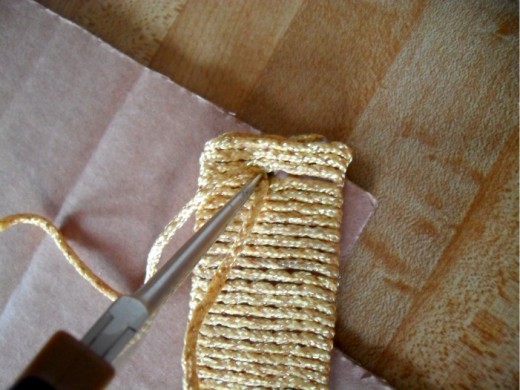
Remember The Hole You Covered?
The hole you punched in the top of the cardboard was covered during the winding and gluing. It will be easy enough to locate with the closed tip of the needle nosed pliers. Poke around and find the hole carefully trying not to move the material more than necessary.
Now using a 6" or 8" length of material fold it in half making a loop. Grab the middle of the loo with the needle nosed pliers and poke it through the hole you have located under the material. See the photos.
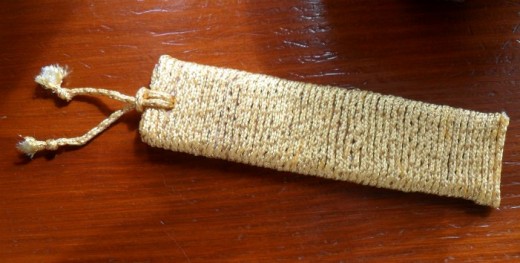
Carefully pull the loop through the hole and then put the two tag ends through the loop. This will make a nice finished look for your new book marker. This loop can be done in a different material or contrasting color to add a little cheer to your handy work.
Drying Time
Double check all your lines to make sure everything is just the way you want it while the glue is still wet. When you are satisfied with the way it look, set the book marker aside to dry for about 3 or 4 hours. It will become a little stiffer when it is completely dry.


