Make Your Travel Photos Magazine Quality

No Software Required
I used to be a travel photo purist. To me, Photoshop and photo editing in general was cheating; if you couldn’t do it with the camera, it shouldn’t be done.
Then one day I was playing around with a photo screen saver for my home computer, and just started watching a slide show of all my photos - family and travel - in sepia tone. Seeing old photos I had forgotten about in a new way made me realize that some photos were of high enough quality that they deserved to be enhanced...and that some photos that seem run of the mill in color actually look like professional shots when converted to sepia or black and white.
When I say a photo has to be of a certain quality, I’m talking about the subject matter and the framing. Sometimes we catch a scene that is of great interest, but when we look at the image on our computer, something just isn’t right with it. Maybe the color balance or the lighting or a random passerby needs cropped out.
I also discovered that great photos in color often look great in black and white or sepia, but it is important to note that this is something that is dependent on each photo.
Before and After Travel Photos
So now let's see some examples from my own portfolio. What follows are the before and after shots, and a little about what I did and what I was going for with the changes.
After the photos I will give you a super easy, step by step way to achieve the same results.
Photo 1 - "Munich in the Morning"
It was about 8:30 in the morning in Munich, and my brother and I had come from an all-night flight. We were waiting to meet our tour group for a free walking tour. I was sitting on the ground, tired, and just pointing my camera around trying to get a feel for a new city. One thing I always try to do is photograph people when they aren't aware.
I like the original photo, especially the framing. By playing around with the contrast and setting it high, as well as adding more saturation to the color, I was able to achieve a more vintage feel, one that complements the shadowing. The background is also more monochromatic, which forces the eye to focus on the person, who is about to take their sunglasses off to get a view of an attractive traveler.
In the edited version, the blues, greens and reds pop more, making the photo more interesting and pleasing.
"Munich in the Morning" - BEFORE

"Munich in the Morning" - AFTER

Photo 2 - "Window into Life" (Budapest)
My brother and I had just finished a homemade meal cobbled together from meats and cheeses from a grocery store in Budapest (Pest side of Danube), and were walking around to familiarize ourselves with the neighborhood.
I saw a man and a woman arguing in a courtyard. They could not see me. I felt as though I was looking through a window in a neighborhood that had once been rife with prostitution and crime, but was working hard to make a turnaround.
While I like the original photo a lot, especially the framing, by washing it out by playing with the brightness and contrast, the foreground is almost blurred, forcing the viewer to the action down the tunnel in the courtyard. The architecture looks a little better, perhaps older, and the resulting image would look great on a travel photo website against a white background.
"Window into Life" - BEFORE

"Window into Life" - AFTER

Photo 3 - "On a Boat, Croatian Bay"
This is a photo of me, so I think it's fairly obvious that I didn't take this one. I included it to give an example of what can be done with portrait shots gone wrong, or in need of improvement.
This is one of my most special memories from our last trip to Croatia. We had left the region of Istria to drive down to the Island of Brac. My aunt and uncle have a few houses there, and an olive grove where they harvest and make their own olive oil.
On our last day on the island, one of my cousins cousins puttered up on a little fishing motorboat, and took us for a tour of the bays and inlets near Boboviscu. It was so relaxing, feeling the sea breezes and sitting in the shade of the boat.
In the original photo, which is nothing special, we were dealing with some challenges from a lack of light, as well as a burgeoning sunburn on my chest and neck, which made it hard to saturate the colors without turning me lobster-red. Instead, this photo called for a more black-and-white feel, with the brightness and contrast turned up to enhance my features and provide definition.
The resulting photo better captures the way I was feeling at the time, like I had traveled back in time. The white wine spritzers helped too!
"On a Boat, Croatian Bay" - BEFORE

"On a Boat, Croatian Bay" - AFTER

Photo 4 - "In Search of Peter's Pool" (Malta)
We had taken a rickety bus almost an hour to Marsaslox, a fishing town on the southern coast of Malta. We had lucked out, because it was the town's Catholic feast day, a time of food, parades, fireworks, and family fun.
Because we had arrived so early, we decided to walk the two or three miles through the countryside, out of town, to find Peter's Pool, a popular cliffside swimming spot carved into the rocks. My brother and I, along with a Frenchman and a French Canadian nomad, walked down dusty dirt roads. It felt like something out of the Godfather.
In the edited version, I simply changed the contrast to near max. This gave the photo a 1960s National Geographic feel to it, and is definitely more visually appealing than the original. By enhancing the color and the juxtaposition between the dead browns and bright greens, you get a better feel of the island. By adding color, you feel the monochromatic nature of Malta (at least I do.)
"In Search of Peter's Pool" - BEFORE

"In Search of Peter's Pool" - AFTER

How to Make Your Travel Photos Magazine Quality
You may be asking at this point...”do I need Photoshop or expensive software to make my vacation photos look better?”
I can tell you the answer is no. All the photos I enhanced for this article were done with the standard tools that are available on the Windows operating system.
- Step 1 - Select the photo you want to edit using the Windows Photo Gallery tool (the standard Windows photo browser).
- Step 2 - Click the File dropdown and select Make a Copy. You will then be prompted to save the photo with a new name.
- Step 3 - Go back to the window containing your photos and open a new copy of your copy. This is important so you don’t save your changes to your original photo.
- Step 4 - With your new copy open in Windows Photo Gallery, near the upper right center, select the Open dropdown and select Microsoft Office Picture Manager.
- Step 5 - The Picture Manager will now be open with your photo. Now it’s time to start playing around.
- Step 6 - Select Edit Pictures on your function ribbon. A sidebar will appear with options. Here you can change the contrast and brightness, color options (including saturation and hue),
- Step 7 - When you have your photo looking the way you want it, select Save. Your copy of your original photo will now be updated to your new, cooler version.
Some More Before and Afters
Here are some more striking before and afters from my portfolio.
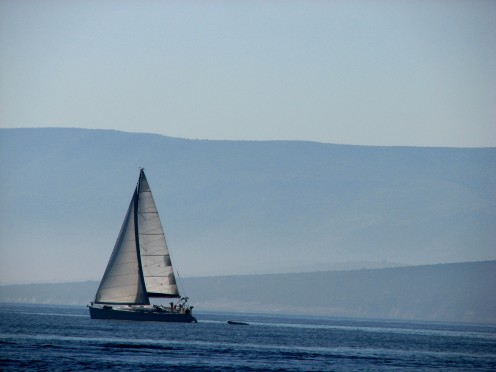
"Sailboat - Island of Brac" - BEFORE
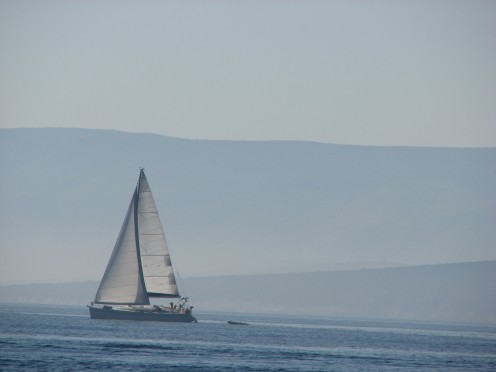
"Sailboat - Island of Brac" - AFTER
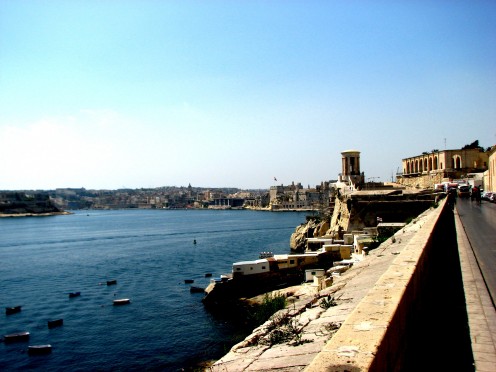
"Walkway in Valetta, Malta" - BEFORE
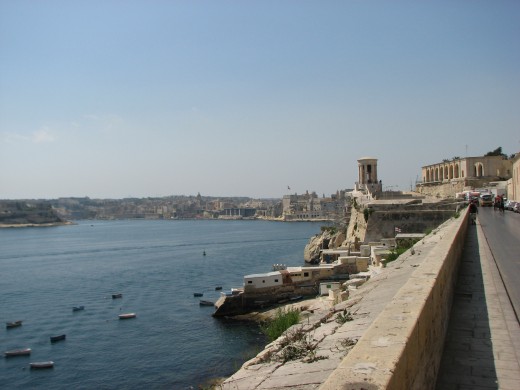
"Walkway in Valetta, Malta" - AFTER
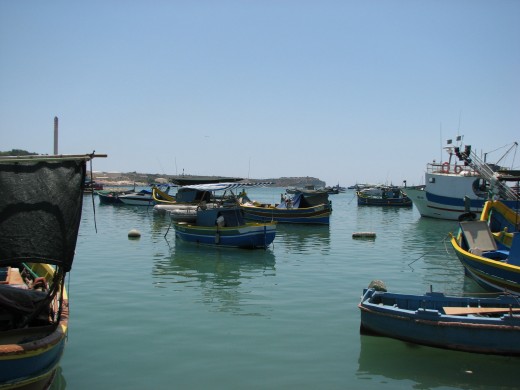
"Marsaslox's Famous Boats" - BEFORE
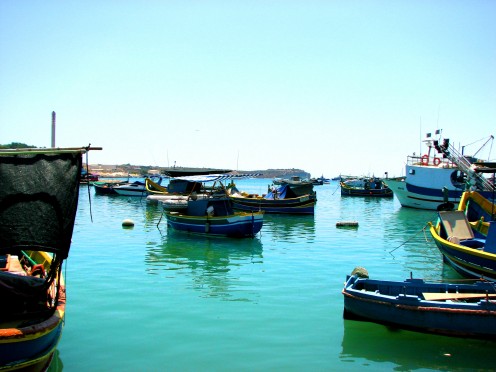
"Marsaslox's Famous Boats" - AFTER
Great Photo Editing without Photoshop
By applying these tips and tricks, you can make your best photos look even better, almost magazine quality. For travel photography, you need to do whatever you can to convey a sense of place and feeling through the photograph. The best photography does not even need words to support it.
Because every photo is different, taken differently, and interpreted differently, there is no photo editing advice that can apply to every photo...
except this advice...
Pick out great photos that show interest, adventure, and emotion, and play with the color (saturation, temperature..) and the brightness and contrast, until it looks better than the original. If you can’t get it right, give up and move on to another photo - it was fine the way you took it.
About the Author
About the author: John is the founder of MarriedWithDebt.com, a personal finance and lifestyle design blog geared towards helping younger, married couples get out of debt and build the life they want...together.
More by this Author
- Magical Istria - A Croatian Photologue
If you have never heard of Istria, let me show you how I feel about this special place through photos. Called the Mediterranean as it Once Was, this region of Croatia looks beyond all the different peoples who have controlled it, and stays true to th - Why I Hate Facebook
I hate Facebook. I mean I really hate it. I hate walking past your desk and seeing your face glued to that stupid blue bar across the top. I hate seeing you stalk your ex boyfriends and ex girlfriends on there. I hate that you have a pretend farm... - You Can Never Return to Someone Else's Home (Short Story)
Have you ever tried to return to someone else's home? The things you are looking for will never be found, because they are not yours.


