Making Your Own Bath and Body Soap: The Basic Bar

Step One: Make a Plan
Make your first batch of bath and body soap a small one so that you know the ropes when you begin to work with larger quantities. Choose your mold(s) for these first bath and body bars and decide on their design. For example, will the soap have colored layers? Will it have shapes or designs on or inside it? Will the added ingredients change the color of the glycerin base? Answering these questions in advance will make each step of the process much calmer and easier.
Because there is a certain amount of lag time when you’re making bars of soap - even if you use more than one double boiler and your soap has a simple design - it is best to have a plan before beginning. Knowing what projects you will begin with will dictate the best order in which to melt various colors and will streamline the process. This in turn will allow you to work on several bath and body soap projects at one time.
Step Two: Melt the Glycerin
Using a double boiler, melt the glycerin gently until it is liquefied but not boiling. Cutting the glycerin into small chunks first will help it melt faster. Keep a lid on the pan as much as possible to avoid the escape of moisture, which can make soap dry and flaky.
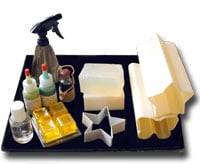
Step Three: Add Your Own Ingredients
Tip: If you think you might want to reproduce your recipe, you’ll want to keep track of all ingredient proportions - color, scent, and any other additives.
Add the desired color you have chosen to the melted glycerin base and mix well. If using a powdered color, mix it in slowly or whisk it gently to avoid clumps. (Instructions for use should come with the type of coloring you have bought.)
Cool the colored glycerin until it is slightly thickened so that it will best retain the fragrance you add. Stir in the scent, taking care to check the label of any fragrance you add to make sure that it doesn’t contain anything harmful. After all, one advantage of making your own soap is controlling what does (and doesn’t) go into it.
Finally, add any extra ingredients like aloe vera, lanolin, cosmetic grade sparkles, or herbs. Again, the amount you add of these extras will depend on personal preference and soap recipe instructions. Begin with the smallest recommended amount and add more incrementally.
Step Four: Pour into Molds
It sounds as though this part would be easy, but pouring hot glycerin into molds can be a problem depending on the kind of mold you use - tube and cookie cutter molds in particular. If there are any spaces where the melted glycerin can leak out between the mold and the surface it is sitting on (a plate, countertop, or cutting board), there could be a messy spill.
To prevent spills, make a seal around the edge of the cutter or tube mold. To do this, you’ll want to work on a small plate or other moveable surface. Pour about ¼ inch of melted glycerin onto the plate. Place the mold in this glycerin and allow it to dry. Once the thin layer of glycerin has hardened around the mold, it seals the edges, allowing the rest of the hot glycerin to be poured in without leaking out. To be extra cautious, put the whole plate and mold in the freezer for about ten minutes. The difference in temperature between the cold seal and the hot glycerin will prevent any remaining possibility of leakage.
Next, pour the glycerin into the molds and allow it to harden completely. This takes about an hour, depending on the soap’s ingredients. Refrigerating the molds speeds the process.
Tip: To eliminate bubbles after you’ve poured your soap into a mold, spray any bubbles that rise to the surface with rubbing alcohol from a spritzer.
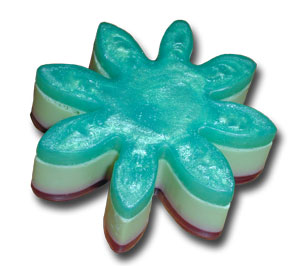
Step Five: Remove Your Soap from the Mold
Soap should come out of a mold quite easily when pushed. However, if the soap is very stubborn, try putting it in the freezer for about ten minutes and then try again. Another trick is to run the mold under hot water to loosen it, since (as we know) glycerin gets softer when heated.
Step Six: Wrap Up or Lather Up
If you have used a tube mold, you can now slice individual bars from the loaf. If you have used a cookie cutter mold, you may want to trim the soap’s edges to make them even.
Make sure to wrap your bath and body soaps tightly with plastic wrap to keep moisture from escaping and the soap from sweating. Once your soaps are individually wrapped in plastic, any other wrapping will work beautifully: paper, handmade labels, cellophane, or ribbons.
")