Pastel Workshops - How to Underpaint Your Pastels Using Watercolour
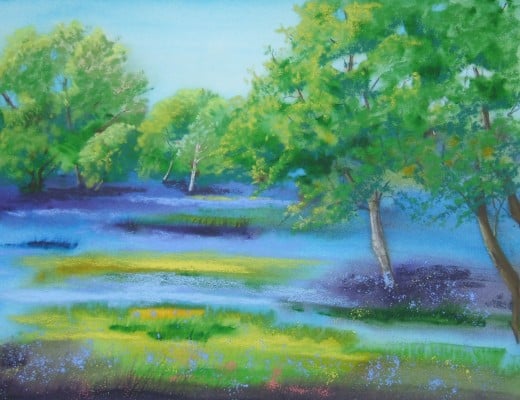
Bluebells and Buttercups.
How to Use Watercolours to Underpaint Your Pastel Picture
It's important not to become stagnant when creating art, and one way of keeping the creative juices flowing is to dabble with different media, to take you out of your comfort zone a little. So, for this reason, I've recently begun underpainting some of my pastel pieces with pen and wash drawings and with watercolours.
The finished picture that you see to the right is a place I visit often. I just like the way the trees draw your eye in to the composition and I have sketches and paintings of this place depicting all four seasons, but in May, the woodland floor is awash with the deep blue of our native English Bluebells, speckled with Buttercups and Red Campion. I think this has to be my favourite time of year to paint this scene (and the scent is wonderful).
The Advantages of Using Watercolours to Underpaint Your Pastels
One huge advantage of using watercolours to underpaint pastels is that you can get really strong, vibrant colours without filling the tooth of the paper, so there is more scope to really layer on the pastel pigments afterwards.
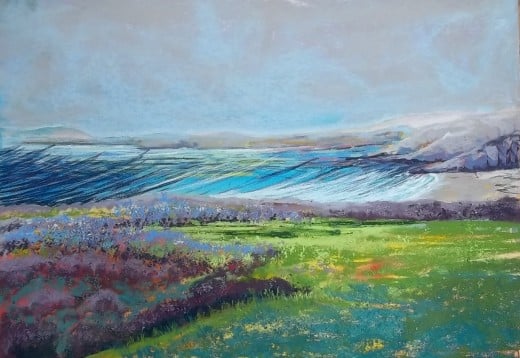
As with pastel underpainting, you can decide how much or how little of the underpainting you wish to have on show and you can use all sorts of techniques to produce different effects within the watercolour that you can then decide to leave in the finished painting. If you apply the watercolour directly from the tube and leave it to dry, you then have a wonderfully textured surface over which to work, and texture is something that can be difficult to achieve with pastels (see the Porlock Bay Painting below).
I also find that when I use watercolours, I'm much more tempted to underpaint using complementary colours, so that when I place the pastel pigments on top, they really zing off the page.
The following table lists all the equipment I used for the Bluebells and Buttercups piece.
Equipment Used to Produce Bluebells and Buttercups
Pastelmat Paper
| Hard Pencil
| Drawing board
|
Unison Pastels
| 1" and 1/2" flat brushes
| Easel
|
Windsor and Newton Waterolour Tubes
| Rolling pin
| Masking tape
|
Glassines
|
Getting Started
Firstly I taped the paper to the drawing board, just as I would if I were beginning a regular pastel painting. There is no need to stretch the paper as you would with watercolour painting, as Pastelmat is pretty tough and won't cockle (you could also use Colourfix paper). There is also no need to 'preserve your whites' as you would with traditional watercolour work, as any white can be added with pastel.
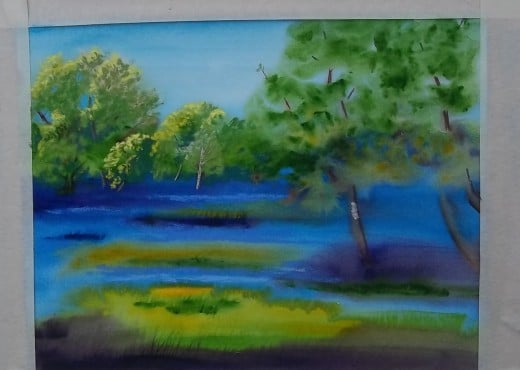
The Underpainting completed

Laying on Watercolour
I began by wetting the area of sky using the 1" flat brush, making sure to take it all the way down to the horizon. Next I used a strong hue of Phtalo Blue, beginning at the top of the page and sweeping the pigment all the way across horizontally. I carried on making horizontal strokes down to the horizon, so that the strongest pigment was at the top of the sky. There's no need to leave spaces for the trees, these simply get painted over the top.
Throughout I've used large flat brushes as it's then impossible to work in any detail. the detail comes in the pastel overpainting stage.
I let the sky dry, then lay strong washes of Ultramarine Blue, Pthalo Blue, Sap Green and Deep Yellow in stripes across the page, painting 'wet up to wet' so that where to two colours met they bled into each other, creating interesting patterns.
To add texture, I squeezed on some areas of Sap Green and Violet (for the deep shadows) directly from the tube in stripes. I then took a dry dip-pen and scratched through the pigment with a vertical motion, to create grassy shapes.
I let the foreground dry somewhat, then used Sap Green to paint the tree canopy, painting 'wet into wet' to achieve blurred pigments into which I dropped some Light Sienna paint from a brush. The tree trunks were again painted 'wet into wet' using the 1/2" brush side-on and Burnt Umber paint. I added Sap Green directly from the tube to the tree in the foreground, for texture and depth of colour.
It's important to let the whole painting dry really well before beginning with the pastel overpainting.
Laying on Pastels in the Background
Laying on Pastels
You now have a vibrant base that doesn't fill the tooth of the paper over which to lay pastels. in this case, I deliberately made the underpainting very strong, as I really wanted to capture the intensity of the Bluebell carpet and the spring colours.
I began painting the background trees with a pale acid yellow and mid greens, keeping the acid yellow to the left of all the trees, as there is strong directional Sun from the left in this picture. I used dull, dark browns for the tree trunks and dull blue-greens for the leaves in shadow. To complete the background trees, I used the pastel equivalent of Pthalo Blue to paint 'sky holes' in the trees, putting a stripe of brown through these to suggest branches. The 'sky holes' add interest to what would otherwise be a dense bank of green.
Once I was happy with the background I put in the foreground bluebells and buttercups using horizontal streaks of deep lilac-blue, plus the same shade but a tone lighter, and an egg yellow and lemon yellow for the buttercups. I painted an extremely deep purple into the Violet background paint to add richness to the shadow areas.
I deliberately left the painted areas that I scratched the pen into, and the areas where the paint pigments bled into each showing through other as these add further interest to the finished piece.
Working on the Foreground

The next major component of the piece to complete was the foreground trees. I used a similar colour palette to the background trees, but much stronger tones, so an acid green for the highlights, a strong mid-green for the mid tones and a vibrant blue-green for the shadows. I deliberately left the areas where I sqeezed Sap Green directly from the tube to show through.
Once again, I added those sky holes, matching the pigment to the background tone of the sky, then finally put in the trunk using a deep and mid brown, plus white for the highlight.
Finishing Up
For the final piece de resistance, I splattered deep lilac blue, mid lilac blue and deep yellow pastel into the foreground to suggest individual blooms, then pressed this into place using a rolling pin, first covering the painting with a glassine. I also did the same with a very little bright red, to add a suggestion of Red Campion and to further add a layer of interest.
On stepping back and looking at the piece as a whole, I felt that the white highlight on the foreground tree was too bright, drawing the eye too much, and so made this a yellower hue. I also felt that the trunk of the birch in the background was too dull, so added a white highlight here to draw the eye in, and added a tiny streak of the deep yellow to the far background for the same purpose, before being satisfied with the finished piece.
Underpainting with watercolours is going to continue to be a part of my repertoire in the future, as it's such a valuable painting tool to have. I like it so much that I'm teaching my students the technique at our next workshop in June.
The Finished piece Again

Porlock Bay
Porlock Bay
This picture further illustrates the use of underpainting with complementary colours. The green areas of the foreground were underpainted with reds and oranges, some of which have been left to show through, whilst the purple heather was underpainted with additional yellows and ochre. In several areas the paint was applied directly from the tube, creating a textured finished piece.

