Tee Shirt Printing for Kids - Our Homeschooling Project

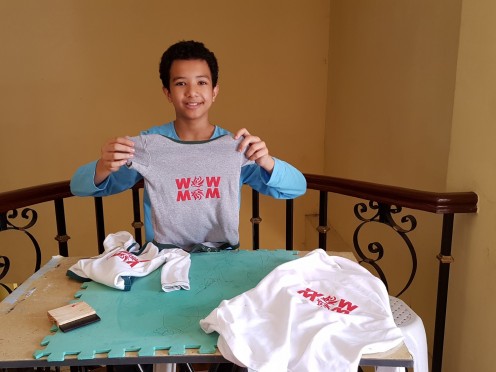
Teen's First T Shirt Output
Start with Silk Screen
Grab a shirt, hold a printing pen or brush and textile paint and execute your design: this is the easiest and most flexible way of printing on a shirt. Nonetheless, it has lots of limitations. There are other several ways of printing on a shirt, the most common are:
Silk Screen Printing
Direct to Garment Printing
Use of Transfer Paper
Use of Vinyl
Anyone who wants to engage in t shirt printing must check carefully what are the pros and cons of each of these options. In this article, I will be dealing with the easiest technique in screen printing.
Whether you are reading this because you want to DIY your next customized shirt or you want to use it in your homeschooling or you want to put up a home-based business, I suggest that you read through until the end, check the video and come back for more tips on tshirt printing. I am sharing here practical tips that I learned through trial and error. Since this is my very first t-shirt printing article, I will keep it simple. For more complicated designs and techniques, I will be posting more soon.
Photo Credit: All Photos in this article are mine
Video Credit: Video links to my videos.
What You Need; As Simple as These

This is the Simplest Technique of T Shirt Silk Screen Printing
As mentioned, there are several techniques in silk screen printing. This hub involves the easiest one; that is, print - cut - print.
You can also use:
* green film
* photo emulsion
This two options are not discussed in detail here.
Watch the Actual Demo Here
5 Simple Materials to Print on Shirt
You may not believe that you only need these for you to print on shirt:
Silk Screen
You may opt to buy the silk textile and mount it on a wood frame or you can simply drop by a craft store and buy one. Of course, online shopping is always an option.
Buying the ready-to-use screen saves you time and materials because if you are not familiar with how tight it should be mounted, you will ruin the textile or your prints on shirts will not come out neat. Too tight will tear the silkscreen textile; too loose can cause paints to smudge.
Textile Paint
Three Kinds of Textile Paint:
1. Ordinary
2. Rubberized
3. Embossed
For white, cream, off-white and other very light colored shirts, you can buy ordinary textile paint. But, if you are planning to print on colored shirts, you have to go for rubberized textile paint. Check the manufacturer's specification because the term "rubberized" may not be what the manufacturer used in categorizing this type of paint.
If you want a raised effect on the print, go for rubberized embossed.
Cutter
You will need this in cutting out the printed design. Use a crafting cutter for more precision specially if you want to cut out intricate designs. If your design does not include to many curves, then an ordinary paper cutter serves the purpose. If you want to engage in t-shirt printing as your business, it is best to invest in computerized cutter.
Print Out
Create a simple design on your computer and print it out on a paper with at least 180 gsm thickness. Do not print it on a very thick paper because you will have difficulty in cutting it out. Avoid thin paper because your cut out will crease during the process of printing on your shirt. 180 gsm thickness can support printing of around 20 shirts. If you have to print more than 20 but less than 50, print your design on a paper of any thickness and use a plastic folder to cut out the design. This technique is not covered in the video tutorial but I will soon demo this in another hub.
Squeegee
You can buy this in stores, both online or in a craft store. If you don't want to buy, you can look for a rubberized flipflop and improvise.
When choosing your squeegee , consider the size of your design. Check the video tutorial for more tips.
Beginner's Tips
Use one colored design until you get the hang of it. Surely, you will destroy a shirt or two. Sometimes, you may have not reached yet the printing stage and you messed up with the template you are making while cutting off the design from the print out. Remember those dealing with t-shirt printing still commits these.
Do not open your paints when you are not ready with your template design.
Wear an apron or a shirt unless you don't mind getting messed when you are working with your paint.
You may want to wear gloves.
Refrain from moving the squeegee back and forth when you are printing - it will increase the probability of smudging or ruining the print.
Print in a well-ventilated area.
Always wash your screen and squeegee soon after you use it. The paint will harden and you will have to buy new materials.
Proudly Showcasing his Output

T-shirt Printing for Pi Day
Have you tried tshirt printing at home?
Will you be trying it?
Printing on Both Front and Rear of the Shirt
If you want to print on both front and rear of the shirt, you have to allot more time for it and I suggest that you do the printing during the day - a sunny day. Use the heat of the sun to dry your first print before you can print on the other side. If you have no access to the sun, use a hair dryer to shorten the drying time. Alternatively, you may print on one side and leave it over night to air dry and print on the other side the next day.
In case you want to use more than one color in printing, you have to make separate template for each color. Then, print one color at a time. See the t-shirt in the picture above? Since the shirt on the right have two colors, we have to print one design/color first, let it dry before printing the next.
I am describing this so that you can estimate the time needed for you to work on a particular design. This will help you in your costing and planning.
Sample of Front and Rear Print; Two Colors

Fixing the Error
My son's very first print was messed up. He put it under the sun for drying but he was not very careful when he laid it on the cardboard so the shirt folded and the paint scattered over the neckline area of the shirt. He felt so guilty about it but he learned to be more careful on the next shirt.
Convert the mess into a design
If you find yourself in this same situation, do not get frustrated or depressed. You can actually cover up the mess by turning it into a creative design. Below is the picture of the shirt that I am describing. See? Nice design, is it not?
Express it with Flowers

You can Create Better; Challenge your Creativity
See this shirt on amazon? Well, if you have no time to print your own, you can simply browse options on Amazon - your shirt is just a click away!
You may also consider designing your own shirt in online sites like cafepress and zazzle. Have you heard of these two sites? Some creative fellows siphoned cash from their creative neurons using these two platforms. With these platforms, you can earn from your designs and you don't need to do the tasking work of printing on the shirt. What you are selling here is your design. In addition, it is a good idea to test your success probability in tshirt printing industry by creating some designs in these websites and have a feel whether you can attract interest of t-shirt buyers.
Planning and Costing
Perhaps you are organizing an outdoor activity and you want to create customized shirts for the participants; or you want to give it as party giveaway; or you want to start a home-based business of printing shirts. For any purpose you want to use what you have learned here, you need to plan and project the cost that you will incur.
Know that the ordinary textile paint is the cheapest option in the market. But then, it can only be used for white and very light-colored shirts, as mentioned earlier. The price of rubberized paint is almost double the price of an ordinary. Lastly, the price of rubberized embossed is double the price of the rubberized.
Rubberized embossed requires that you press it with iron to make the paint puff. That would be an additional cost. Consider the time you need for a project using embossed paint too. It needs drying and iron pressing.
Don't Forget to Watch the Video
Don't forget to watch the video, describing the process with words may not be as clear as when you see how it is exactly done.
Stay updated for future hubs on t shirt printing and tutu dress making. My next hubs will focus on this. Meanwhile, I have shared more hubs on flower making, craft making, painting, drawing and other things we do in homeschooling.
It would be great to hear and see your output soon.
Another How To Video You might want to Watch
You Might Want to See my Other Hubs
- He Deserves a Casio G-Shock GWN-Q1000
The latest of Gulfmaster series of Casio is G-Shock GWN-Q1000. With its quad sensor, five sensor modes, carbon fiber built and wrist band made of soft urethane, it is an irresistible watch for men. - Creating Crafts and Arts
Creating craft and arts is not only a hobby but also a stress outlet. Pour in your emotions while doing it and you will surely feel great with your output. I've listed here my fave art activities. - How to Make Tinkerbell Wings
Wings are the most attractive part of a costume. Make your own Tinkerbell wings. Your little princess will surely be proud wearing her fantastic wings on her birthday, Halloween or costume party. - Homeschooling is Fun
Homeschooling is not about bringing home school burden; it is about reaping the synergy of education and home for phenomenal learning. For kids' overall personality development, it's the best option!


")


