Easy to Make Spring Table Decoration - Giant Daisy


Craft a Giant Daisy - It's Easy to Make!
I was part of the restaurant and event industry for more than a couple of decades. My favorite part was decorating -- buffet tables, guest tables, rooms -- you name it, I decorated it! I always tried to come up with new and different ideas for crafting a table decoration for our holiday and special occasion buffets.
One Easter, I decided the dessert table needed a fun and whimsical table decoration that would be simple to make. I came up with the Giant Daisy!
Many of my customers commented on how cute and fun the daisy was gracing the center of the dessert table. Many also asked if it was hard to make and how to make it.
The answer was it was easy to make and I shared my step by step instructions with them. Now, I am gonna share it with you. I hope you enjoy making your own Giant Daisy table decoration.
Images, unless otherwise noted, belong to me: DecoratingforEvents - Mandee
1 - 4" craft foam ball (not floral dry or wet foam).
1 - Craft Dowel Rod, ¼" diameter (cut to desired length)
2 - packages of 4" to 6" white feathers (not ostrich, just regular craft quills - they need to be stiffer in consistency than an ostrich feather).
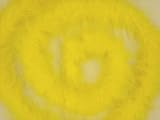
1 - 2 yard yellow marabou boa (fuzzy looking feathers, not ostrich).
1 - sheet green felt
1 - craft foam ball same diameter as your chosen container opening (my container opening was just under 5", I used a 5" craft foam ball so the fit would be tight).
Flower pot or container for your Daisy, 5" to 6" inches in diameter.
Green Craft Paint
Sheet Moss (you can use loose moss it takes more and the finished product is a bit more messy).
Rocks or marbles for weight in your container.
Floral Pins ("U" channel shape. Also called "greening pins" and panacea pins.)
Also...
You will need a hot glue gun up and ready as you make your daisy in addition to a good pair of scissors.
Container for your Giant Daisy - Choose a Spring Color
The planter should be between 5" and 6" in diameter. This will allow for it not to become too top heavy by using a solid, properly sized base.

Introduce a New Color with the Container - Purple is very Pretty for Spring!

Recycle - Reuse
In my case, I had the container I used from an old project and just reused it for this project. Makes the whole thing a bit more Green!
As a DIY Centerpiece

Hot Glue Sticks Made to Work with Foam - I love these!

When Can I Use the Daisy?
* Easter
* Mother's Day
* Baby Shower
* Bridal Shower
* Throughout Spring as Decoration
Steps in Photos - Follow along as I make My Giant Daisy
Click thumbnail to view full-size


10 Step-by-Step Text Instructions - Easy to Make Spring Table Decoration
Paint the dowel rod with green craft paint.
Cover the 4" craft foam ball with the 2 yd. boa. Secure boa in place by using floral pins ("U" channel pins).
After cutting the dowel to the desired length (allowing for it to stick into the boa cover ball and all the down to the bottom of the container), insert it halfway into the boa covered craft foam ball in the center. Eyeball it so the dowel will be in the middle of the ball.
For a ¼" dowel, use scissors gently scoring and rotating until you can snap it off with a clean break. Mine ended up being about 19 ½" in total length with part was in the base and part in the yellow ball.
Place rock or marbles into the bottom of your container for weight. It doesn't have to be full, just enough to make sure the finished product won't be top heavy and topple.
Place the other craft foam ball into the container. Make sure it is a tight fit (you can add some hot glue around the edge for more security). Push down as far as the ball will go.
Cut a pattern for your leaves from paper. Fold felt in half and attach pattern with a sewing pin so that the end of the leaf is on the fold. Take care to pin through both thicknesses of the felt and cut. Cut a second leaf using the same process.
Stick your painted dowel with boa covered ball into the center and all the way down into the base craft foam ball. Push until the dowel hits the rocks at the bottom of your container.
Hot glue the sheet moss in pieces onto the base craft foam ball until it is completely covered.
Begin adding the white feathers. It's easiest to start right next to the dowel at the bottom of the boa covered ball. You may have to move the boa a bit to get to the foam for the feathers to insert. Work your way around the ball so that you have a fan of feathers in a line going around the middle of the boar craft ball.
Go back and add another row of feathers right beside the first row for fullness.
Enjoy!
More Photos of Assembling your Table Decoration - Almost Finished!
Click thumbnail to view full-size

 to secure the moss.")

 to the inside of each of the felt leaves so they would hold their shape. I secured it with hot glue.")


 to secure the moss.")

 to the inside of each of the felt leaves so they would hold their shape. I secured it with hot glue.")


Where Can I Use the Daisy?
* Dining Table Centerpiece
* Foyer Table Seasonal Decor
* On a Buffet or Dessert Table
* Coffee Table Centerpiece
* Mantel
* Shelf
What about You? - Where do you fit in?
Do you decorate for Spring, Easter and/or Mother's Day?
Variation:
I have also made this Giant Daisy by losing the yellow boa and simply painting a smaller craft foam ball yellow and adding a few more feathers. It works nicely.
See photo below.
Painted Center Daisy Variation - A bit different... Here's how...

For the two daisies above, I used a smaller, 3" craft foam ball and painted it. I also attached two leaves from a silk plant I had lying around the house instead of the felt leaves in the tutorial.
The containers are inexpensive terracotta pots. I painted one solid pearl pink and the other I painted pearl green with pearl pink on the top band. It took quite a few coats since the clay is very porous but both turned out nice!
I used a half ball in the container for these two daisies. After adding the rocks to the container, I turned the ball so that the flat side faced up and the rounded side went against the rocks. This gave me a flat surface for my grass.
Instead of the moss, I covered the base foam with shredded Easter grass. Just a dab of hot glue here and there to hold it in place. I laid Easter egg ornaments on top of the Easter grass to add some more interest.
It's a fun twist of the same basic concept.
Some of the Supplies for your Table Decoration - Giant Daisies are Fun!
Dress it Up for the Spring Season - Add items to create a Vignette

- For Easter, add a carrot, rabbit or Easter eggs on the moss or arranged around the base.
- For Mother's day, add a DIY pennant on a skewer in the moss that says "Best Mom" or "Happy Mother's Day".
- For a seasonal look, place spring themed items together with it and maybe a little pennant that says "April Showers bring May Flowers".
- Anyway you do it, own it and have some fun with this craft.
Resources for Making Mini Pennants - You can add one to your Daisy!
- paper crafts for kids: mini pennant (and cake bunting) tutorial | make handmade, crochet, craft
how to make mini pennant flags. paper crafts for kids:Â mini pennant (and cake bunting) tutorial aren't they just the cutest little things?? here's what you're - It's a Creative World: Toothpick Pennants (or Flags)
Hi, Mandy here. I decided to have a go at making some toothpick pennants to embellish my scrapbook pages. I really like having a pile of hand-made embellishments ready for when I want to add one to a LO. A... - Cupcake Flags - Printable Toothpick Pennants
Printable Cupcake Flags for homeschool celebrations. Turn your learning into something special! - Mini Bunting for a Birthday Card (and other applications)
My latest quickie DIY project: a birthday card with a tiny bunting of miniature flags. If you want to try one, here's how to make it.
Squidoo is a FREE format that offers you the opportunity to write about your favorite niche topic and make an income or donate to charity at the same time! What could be better?
Click the Squid for more information...


