How to Make a Drawstring Backpack

a backpack for you
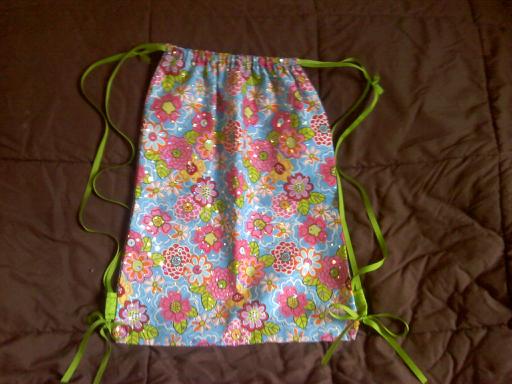
Yes you can make your own drawstring backpack. its easy, its affordable, its personal and its fun. i had such a fun time making this backpack for my grandbaby, it didnt take too long at all. the best thing is that people of all ages can have one of these, everybody love's them, they are durable and bring's folk's closer by spending time together to make it.
four easy steps to making a drawstring backpack
step 1: select a half a yard of material or fabric of your liking, you will need half yard of fabric for inside lining as well, also pick out the drawstring of your choice to match your fabric.
step 2: lay the fabric out (inside"s of fabric facing each other) now cut a square to the desired size of your backpack.
step 3: sew sew sew; sew the two sides together, when sewing the sides, add a strip of fabric to make a loop at both bottom sides of the backpack, keep the top open but do fold over the edges and sew a top loop for your drawstring.
step 4: insert thr drawstring into one side of your top loop, bring it all the way around and down to the bottom loop, tie a knot so it dont loosen, insert the second piece of drawstring into the oppisite side of the top loop and repeat same as other side. your backpack is all finished.
If you like crafting, you can learn hot to make a photo album here.
You can also learn how to crochet here.
You can also learn how to make a fleece tie blanket here.
If you are interested in learning how to make money online, visit here.


