Make Your Own Bulletin Board

A DIY Memory Board for Around $5
When you think of a bulletin board, what comes to mind?
Do you see elementary school classrooms with seasonal bulletin boards up? Educational boarders, and last years laminated letters as decoration?
What if I used the term Memory Board instead? Or Inspiration Board?
Inspiration boards are a big thing right now. So big that it has even gone digital! (Pinterest anyone?)
It helps to have a place to store images that inspire you and make you feel good where you can look at them whenever you want. Sure, you can frame beautiful pictures and hang them, but its also fun to have it in a format where you can change the images on a whim.
That is where my DIY Bulletin Board comes in handy.
It is easy to create, easy to use and inexpensive. It might not last as long as a photo frame, or even a standard cork board type of bulletin board, but that is the beauty of it. It is meant to be easily changed, whether you want to change a single image or the whole thing!
******
All photos (excluding images on any module links) on this lens were taken by Winona Morris or Robert Morris (her husband) ©2013 to present.
Bulletin Board image created using PicMonkey
Supplies
Approx. $5
Most of these supplies can be found at a dollar store, and all of them can be found at craft stores. Prices may vary depending on location.
Foam Core Board ($1)
Paint (on hand)
White Glue (on hand or $1)
Newspaper (on hand or free)
Ribbon ($1)
Push Pens ($1)
Buttons, silk flowers and other ephemera (on hand)
Hot glue (on hand)
The decoupage step can be skipped if you prefer, in which case you would not need the newspaper or white glue.
I prefer to cover the foam core with newspaper to give it a little extra strength and support when I start using it.
Cover Your Board
Step 1
This is actually an optional step, but I do recommend doing it. It will give your foam core board a little extra strength, and has the added bonus of covering the unfinished edges with the newspaper instead of having foam showing.
You will take your white glue (or mod podge if you prefer) and use it to cover your foam core board with one or two layers of newspaper pages. Cover the front, and wrap around the sides to cover the edges of your foam core board as well.
Make sure you let the glue dry completely between layers.
It is okay if your newspaper is not 100% smooth at the end. If you do want it to be 100% smooth you can, just make sure all the bubbles/wrinkles are rubbed out as you go along.
If, like me, you don't have a subscription to a newspaper, you can still get your hands on it pretty easy. Friends will surely give you their old issues if you ask. Or you can raid a recycling bin for what you need.
I grab the FREE "magazines" at our grocery store. They are not really newspaper, but are made from the same material so it'll work just fine.
Make Your Own Decoupage Glue
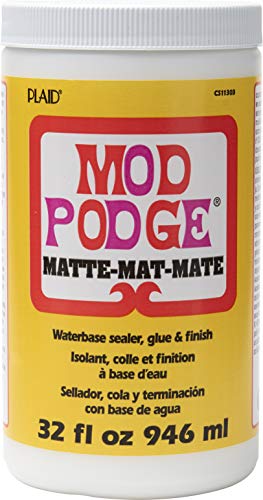
When most people think of Decoupage glue they think of Mod Podge. And while Mod Podge is the mighty giant of awesome decoupage products, it is feasible to make a similar product at home using water and white glue.
I don't recommend my DIY Mod Podge for ALL projects, but its perfect for creating your own bulletinboard out of a piece of foam core, because it is strong enough to last as long as the board, but it doesn't have to be acid free and last forever.
Getting Sticky With It
In the world of (liquid) glues, 2 names stand head and shoulders above the rest. If you need a little glue (or a lot) you can't go wrong with Elmer's or Mod Podge brands.
Paint Your Board
Step 2
This one is fun and messy. You get to create the perfect background for your board by making it yourself.
You can paint the background one solid color, or paint it in rainbow shades. Go abstract, or create an actual work of art.
One thing you MAY want to do is coat the whole shebang with a coat of white paint (or gesso) to prime it first. Otherwise you may have to add more than one layer of paint if you don't want the text of the newspaper to show through.
Paint and Brushes
If you are an avid crafter then it is very likely you already have all the paint and brushes at home that you need to complete this project.
If not, here are a few options.
I have found that buying craft paint is JUST FINE for craft projects. Sure, you can spend tons of extra dough for artist grade stuff, but unless you are creating a thousand dollar work of art on canvas, then I say, stick with Martha Stewart, Deco Art, Americana or even your local craft store's store brand of paint.
Paints

Brushes

Decorate Your Board
Step 3
Once your board has been painted, and the paint has dried, the REAL fun will begin.
This is the part where you find things that move you. A pretty picture. A motivating quote. A snapshot of you and your BFF at Starbucks.
Cover your board with anything and everything that makes you happy and makes you smile. That is what it is there for. If there is something you know you will never get tired of, just glue it right on. If not, then you can use those push pins I mentioned in the supplies.
When you use push pins to add things, it will leave a little hole in the board. The more things you put on and take off, the more damaged your board will be. This Bulletin board should last several months at least, but if you poke it to death in a week just remember, its only $1 and was fun to make, so it'll be fun to make another one too!
Hang Your Board
Step 4
Now that you've got your board pretty to perfection, its time to hang it.
There are 2 ways you can hang it. 1 is to use poster putty (sometimes known as Handi-tack or Elmer's Tack) to hang it. This works well in places you cannot put a nail into the wall. The downside is that the more you've added to the board, the more tack it will take to keep it up!
The 2nd option is to take some pretty ribbon and tie a pretty bow, then take 2 of the tumb tacks and tack the ends of the ribbon to the back of the board. Now hang it from a nail or hanger.
The pretty bow should cover the ugly nail. If not you can glue a flower, or button or something to the nail head.
Poster Putty

What do you think of my Bulletin Board idea? Is is something you might make, or make with your children?
You Do Not have to be a member of Squidoo to leave me a note!
© 2013 Winona Morris


")


