Make Your First Patchwork Block

Absolute Beginner's Guide
How to Make a Four Patch Quilt Block with Jan T.
Step by step, I'll take you through the easy process for making a simple patchwork block: Four Patch. This such an easy block to make, and can be used in combinations like small blocks with larger blocks, or paired with plain squares.
Fun and fast, let's make a block.
What is a Quilt Block?
Blocks Are the Pattern
A block is the basic unit for a traditional patchwork quilt and the starting point for many quilts.
Blocks are composed of patches joined together to make a design.
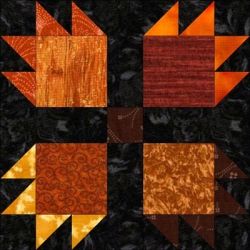
Block designs date from the 1800s and have names like Log Cabin, Simple Star, Bear's Paw (pictured), Duck and Ducklings, Hands All Round...
There are thousands of block patterns and quilters are designing new ones even today.

What is a Block Patch?
The Small Pieces of Fabric in a Block
Patches can be any shape that is cut in order to make a block pattern.
Squares, rectangles and triangles are the most common patches, but trapezoids, diamonds and parallelograms frequently appear in block designs.
In the blocks you see at right, all the unique shapes are coloured yellow.
Four-Patch Blocks
These blocks are the easiest of all to make
Not only are they easy to sew, they are very versatile.
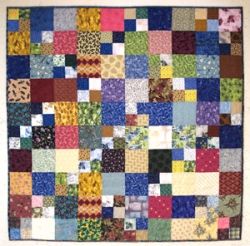
Beginning patchworkers can learn to make one four patch block, and they can happily combine these with larger squares and rectangles to make delightful patchwork quilts.
This quilt is made entirely of Four Patch and Double Four-Patch blocks. It is one of the quilts for the Cancer Council Quilts project. The lens telling the stories of this project is featured below.
Let's Get Started!
Make a Four Patch block
What You Need: Fabrics
Scrap Fabrics or
2 Fat Quarters
Special quilt fabrics are not essential, but these are pretty.
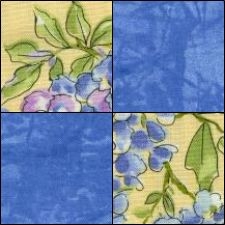
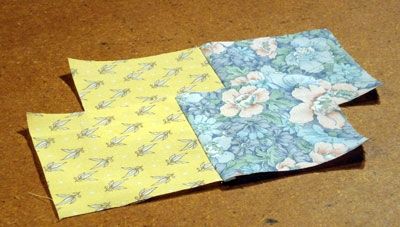
Two fabrics which contrast with each other. The patterns don't matter, just that they are really visible as different.
In the example at the top of the page, I have used a light background floral fabric, and a bright darker tone on tone fabric.
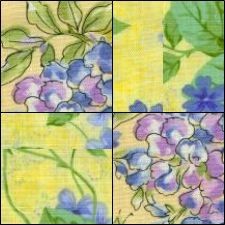
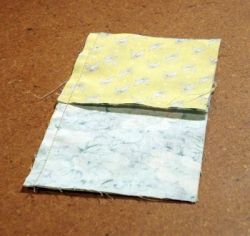
At right is an example where the contrast is not high enough.
What is a Fat Quarter?
Patchwork Speak!
If you cut a quarter yard (or metre) of fabric across the bolt, the piece you get is approximately 42 inches long by 9 inches wide.
If you cut a half yard (or metre) piece 18" x 42", and cut that in half crosswise, you get a piece that is around about 18" x 21".
Quilters find this a more user-friendly shape from which to get maximum patches.
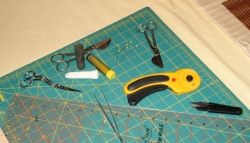
What You Need: Equipment
For Making a Quilt Block by Machine
- Sewing machine
- Thread to match the patches, or neutral (grey or fawn)
- Iron and ironing pad or board
- Rotary cutter
- Rotary cutting board
- Quilter's rotary ruler
In the picture are some of my old friends, my quilting tools.
Size is Easy
What Size Do I Cut the Patches?
Patches are cut using a rotary cutter (looks like a pizza cutter), with the size to cut calculated using a simple maths rule:
- add ¼ inch seam allowance to each side of the finished patch size
Our block will be 6 inches finished size, when it is sewn into a quilt. When you have sewn it, and before it is joined to anything else, it will measure 6½ inches.
This includes the ¼ inch seam allowance on all four sides.
Our 6 inch block is made by sewing four 3 inch squares together.
We need to cut the four patches :
- 3 inches PLUS 2 x ¼ seam allowances
So they are cut at:
- 3 in + ¼ in + ¼ in = 3½ inches
 4 Patch block - from the Cancer Council Quilts")
What to Cut: For One Four Patch Block
Matched or Scrap
For a co-ordinated block (matching):
- Cut 3½ inch squares
- 2 squares in each fabric
For a scrappy (not matched) look, use four different fabrics:
- Cut 3½ inch squares
- 2 in each of two light fabrics
- 2 in each of two dark fabrics
Psst! I need to tell you something ...
— Jan TBefore You Start
Follow the Lessons On the Hub Below:
Absolutely, positively, the best lessons you can learn are:
- How to perfect that ¼ inch seam
- and
- How to press the Jan T way!
When you're ready, come back and we'll continue making our block.
Perfect 1/4 inch Patchwork Seams
- Beginning patchwork: perfect quarter inch seams
This is a lesson on how to achieve a perfect ¼ inch seam with no fuss. In addition, you will learn how to press the Jan T way — for success
Know how to get your seams perfectly flat now? Let's go!
— Jan T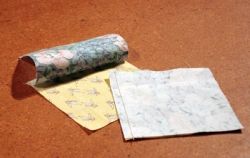
Step 1: Join the Patches
To Join Two patches:
- Place them right sides together.
- Sew along one side on the sewing machine, using a quarter inch seam.
- Press towards the darker of the two fabrics.
Make Two Pairs the Same
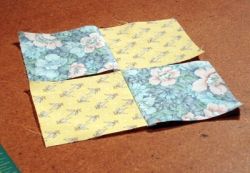
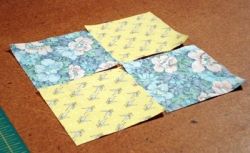
Step 2: Lay Out the Block
Place the Two Pairs of Patches Together:
- Lay the two pairs side by side so they look like the picture.
- Flip one pair over onto the other pair, so they are right sides together.
- Push the two sets of seams towards one another, so they butt up next to each other, with no space and no lumpy bit. That's a technical patchwork term ;>)
What you are trying to do is to have them nest together, so when they are sewn there is no gap or overlap. It's easy if you 'feel' for the gap or lump.
Step 3: Sew the Patches Together
To Complete the Block:
- Sew down the long side on the sewing machine, using a quarter inch seam.
-
Press to one side.
You've made your block.
Well done!

Troubleshooting!
How is Your Join?
Excellent?
Or could it be improved?
- Does the block measure 6½ inches across in both directions?
- If not, can you see which seam is too big, or too narrow?
- How is the seam junction?
- A gap or overlap?
Put Your Ruler On Top

Not Too Critical Please!
Be nice!
You're just a beginner!
Remember this is your very first patchwork block, so be kind to yourself if it's not perfect. If it's not as good as you think it should be, leave it for a day or two and have another try.
Pat yourself on the back for your effort and you'll see it will improve in no time.
It's as easy as I say, practice helps.
My first quilt was not very good, but I love it still.
Gallery of Four Patch Designs
Click thumbnail to view full-size


© 2009 Jan T Urquhart Baillie


