Pet Paw Print Kits: Make a Lasting Impression of Your Pet's Paw
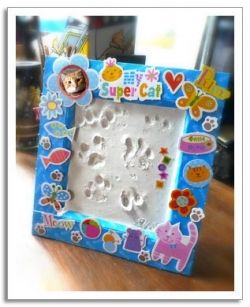
Create a beautiful homemade keepsake featuring impressions of your favorite furry friend's pawprint.
Make a lasting imprint of your favorite animal buddy's paw with a paw print making kit. Using plaster, water, a teensy bit of effort and some patience (from both you and your pet), you can make a beautiful paw print frame keepsake that will also show your furry friend how much he or she means to you.
This page will teach you all the steps in making a plaster mould for your pet to make his mark on, along with a few tips on how to embellish the finished product after the cast has completely dried. The photo to the left shows what our finished product looks like. Interested in making one for your furry pal? Please read on.
I am delighted to say that this Squidoo lens was awarded a Purple Star on April 9, 2010. What an honor! Learn more about the Purple Star Program by clicking on the link.
All images on this page are photos by my husband or myself, except where indicated otherwise.
Get this Golden Retriever Best Buddies Poster Print at Zazzle
We have both and we love the two of them dearly but I'm partial to my kitty since he stays indoors with us. I want to know what you think.
Are you a cat or a dog person? Let's discuss!
Get a Pet Paw Print Kit - With this kit, making a paw print frame is easy as 1-2-3!

How to Make Your Pet Tribute Paw Print Keepsake
Even if you don't have a pawprint making kit, the instructions below can help you make a plaster cast of your furry friend's paw.
Paw Print Making Kit Materials - Everything you need to make a paw print ornament.
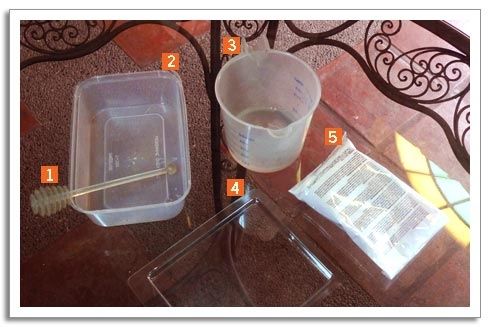
You will need the following materials
1. A stick, stirrer or any tool for mixing the plaster
2. A vessel for mixing your plaster mixture
3. About 75-90 ml. of water
4. A moulding tray for your plaster cast (any shallow container will do)
5. Plaster, just enough to fit your mould (I used 150 grams)
Step 1: Pour the plaster into your mixing vessel. - Use a mixing bowl with a smooth inside surface.
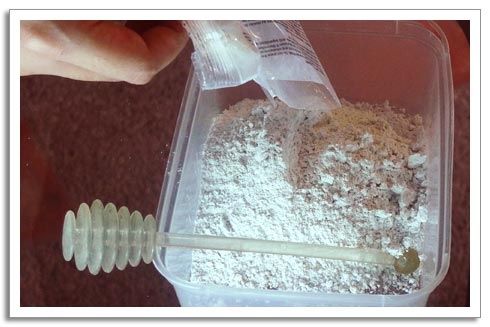
As you can see, I didn't have a mixing bowl on hand that I wanted to dirty with the plaster so I used a cheap reusable craft container instead. I couldn't find a popsicle stick for mixing so I used my old honey stirrer.
Step 2: Add water gradually while stirring the mixture gently. - Keep checking the mixture as you stir and wait for it to form a smooth (not lumpy) paste.
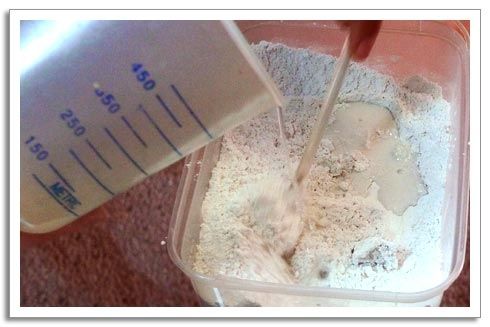
Remember, adding water will make the mixture harden so make sure to add it slowly while stirring constantly. Take care not to add too much water because a runny mixture will be difficult to mould.
Step 3: Transfer the mixture. - When the mixture has formed into a smooth paste, it's time to make the mould.
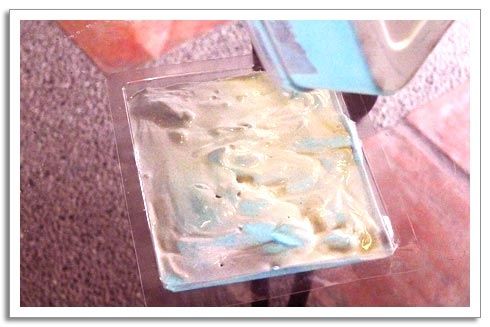
Place the mould on a level surface and carefully pour in the plaster mixture. (I worked on a glass table so that is our table's leg and the floor you are seeing under the mould, just in case you're wondering.
Step 4: Tap the sides gently to get rid of bubbles on the surface. - Gently shake the mould so that the plaster levels evenly.
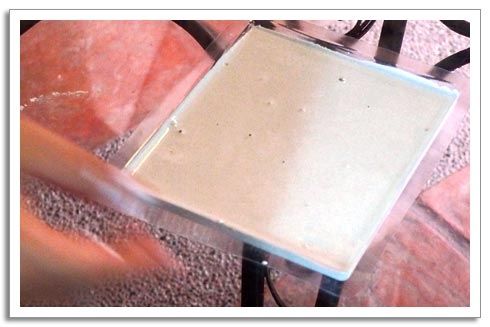
Don't worry if it looks uneven at first, tap the sides gently to smooth the surface and also to get rid of any bubbles. The plaster will start to harden after it has been poured into the mould.
Step 5: Make your pet's paw print. - The moment your pet has been waiting for.
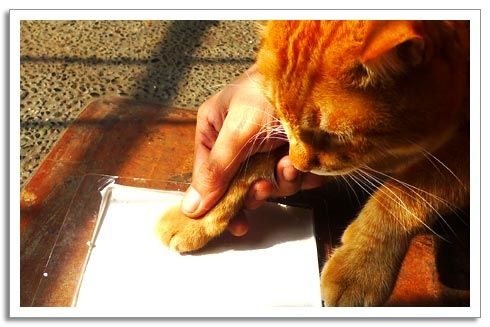
When the plaster is like soft dough, it's time to make the paw print. Test the corners with a toothpick - if it makes an indention, it's the right consistency. Don't make an impression if it's too runny. Press your pet's paw firmly onto the surface. You may also write words on the plaster with a toothpick.
Very important: Wash your pet's paws with water immediately after he or she has made the impression. Dry them thoroughly with a clean towel. We certainly don't want the plaster to harden on your beloved pet's paw!
Voila, the finished product! - Your very own pet's paw print impression on plaster.
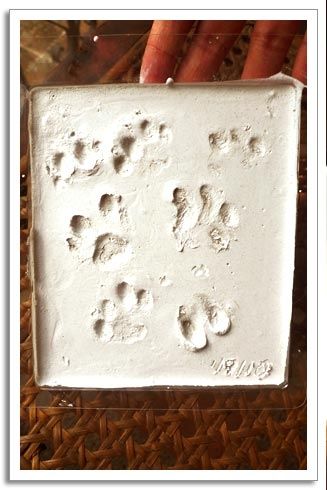
Place the mould in a safe place while waiting for the plaster to set. It will usually take a day and then you can frame and decorate it as you please. Meanwhile, remember to clean the plaster from all the materials you used before it becomes completely hard. Always clean them under running water to ensure that the plaster won't block the drain.
This is what our pet's paw print keepsake looked like after we decorated it. - Our kitty seems to approve.... or so we'd like to think!
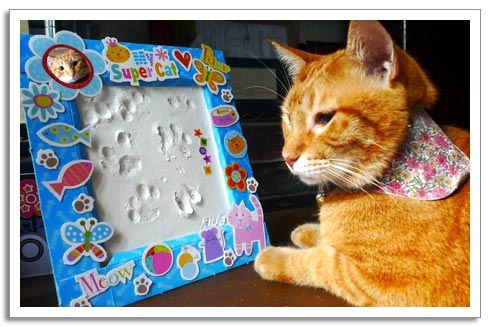
Our paw print making kit came with stickers, a do-it-yourself frame and cardboard stand so we had a blast assembling it to form this adorable little keepsake. There are stickers for a dog frame too if your furry friend is one.
My husband, our kitty and I had a great time making this photo tutorial so we hope you'll have fun making your own pet's paw print keepsake too! If you do get around to making one, please share your experience with me here.


