How to Replace an Alternator


Replacing an alternator doesn't require special skills. But you need to make the necessary overall maintenance tasks, and follow the correct steps for a successful repair.
For most vehicle models, removing the alternator involves taking off the drive or serpentine belt, a few mounting bolts, and disconnecting electrical wires. However, depending on your particular vehicle model, gaining access to the alternator may need more than popping the hood open.
Either way, this repair job will take you about one to two hours of work. But the time spent is well worth it. You'll spend between $100.00 and $500.00 dollars for the alternator, approximately, depending on your particular model, but you'll save around $200 or more in labor costs following this guide.
So, let's start.
Index
|
|---|
Tools You'll Need
|
I. Remove the Old Alternator
|
II. Other Maintenance Items You May Need to Replace
|
Ratchet extension
|
III. Install the New Alternator
|
IV. Working Smart
|
Tools You'll Need
|
|---|
Combination wrenches
|
Ratchet
|
Ratchet extension
|
Socket set
|
Floor jack, 2 jack stands and 2 chocks, if necessary
|
Pry bar or breaker bar, if necessary
|
Torque wrench
|
I. Remove the Old Alternator
On most modern vehicles, car manufacturers recommend using a Car Computer Memory saver. Before you disconnect the battery, simply connect the memory saver to the cigarette lighter. The saver will help preserve settings for devices like the engine control unit (ECU -car computer), automatic transmission on some vehicle models, alarm, other vehicle modules (if equipped), alarm, plus your radio and clock.
When disconnecting the battery without the means to preserve the ECU's memory, the car computer will have to go through a relearning process that may take a few miles of driving - up to 100 miles in some cases - before the engine and other systems work efficiently. On some specific models, you'll need a scan tool to reset the modules. Consult your owner's or repair manual, if necessary.
-
Disconnect the negative terminal from the battery using a wrench, and secure the terminal away from the battery post to keep it from accidentally touching the post during your repair. This will prevent shorting out the wires on the back of the alternator when removing the unit.
-
Now, check whether you have enough room to remove the alternator from the top of the engine compartment. You may need to remove air cleaner assembly parts like the air duct, air intake tube, and heat shield. Sometimes, you'll need to remove one or two other components as well, depending on your particular model.
-
On some models, you have to work under the car to reach one or more mounting bolts or some other part to free the alternator. If so, you also may need to remove a splash shield from under the engine compartment. For this, use a floor jack to raise your vehicle and support it safely on jack stands. Then, chock the rear wheels, and engage the parking brake.
-
Crawl under the vehicle and remove the shield.
-
Now, you need to remove the drive belt or serpentine belt from the alternator drive pulley. Before you do that, make sure to note the belt's routing path so that you reinstall it correctly it. Depending on your model, this belt may drive the water pump, air-conditioning compressor, steering pump, or some other accessory. Most vehicles have a decal on the engine compartment showing the belt routing. Double check that your belt follows this same path. If not, sketch the path on a piece of paper for later reference.
-
On most engines, two or three bolts hold the alternator in place. To remove the drive belt (if your engine uses a serpentine belt with an automatic belt tensioner, go to the next step), start loosening the alternator mounting bolts (adjusting, pivot and locking bolts) using a ratchet, ratchet extension, socket, and wrenches. If one or more bolts have a nut at the opposite end, you may need to use a wrench to hold the nut in place while turning the bolt.
After loosening the bolts, you can swing the alternator on its mounting bracket and slip the belt off the alternator pulley. Go to step 8.
NOTE: some alternator mounting assemblies use a transverse bolt that provides tension to the drive belt. You need to unscrew this bolt a few turns to slip the drive belt off the alternator pulley.
-
Vehicle models with a serpentine belt offer a more friendly way to remove, and reinstall, the belt. To remove this belt, rotate the spring-loaded belt tensioner against the spring force (to rotate the tensioner, you'll need a wrench, or ratchet or breaker bar with a half-inch drive). This will release the belt's tension, and allow you to slip the belt off the alternator pulley. On some models, you'll need a serpentine belt tool to release the belt because of the narrow space to access the tensioner.
-
Once the belt is off the pulley, slowly let the tensioner spring back into place. And head over to the next section.
-
On some models, you need to remove a heat shield that protects the alternator. You may need to remove the shield before or after removing the alternator from the vehicle. Consult your vehicle repair manual, if necessary.
-
After removing the drive or serpentine belt off the alternator pulley, completely remove the alternator mounting bolts while holding the alternator in place with one hand. Note where each bolt goes since they may be of different length.
-
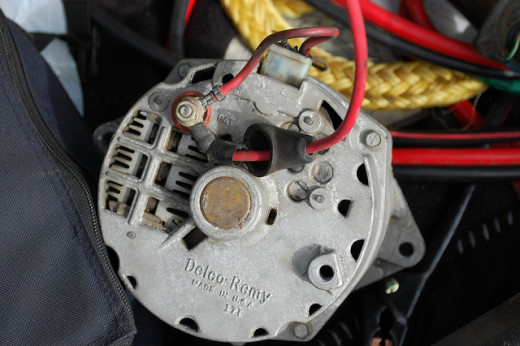
After removing the mounting bolts, carefully rotate the alternator and detach the electrical wires and wiring harness from the back of the alternator. Note the corresponding wire and terminal pairs so that you attach those wires back to their correct terminals.
-
Then, remove the alternator from your vehicle.
The following video can give you some visual clues about removing the alternator belt.
Removing the Drive Belt
II. Other Maintenance Items You May Need to Replace
Now is the time to consider replacing your drive belt or serpentine belt.
-
If your alternator drive belt looks worn, glazed, or has missing pieces or cracks, replace it. Or just install a new one if it's been in service for two or more years.
-
If your serpentine belt has over 50,000 miles in use, replace it. Usually, this type of belt can last up to 100,000 miles or more, but you may want to consider installing a new one now to make sure your new alternator will function properly.
-
Also, replace the belt tensioner if you still have the original or it's been in service for a few years.
III. Install the New Alternator
When you buy the new or rebuilt alternator, match the old one to the new unit:
- Make sure the mounting configuration is the same,
- That both have the same power rating (usually between 90 and 130 amps for modern vehicle models),
- And all the necessary electrical connectors are placed at the same location.
- Some newer alternators use a decoupler pulley. You new unit may or may not have this type of pulley, or you may need to transfer the pulley from the old unit to the new one.
To install the alternator use the same steps you followed to remove the unit, but do it in reverse order.
Also, depending on your particular model, you may need to transfer a mounting bracket from the old unit to the new alternator.
-
Position the alternator in place and plug in the electrical harness and connect the electrical wires to the back of the alternator. If the nuts or washers that hold these wires in place are dirty or rusted, clean them with sandpaper.
-
On some models, the lower bracket for the mounting bolt has a press fit sleeve inside on one of the holes that you may need to push out with a punch so the new unit fits in place. Use a hammer and punch to push out the sleeve a bit.
-
Loosely fit the alternator's mounting bolts, if you are installing a drive belt; if your alternator uses a belt tensioner, tighten the bolts to the torque listed in your repair manual now. Use a torque wrench. Sometimes, it helps to use a punch or two to line up the alternator in place as you install the mounting bolts.
-
Thread the belt over each of the accessory pulleys, if you have a drive belt. If you are installing a serpentine belt, leave the pulley you have the easiest access to for last.
-
If you're installing a serpentine belt, rotate the belt tensioner as you did before. Slip the belt over the last pulley and carefully release the tensioner. Then go to step number 9.
-
If you're installing a drive belt, pull the alternator away form the engine using the pry bar to tense the belt. Be careful, though. Prying on some alternators for alignment or tensioning can actually cause internal damage to the alternator, especially some new model Bosch alternators. Carefully read the instructions that come with your new or rebuilt unit. On some alternators, the mounting bracket comes with a square hole for a 1/2-inch drive breaker bar for this purpose.
NOTE: The bracket assembly on some alternators uses a transverse bolt to adjust the belt tension once the belt has been threaded around the accessories. If necessary, consult your repair manual to adjust belt tension on your particular model.
-
While keeping the alternator in position and the belt stretched, press on the belt's middle section (the section that runs between two of the pulleys with the longest stretch) using your thumb. If the distance between the pulleys is 12 inches or less, the belt should deflect between 1/8 to a 1/4 of an inch; if the distance between the pulleys is over 12 inches, the belt should deflect between 1/8 to a 3/8 of an inch.
-
Once the belt has the correct tension, tighten the mounting bolts to the torque listed in your repair manual using a torque wrench. You don't want the belt to be over tightened. This may damage bearings inside pulleys and the belt itself. A loose belt, on the other hand, may become noisy, vibrate and wear out the belt prematurely.
-
Double check that you routed the belt correctly. The belt should be aligned correctly over each pulley. And double check that all the electrical connections on the back of the alternator are tightened.
-
Reinstall the splash shield and lower your vehicle off the jack stands, if you had to raise it.
-
Install any components you had to remove.
-
Then, reconnect the battery's negative terminal and, if you were using one, unplug the memory saver.
-
Turn the ignition key to the On position, but do not start the engine yet. Verify that the charge (battery) light on the dashboard panel illuminates.
-
Start the engine and check that the charge (battery) light is off. Check that the drive belt is not wobbling. If it is, give more tension to the drive belt. Or, if your car uses a serpentine belt, the belt tensioner may be worn and you need to replace it.
-
To check that your new alternator is properly charging the battery, while the engine is idling, connect a voltmeter across the battery terminals. The readout should display a voltage between 13.5 and 14.6 volts.
The following video goes over the job of replacing the alternator.
Replacing the Alternator
IV. Working Smart
When replacing an alternator, the most important part of your job is to work safely to prevent personal injuries and damage to other components. Although you don't need experience or special skills to do this repair, you still may run into difficulties on some specific vehicle models. When necessary, read the instructions on replacing the alternator that come in your repair or service manual for your particular make and model. The manual will help you clear up any issues you may encounter.
Also, as part of your repair project, check the battery, or have it checked, to make sure it's still in good condition; and inspect battery cables and terminals for damage and corrosion.
If you don't have the repair manual for your particular vehicle make and model, buy an inexpensive, aftermarket copy online like this Haynes manual from Amazon. Haynes manuals come with step-by-step procedures for many car projects including maintenance, troubleshooting and component installation.
Test Your Knowledge of Charging Systems Repair
view quiz statistics© 2015 Dan Ferrell


")


